A significant proportion of our work at the yard comes to us via insurance companies and usually as a result of some unfortunate accident.
In this particular case a Southerly 115 was clobbered whilst sitting on her mooring by 40′ yacht who were obviously having a few handling issues.
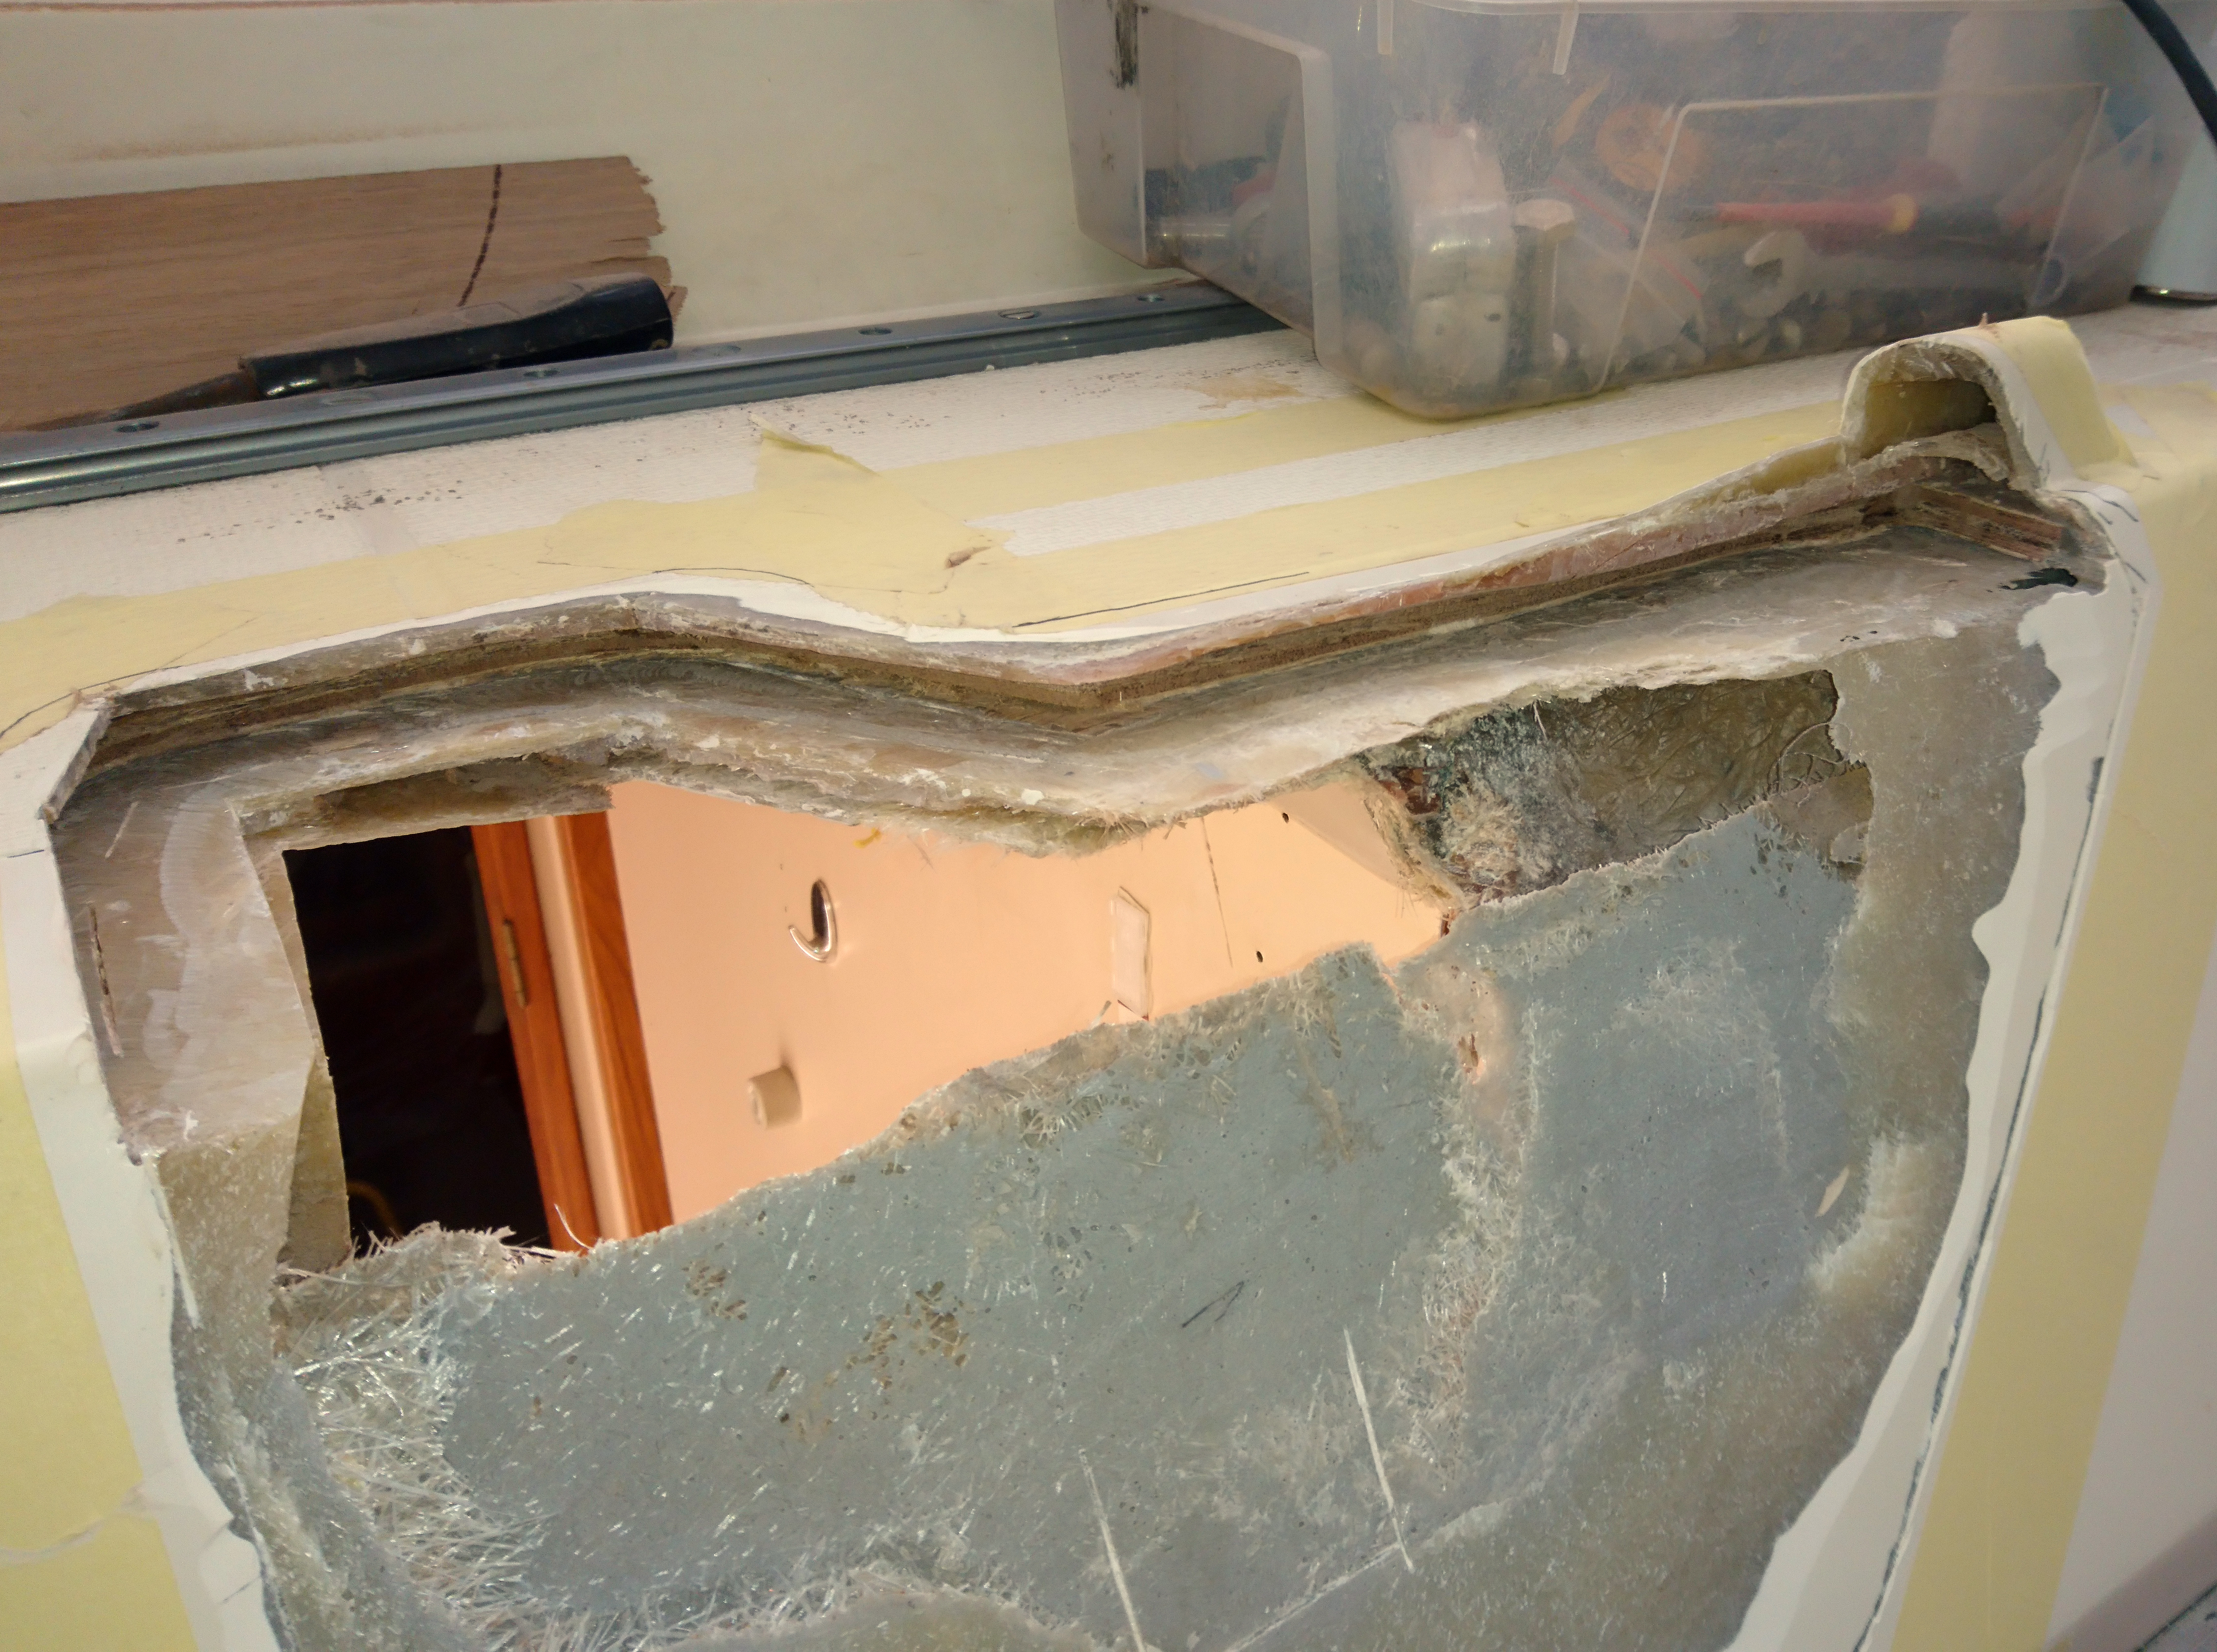
Southerly’s of this era are pretty heavily built, so to have an impact where the teak rubbing strake was shattered, hull and deck punctured and the internal bulkhead pushed to port, shearing the headlining screws, separating the grp lining from the coach roof and companionway, it must have been a hell of a bang.
In point of fact the hull was fine as the hull deck joint is under the teak rubbing strake, some 20″ below the side deck level.
The vertical section of deck is around 10mm thick and the horizontal is made up of a 5mm inner layer, 12mm plywood as a core and another 8mm of glass and gelcoat on top.
There is also a grp and gelcoated toe rail which was integral to the deck, having been molded when the boat was built.
Grp is strong, flexible and can take a lot of abuse without much visible evidence.
Gelcoat however is not very flexible and will crack and craze very easily after an impact.
So if you can see the damage is right down to the laminate you just know the gelcoat damage will be far worse and will possibly spread over time.
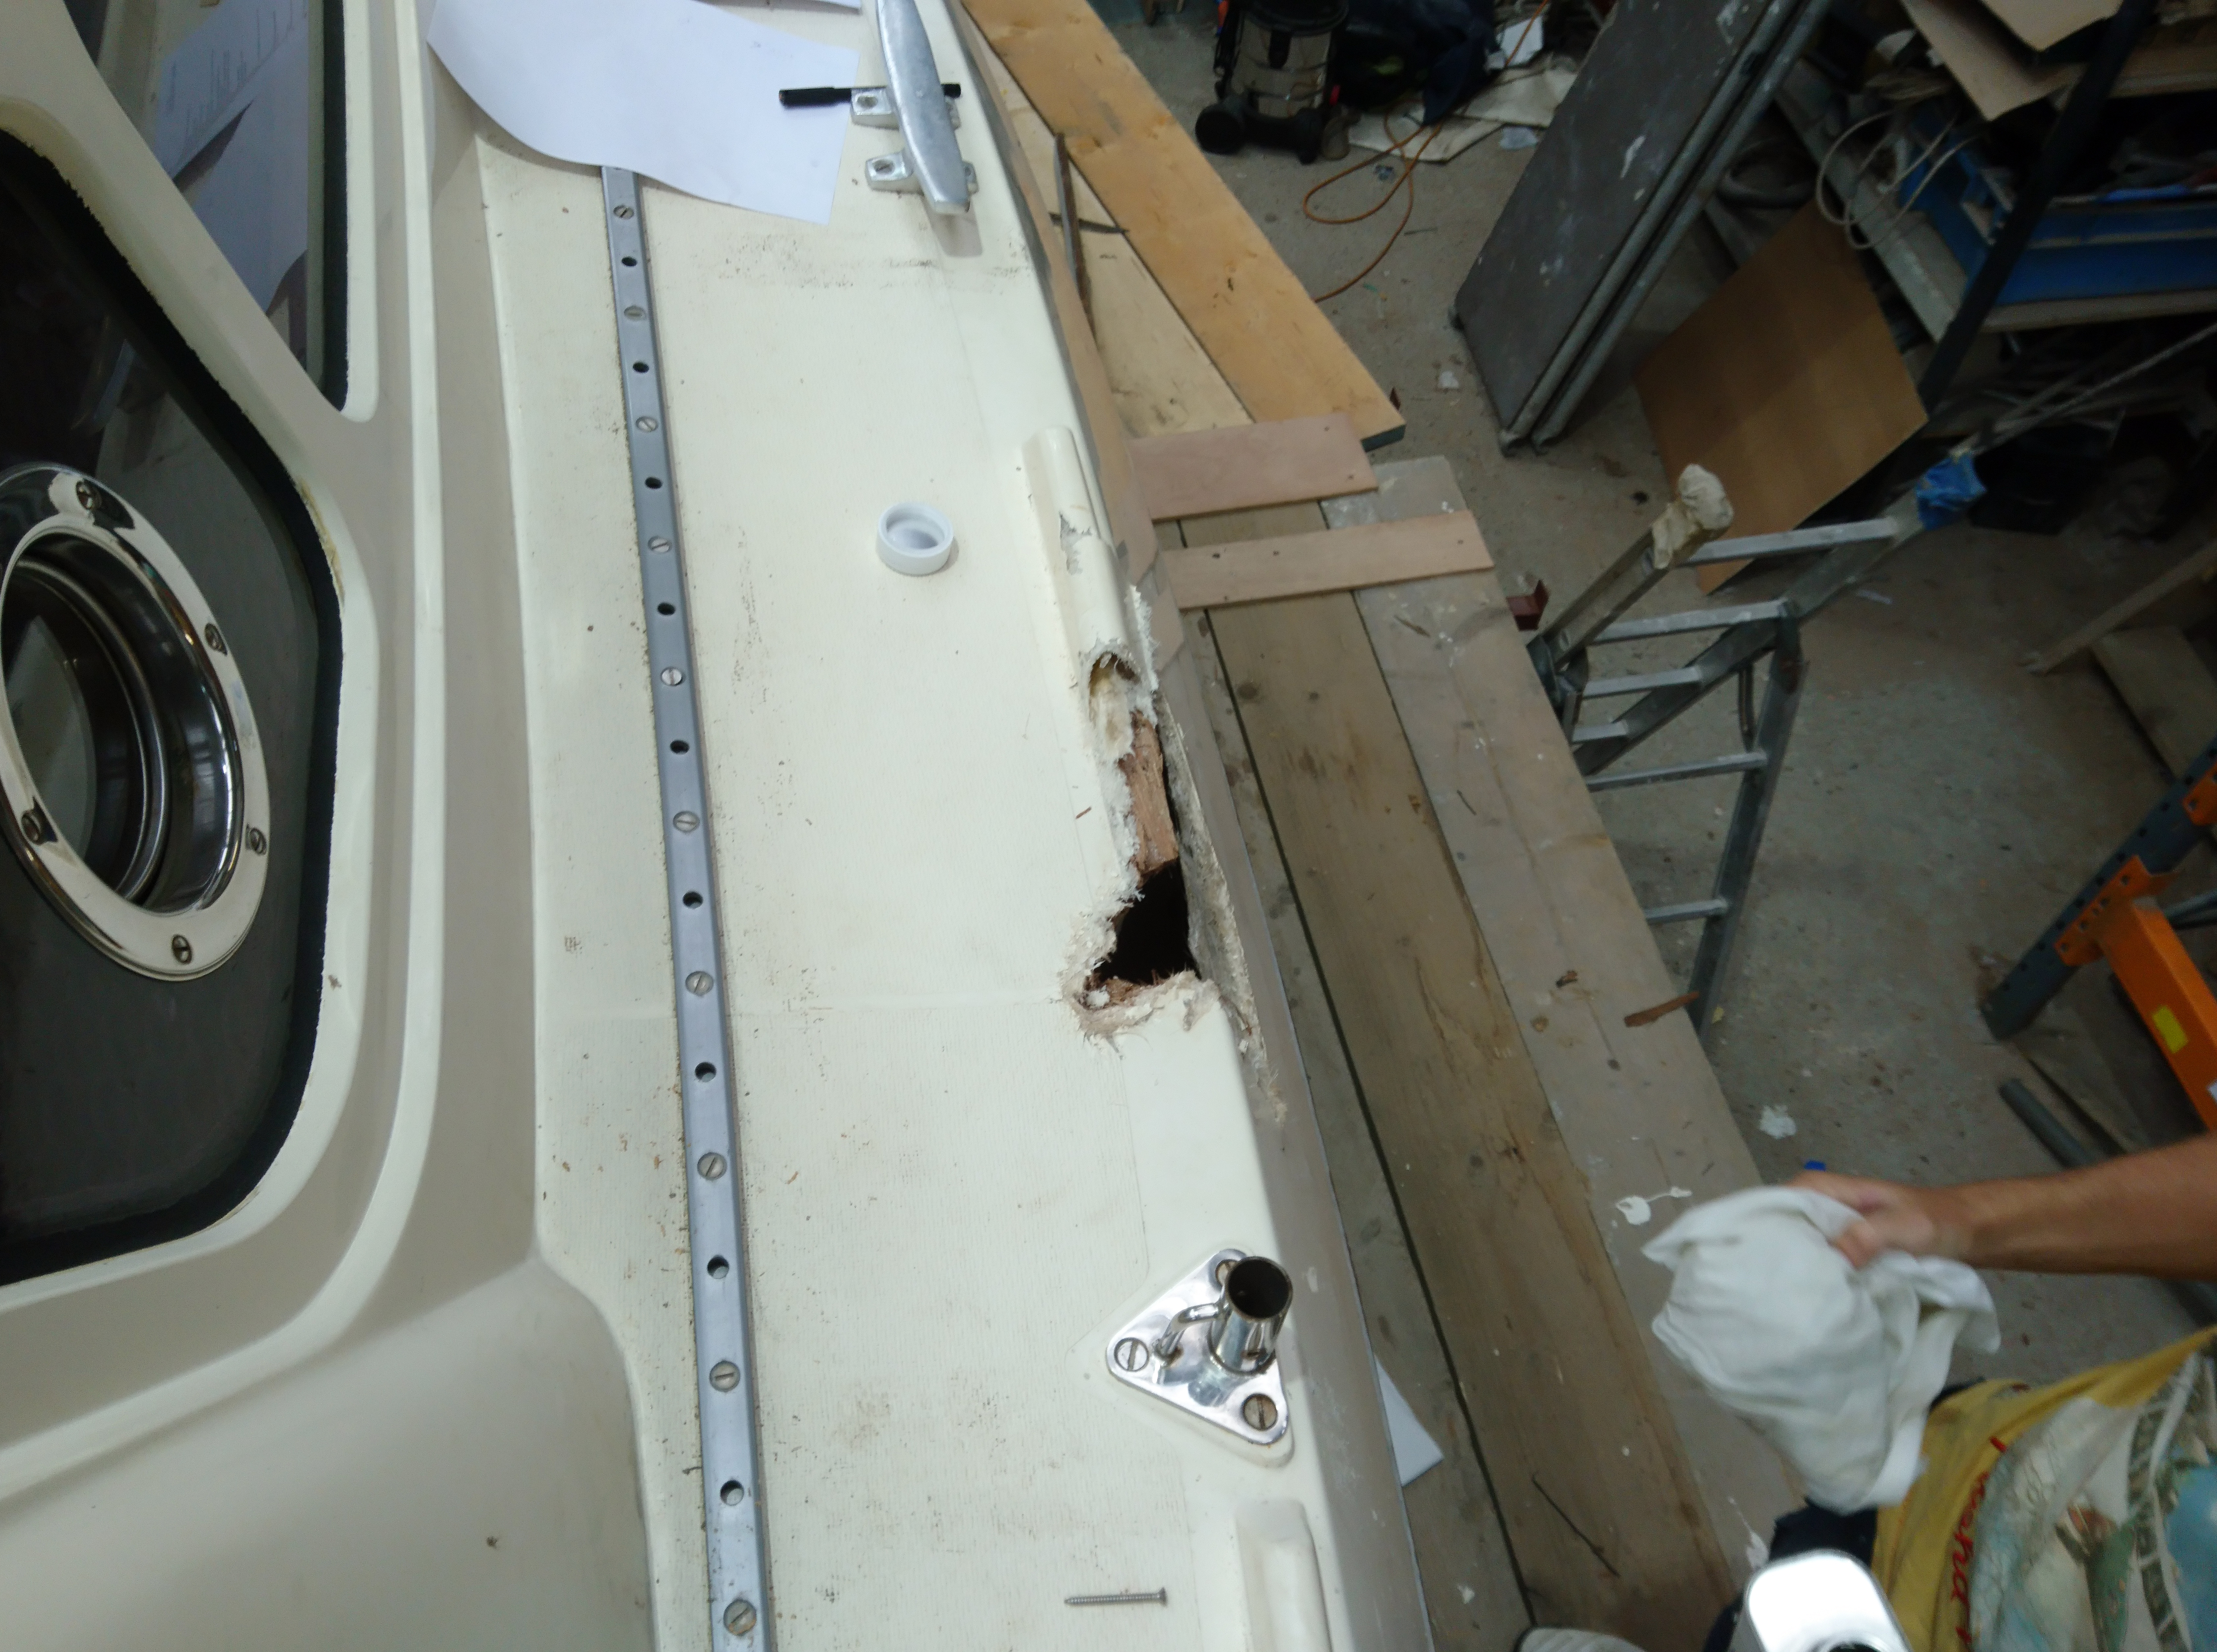
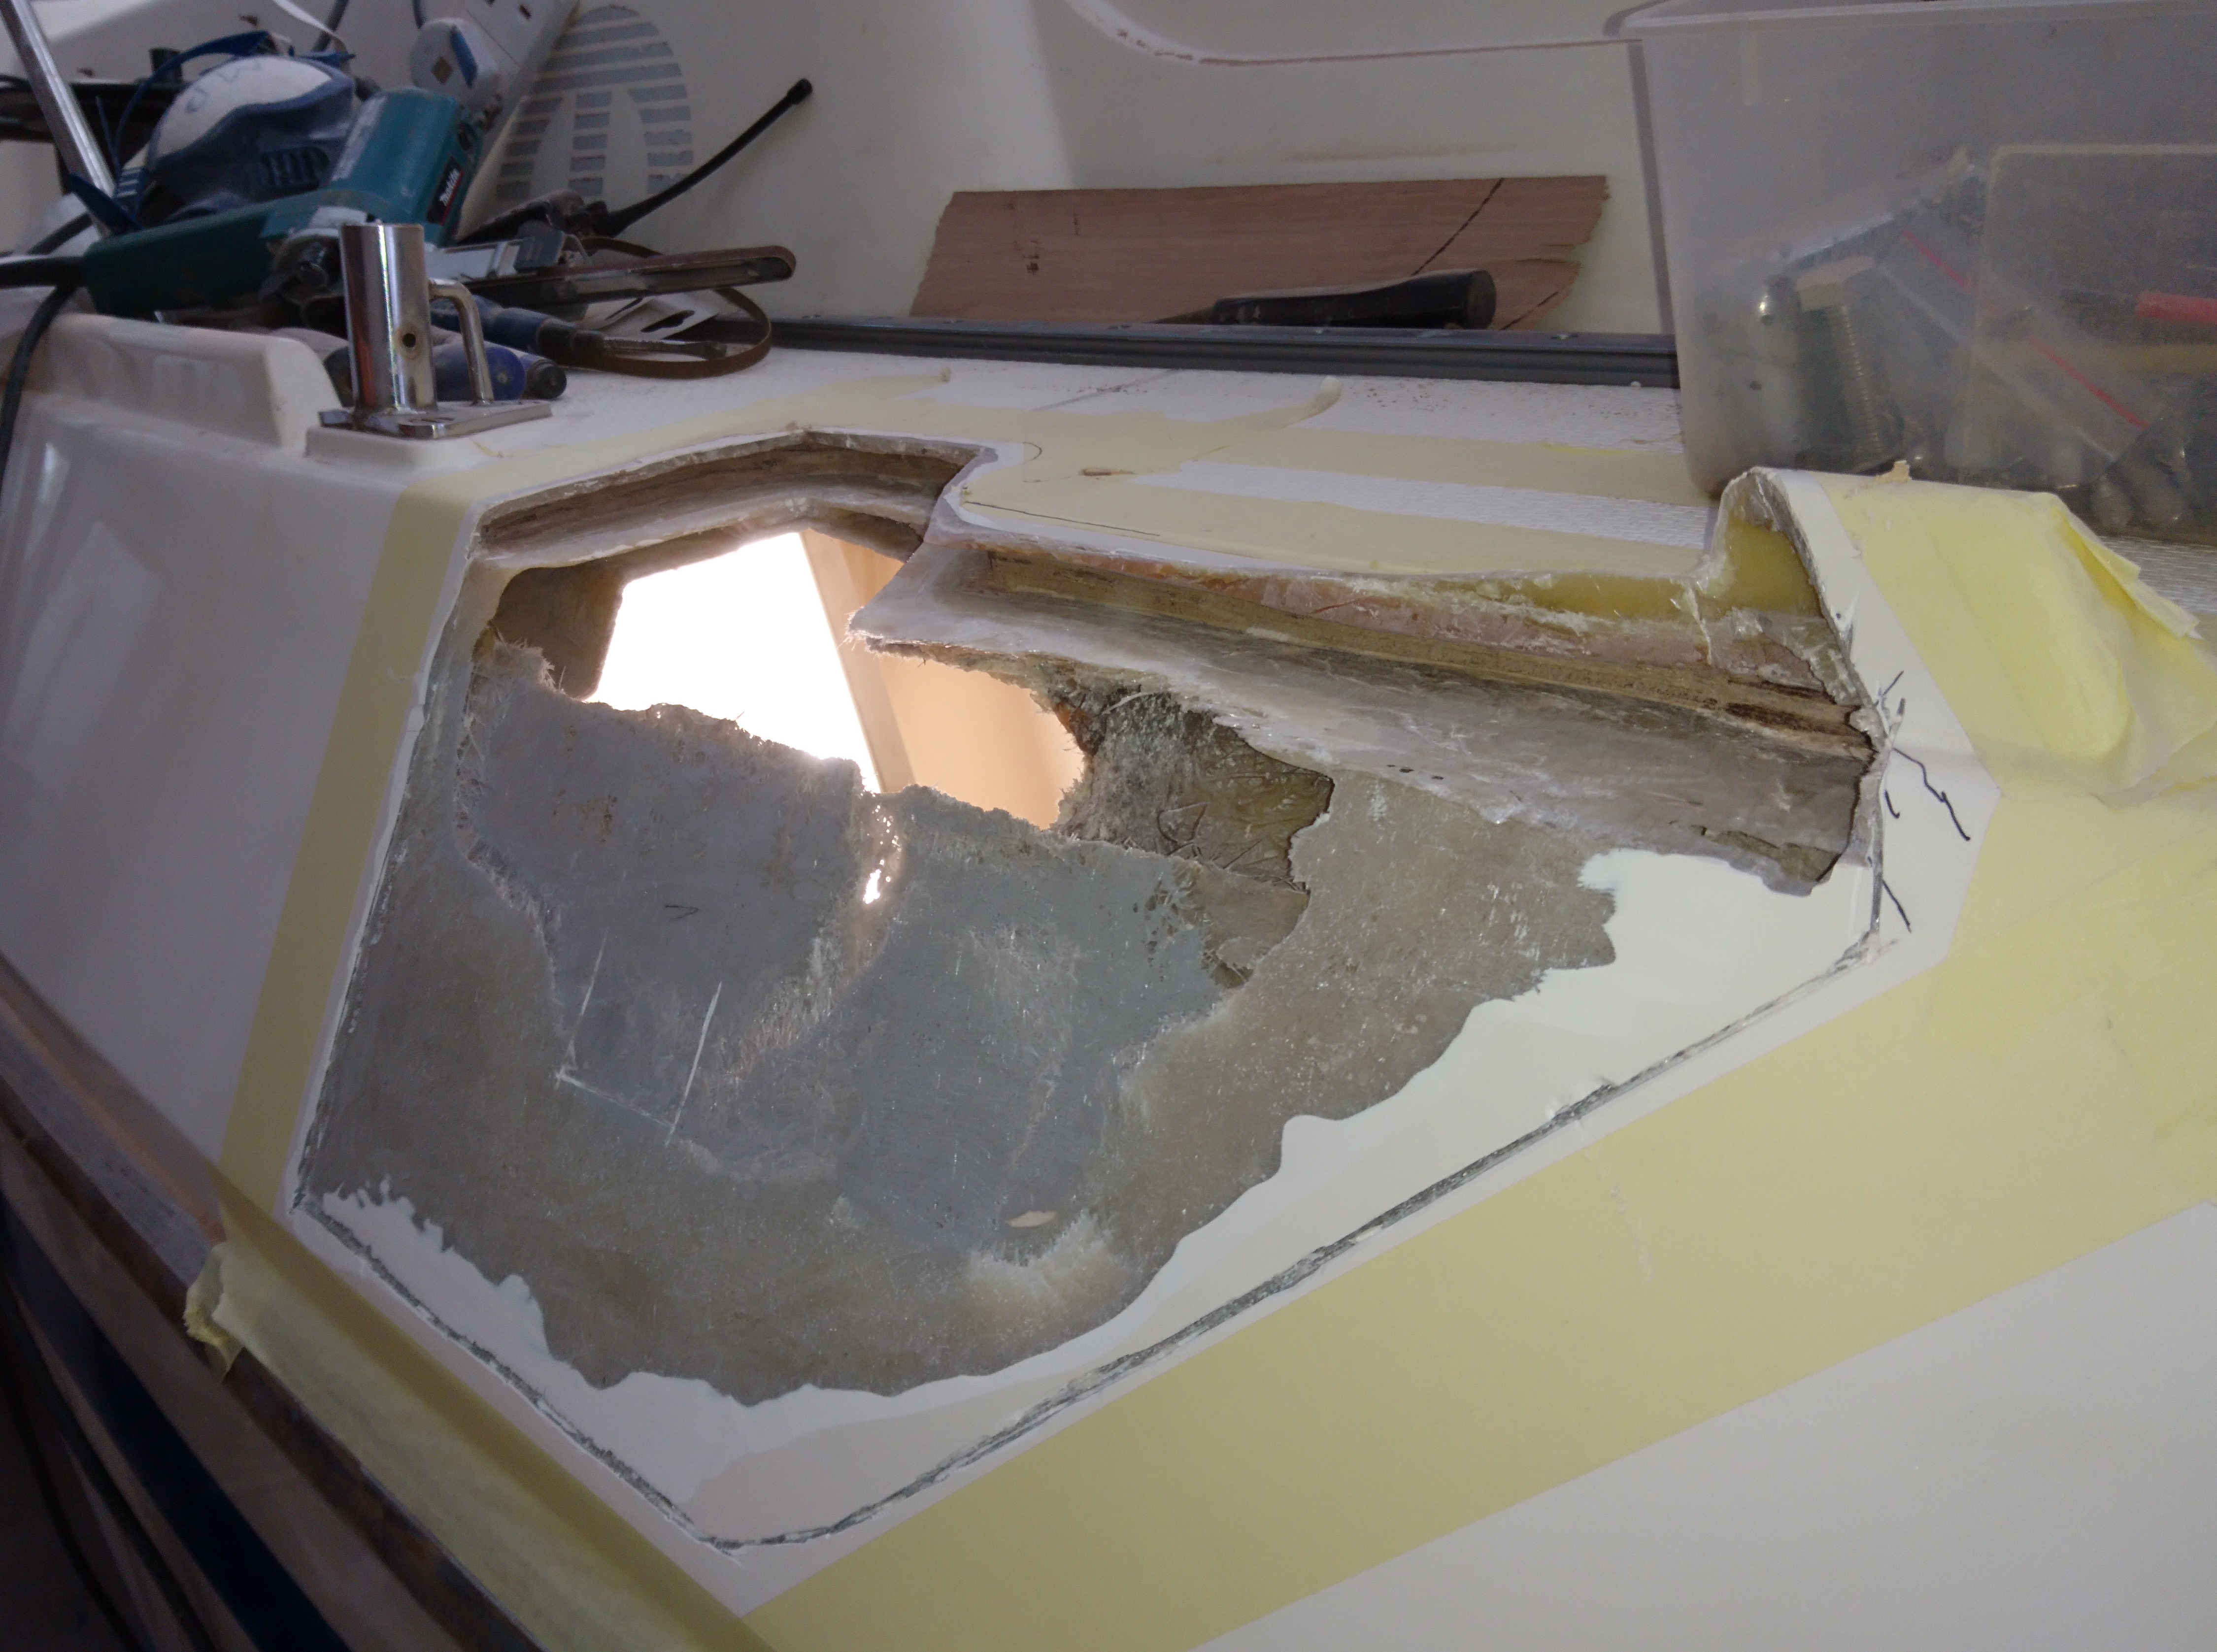
The damage included a significant wedge taken out of the deck.
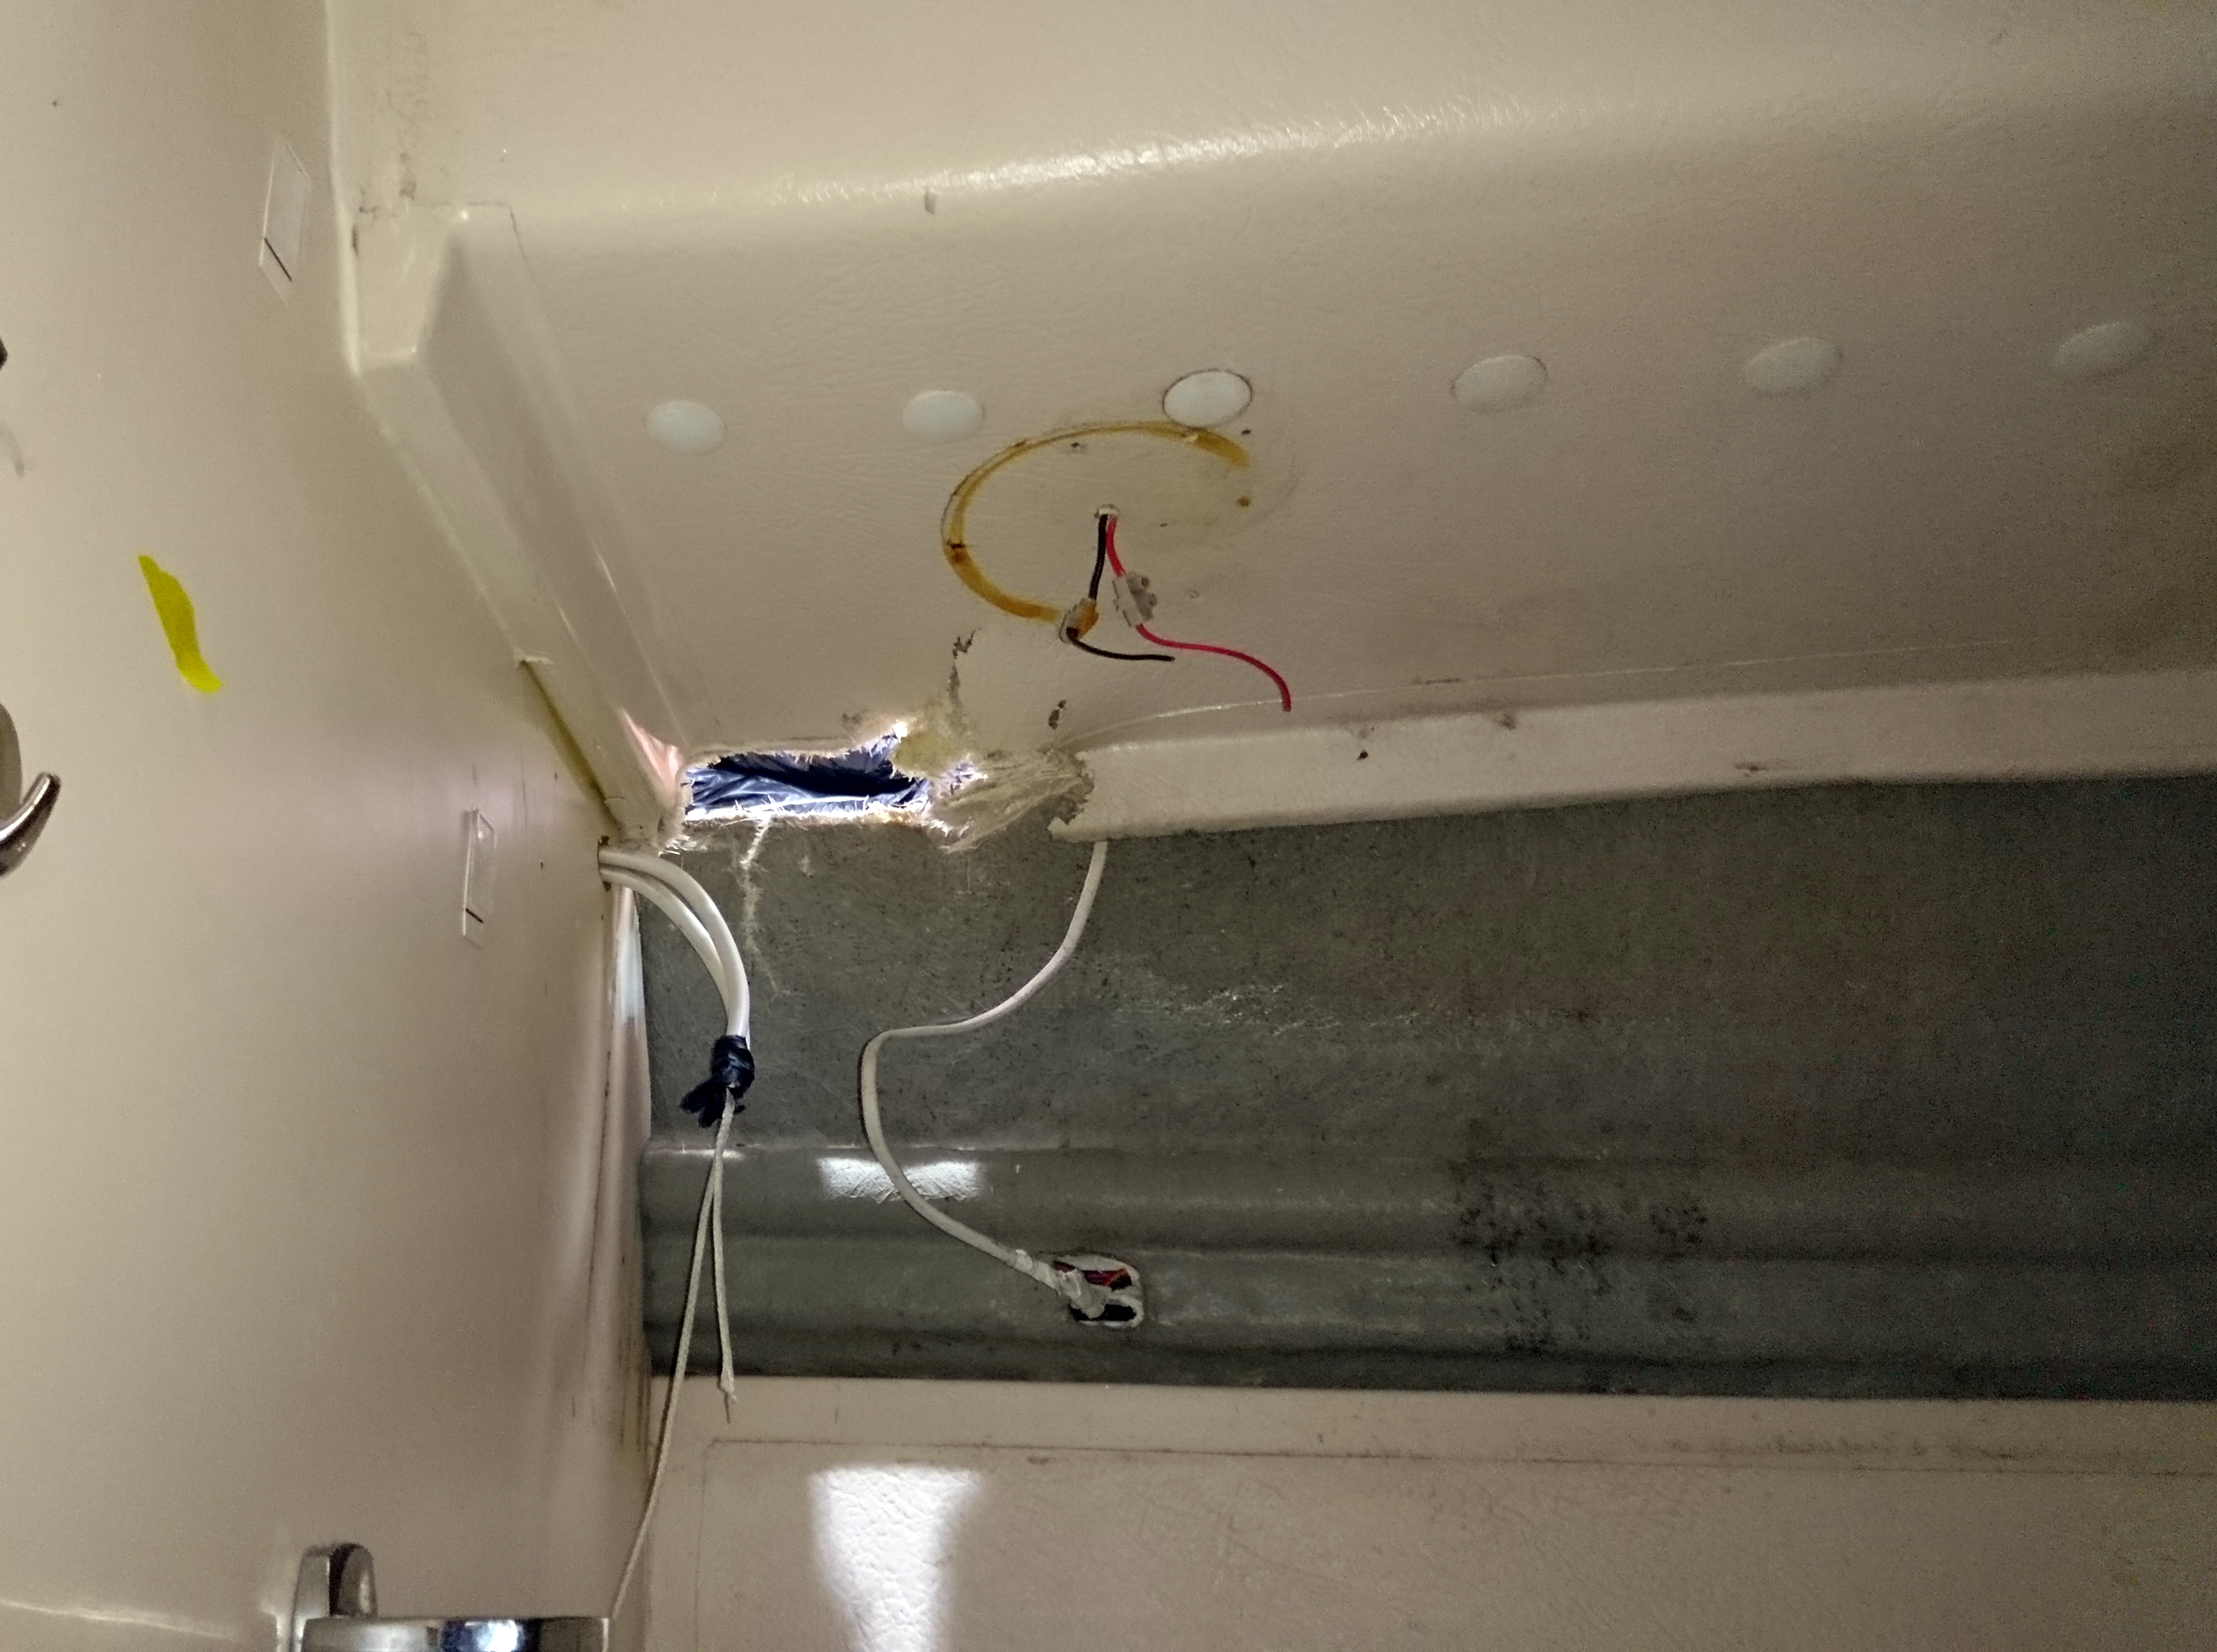
The puncture went through the hull and deck and can clearly be seen in the heads.
A common misconception is that those nasty little cracks and crazes in the gel coat do not emanate from the surface down, in fact the opposite is usually true.
An impact makes the grp flex, the gelcoat attached to it can’t flex as much, so it cracks from the laminate outwards.
So the only way of successfully repairing gel cracks is to grind all the way back to the laminate and re gel.
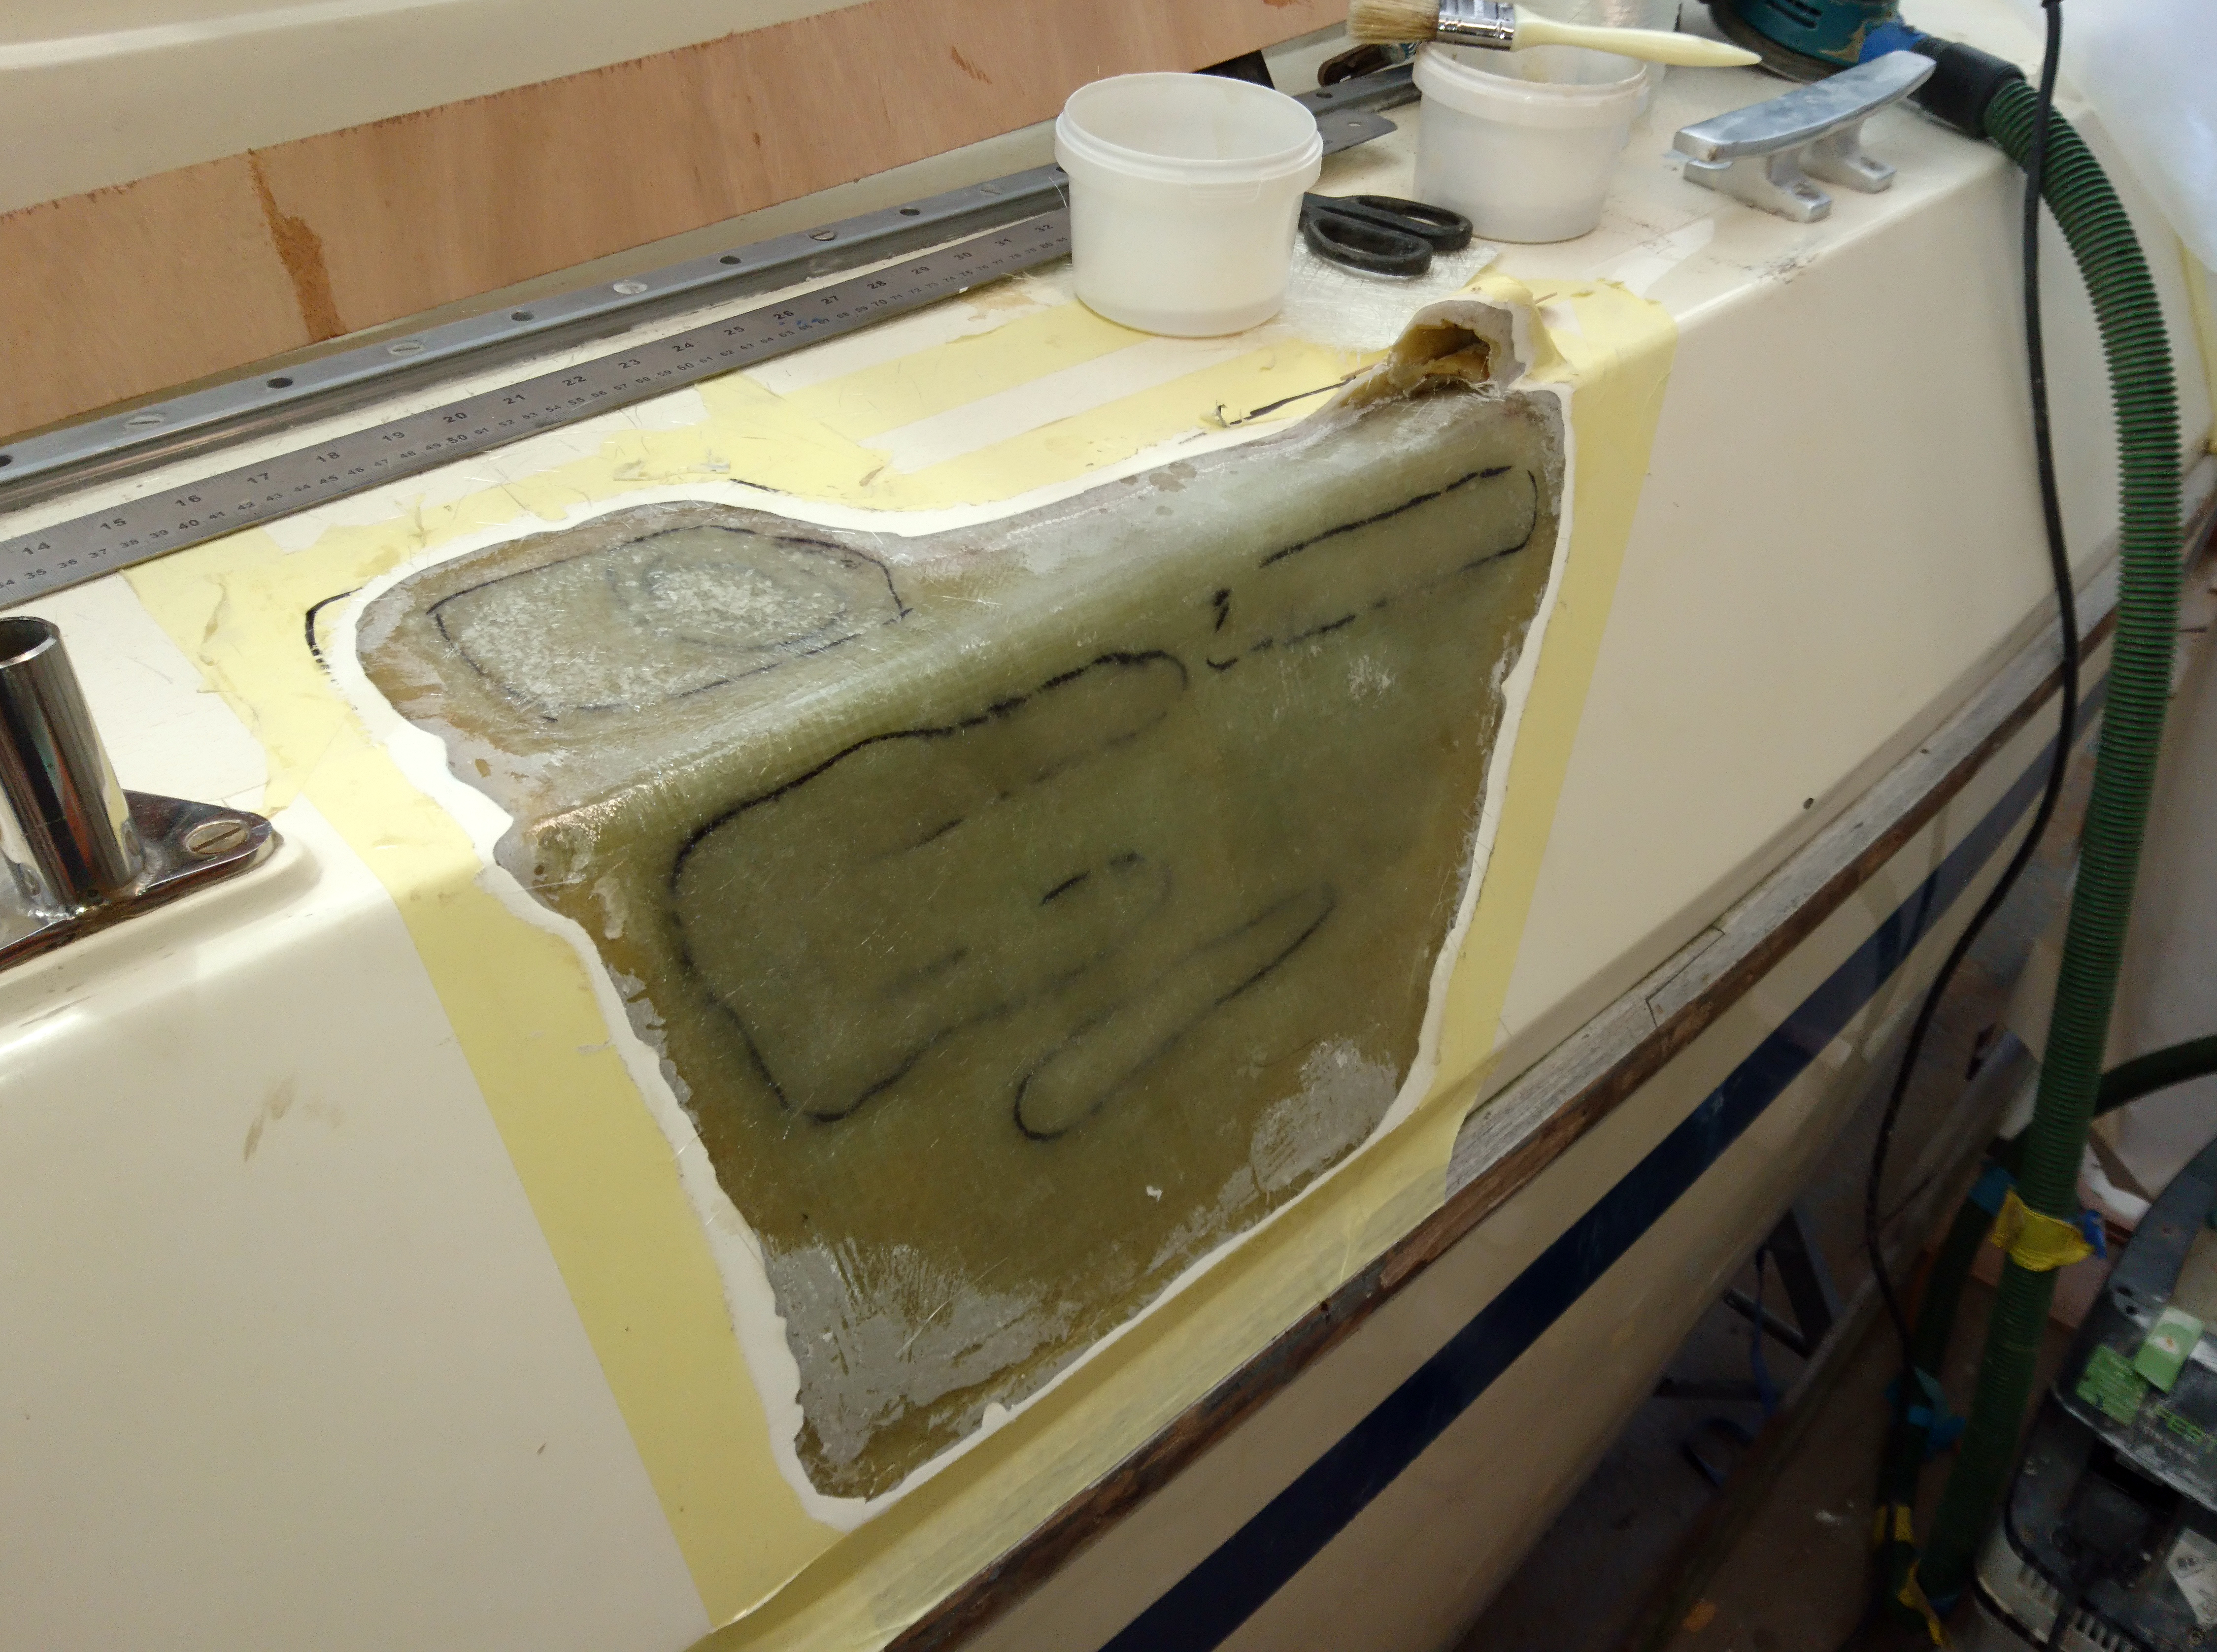
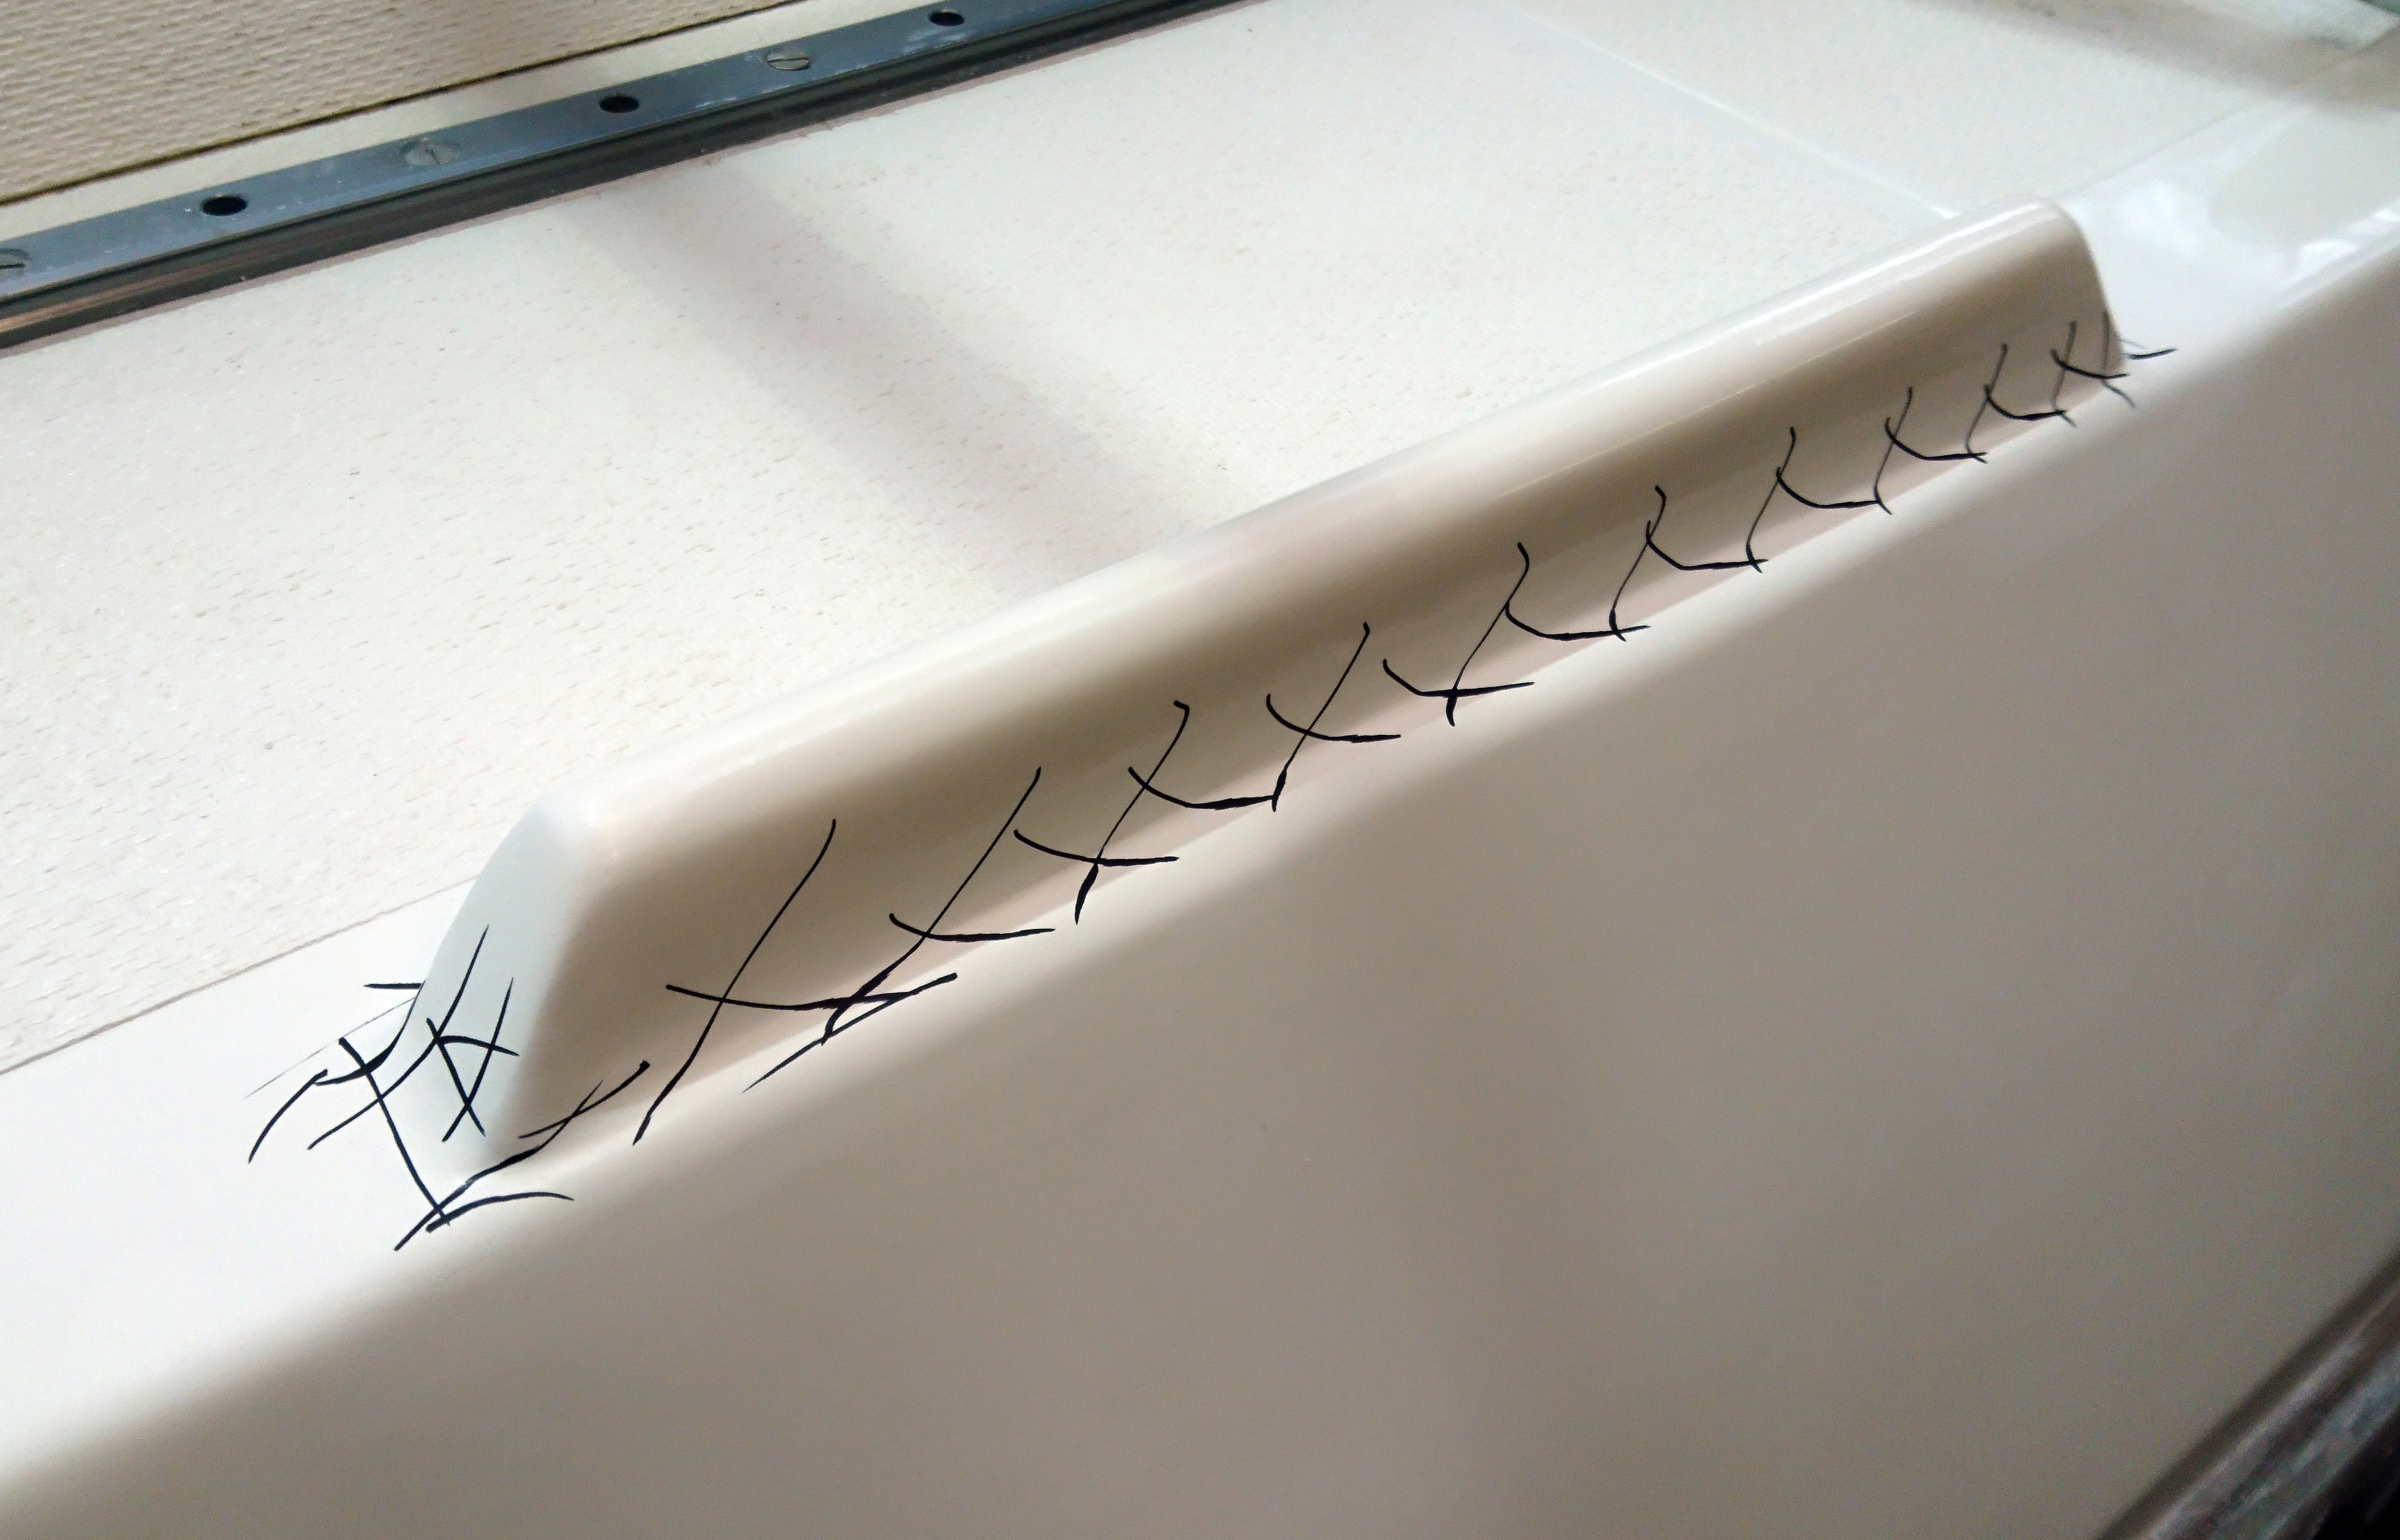
In this case one of the first jobs was to trace all the cracks and crazing caused be the collision.
I employ young eyes for this task as even with my reading glasses on it’s easy to miss tracking a crack a fraction of a millimeter wide.
All the crack extremities are marked with a black marker pen to give a guide to the area needing work and everything inside the marks is ground away.
Before we grind however, an area within the damaged area is sanded with 1000 grit wet and dry and then cut with a cutting compound before buffing to a high polish.
A 50mm square section is then cut out which will be used to get a gelcoat colour match.
To achieve an invisible repair this matching process is possibly the most important.
The gelcoat number from the manufacturer can help but once the boat is over five years old it pays to mix your own as UV light will have effected the original colour.
Looking at this job I estimated that I’d need around 2 to 3 litres of gelcoat.
All the damaged gelcoat was ground away using a flap wheel on a 4″ grinder.
Any evidence of damaged laminate was also ground away, tapering at the edges but ensuring I left a thin laminate so there was something for the new glass to go up against.
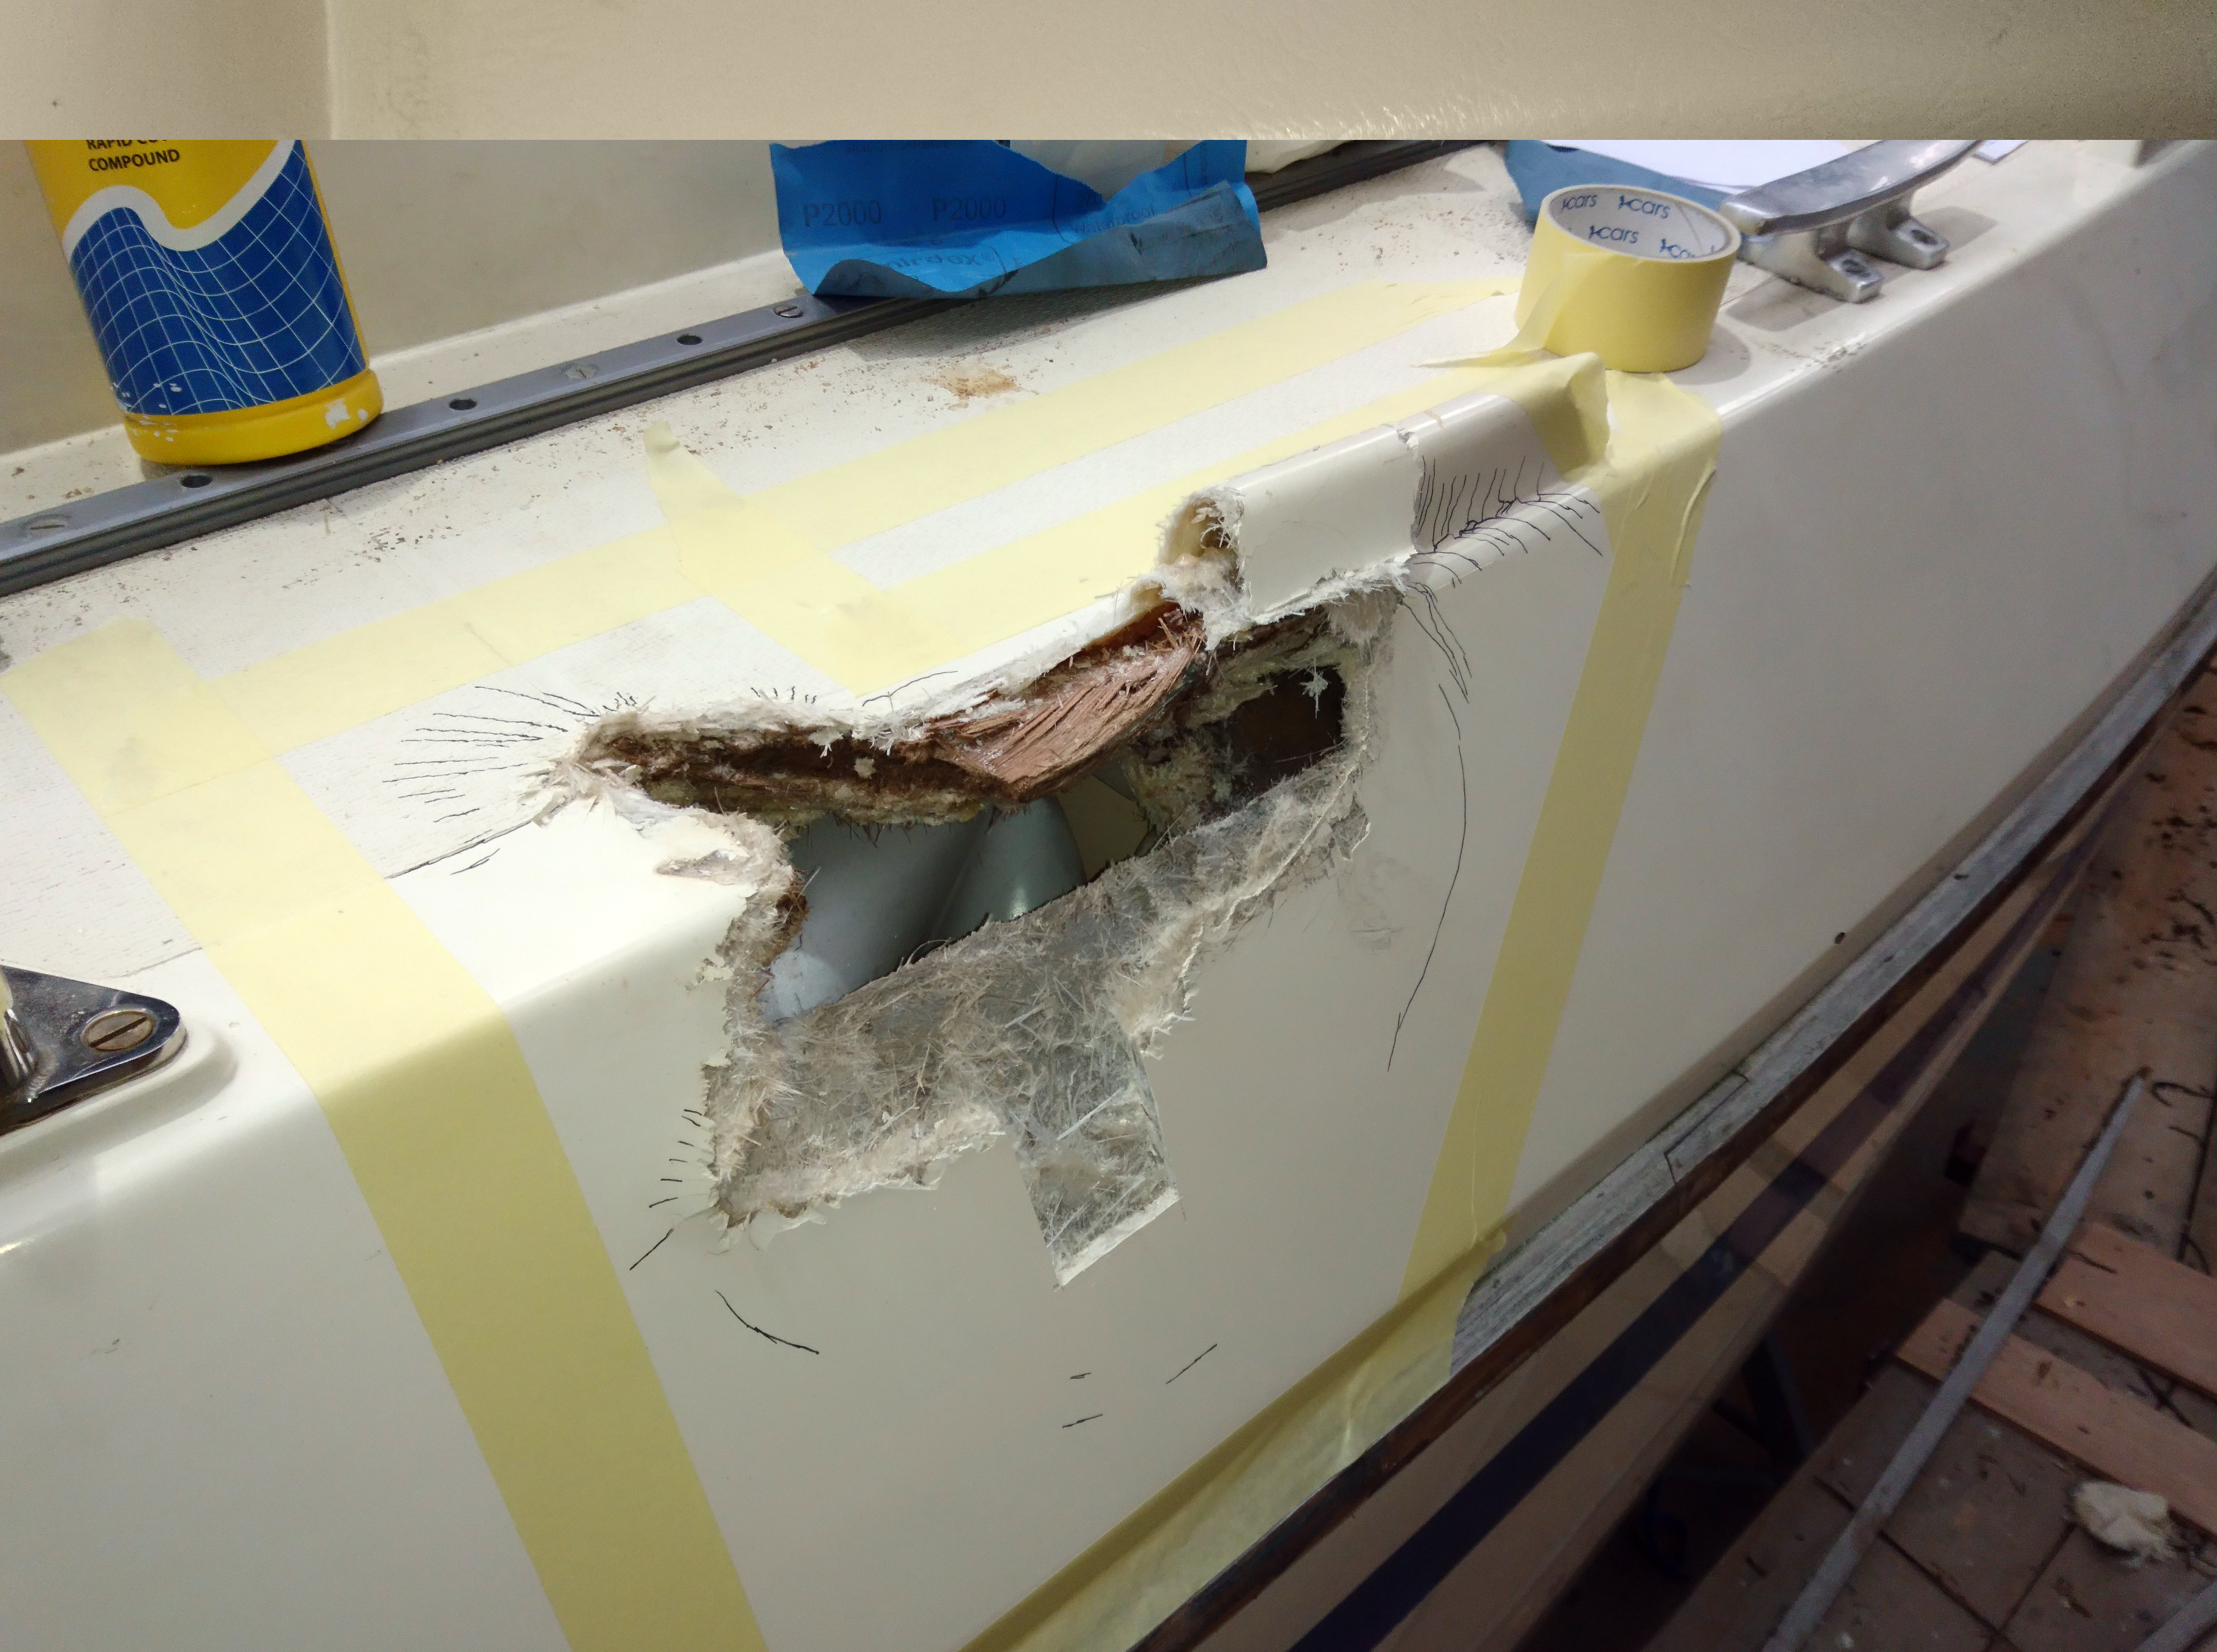
One of the first jobs it to carry out a careful inspection of the damage including tracing the extent of the gel cracks which are marked in black pen.

Section cut out, sanded and polished to get a colour match.
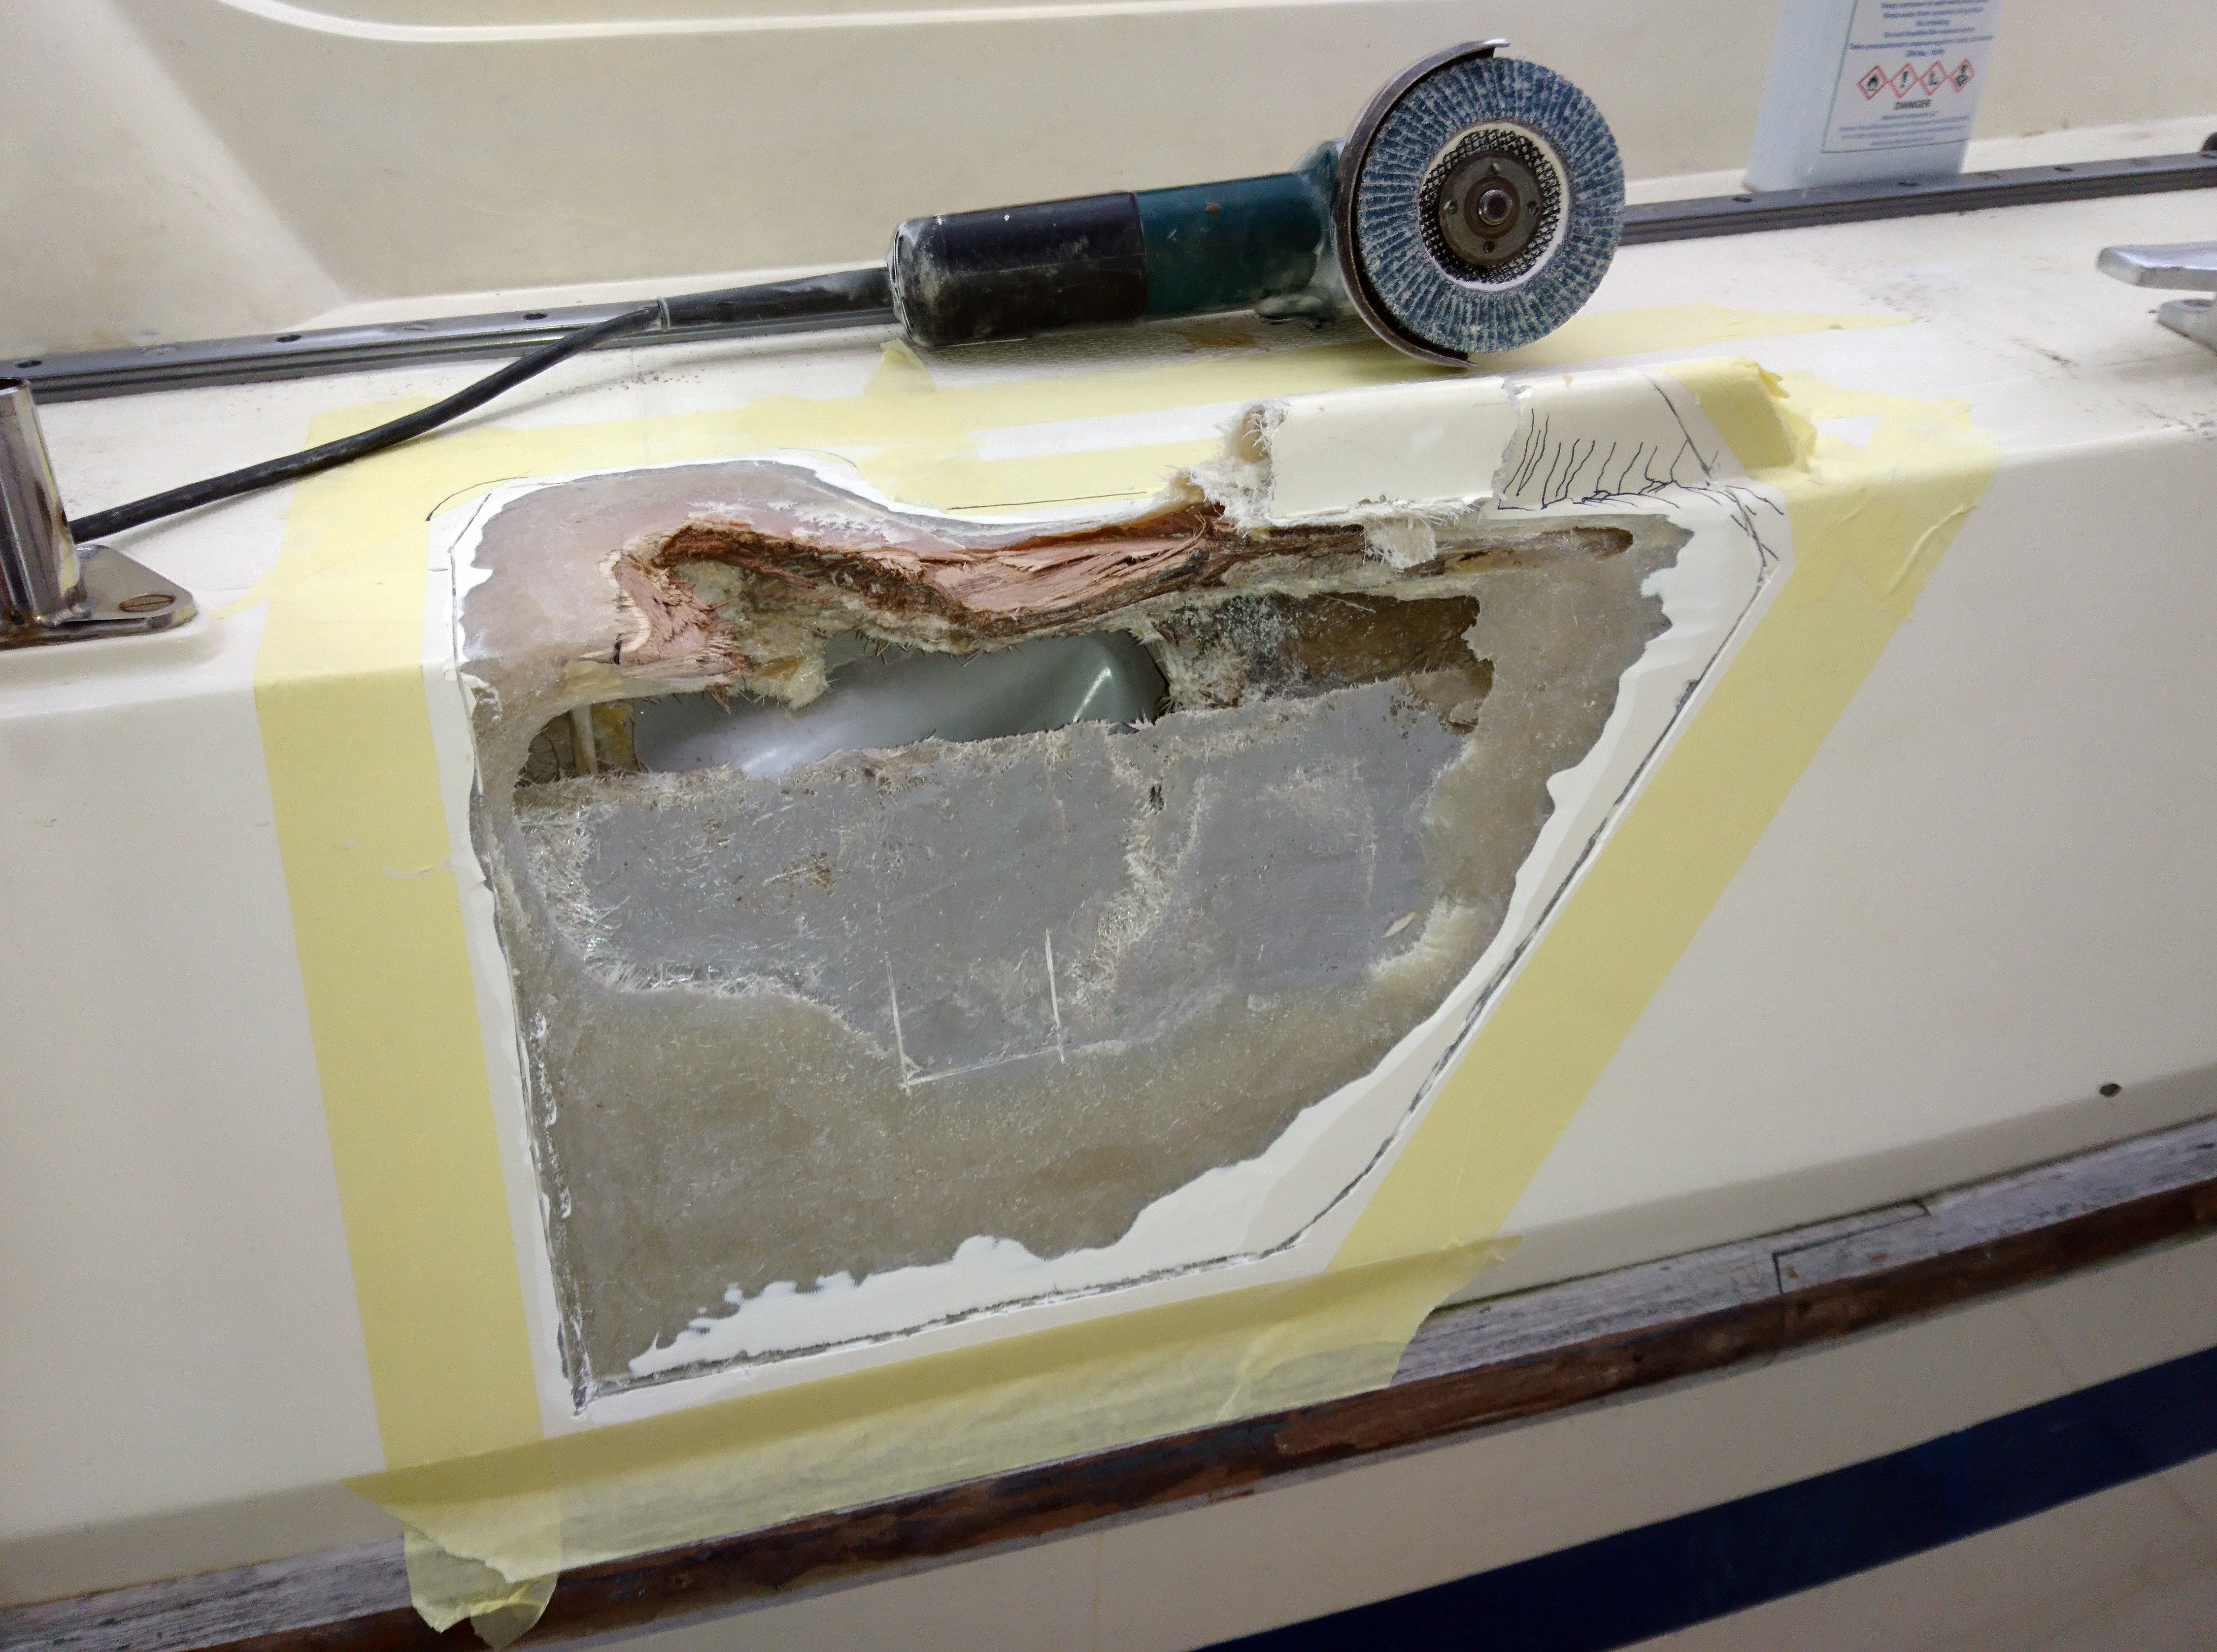
All the damaged gel coat is ground away to bare laminate.
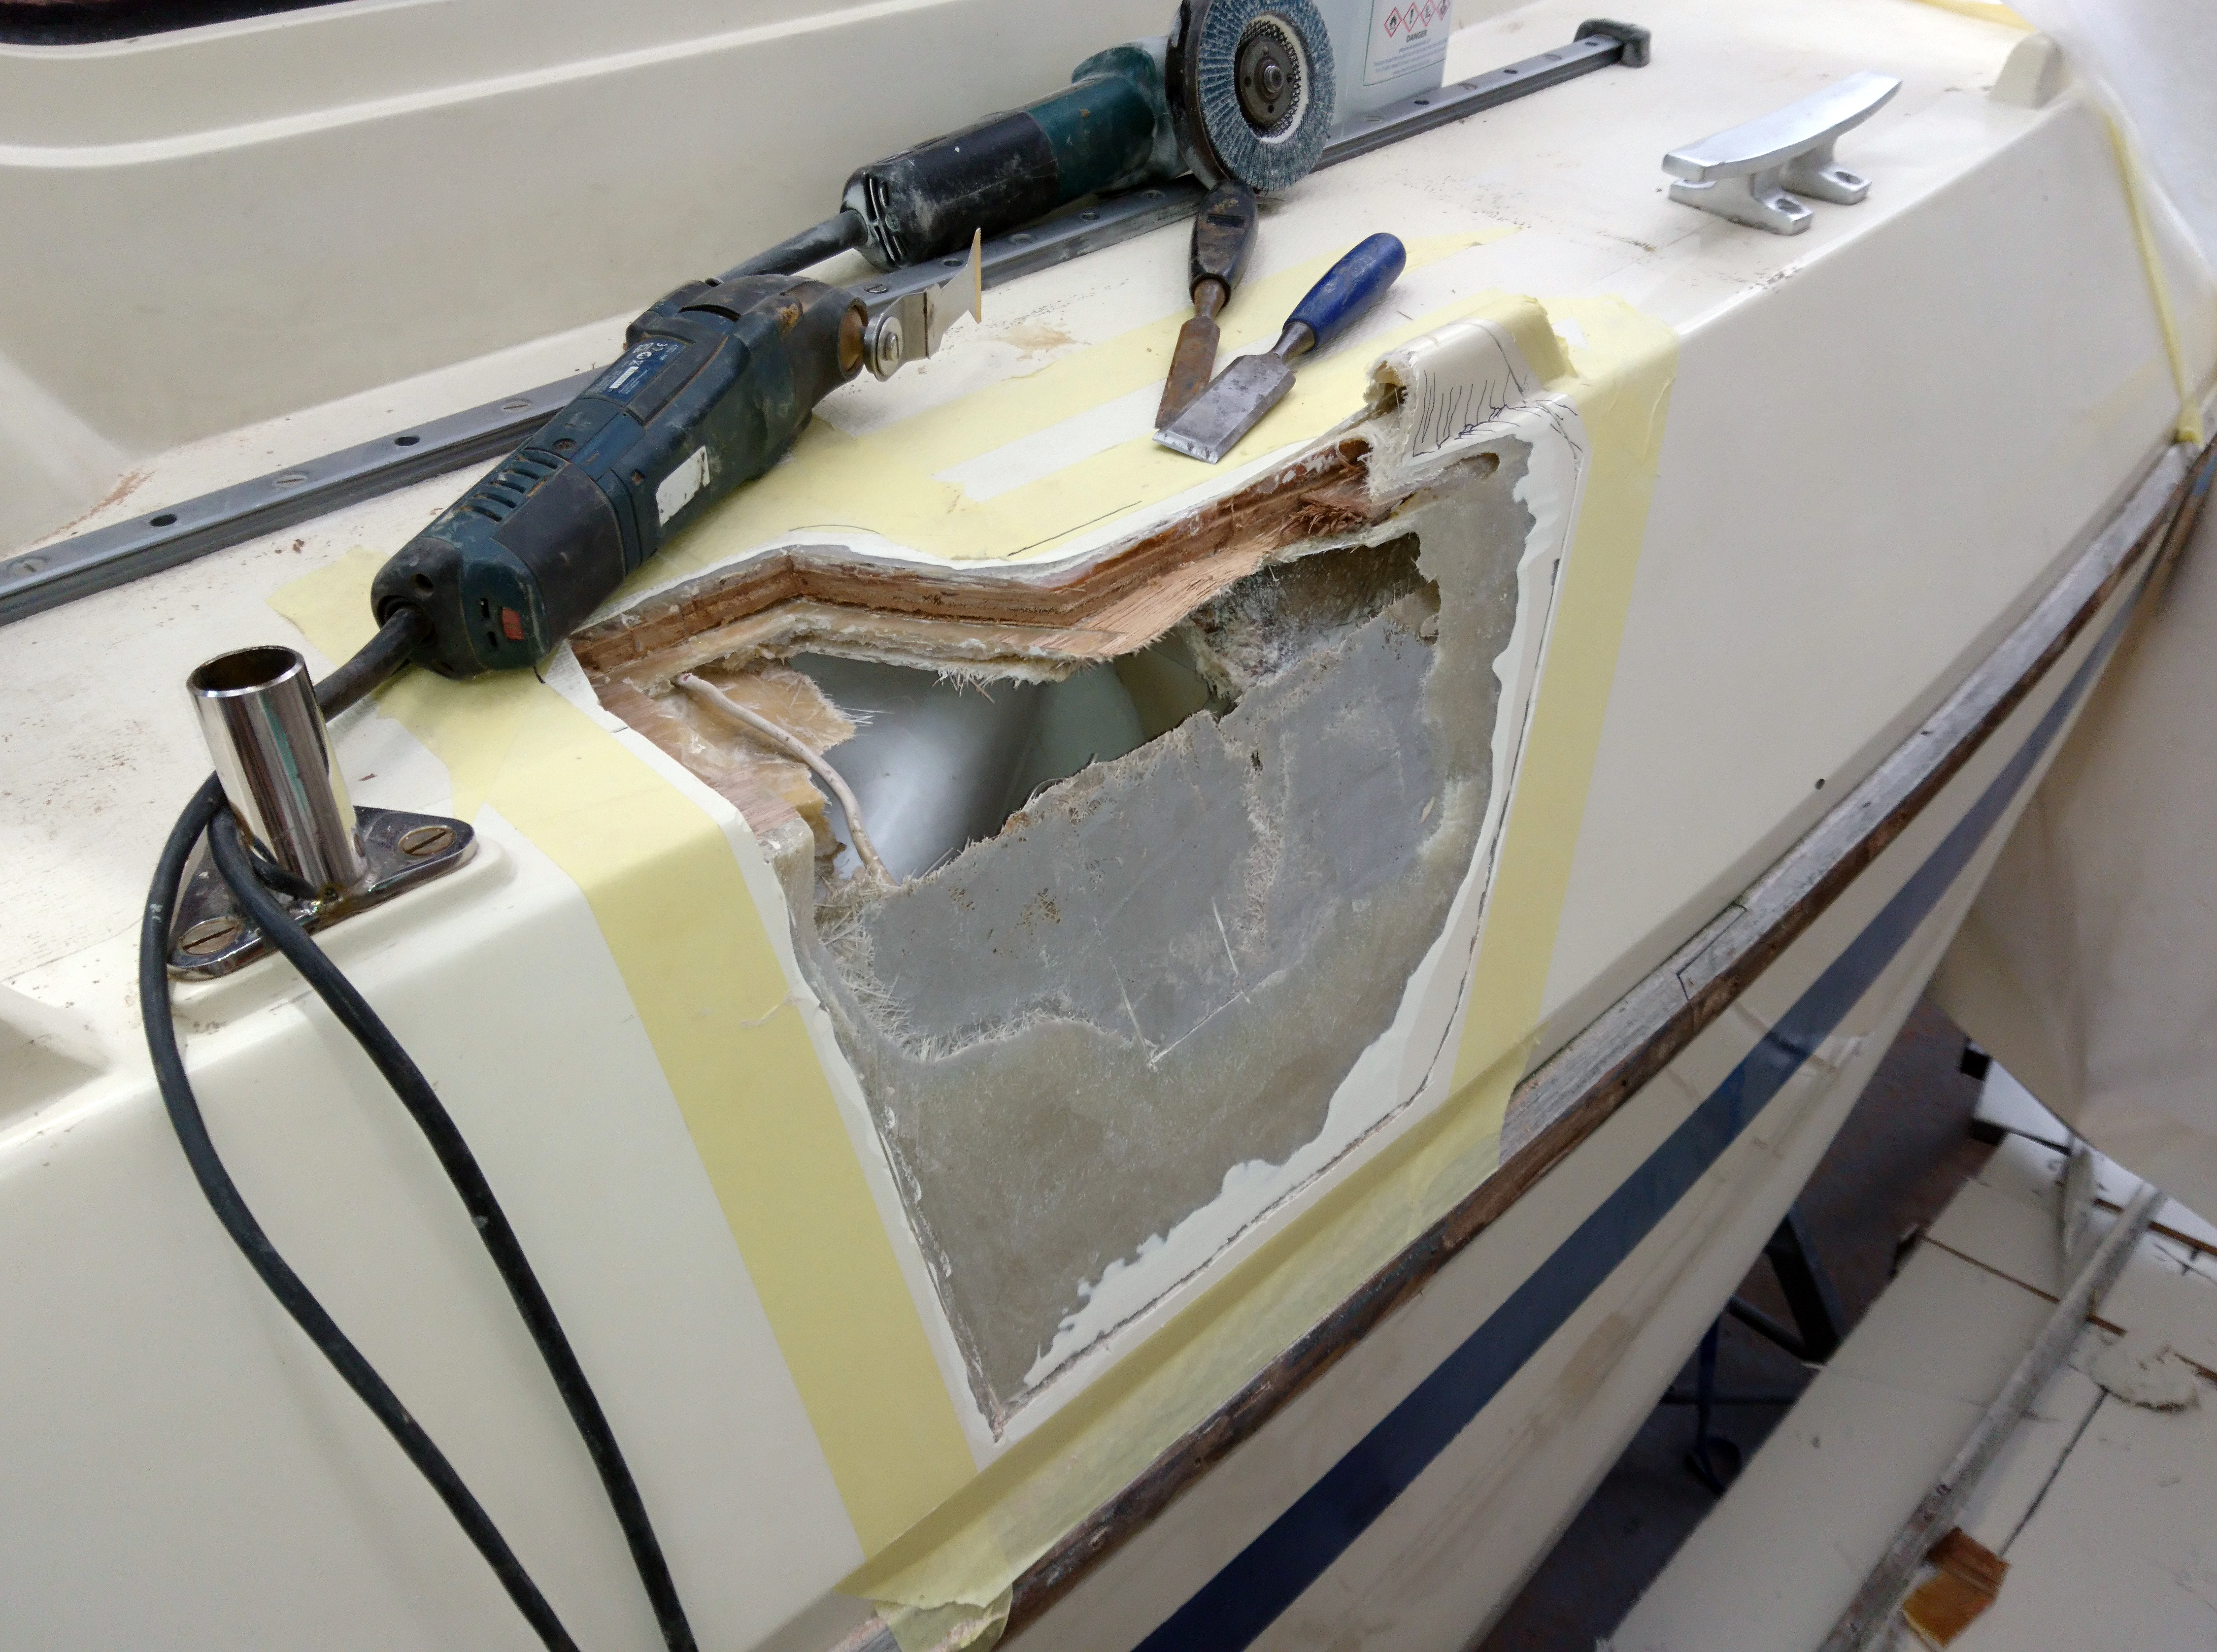
The crushed plywood core was cut away and all the jagged edges removed.
Its only at this stage, once all the bad stuff has been removed, that you can take a step back and come up with a rebuilding plan.
The choices really being repair from outside-in, inside-out or start in the middle.
I decided to firstly repair the deck core and then glass outside and then inside.
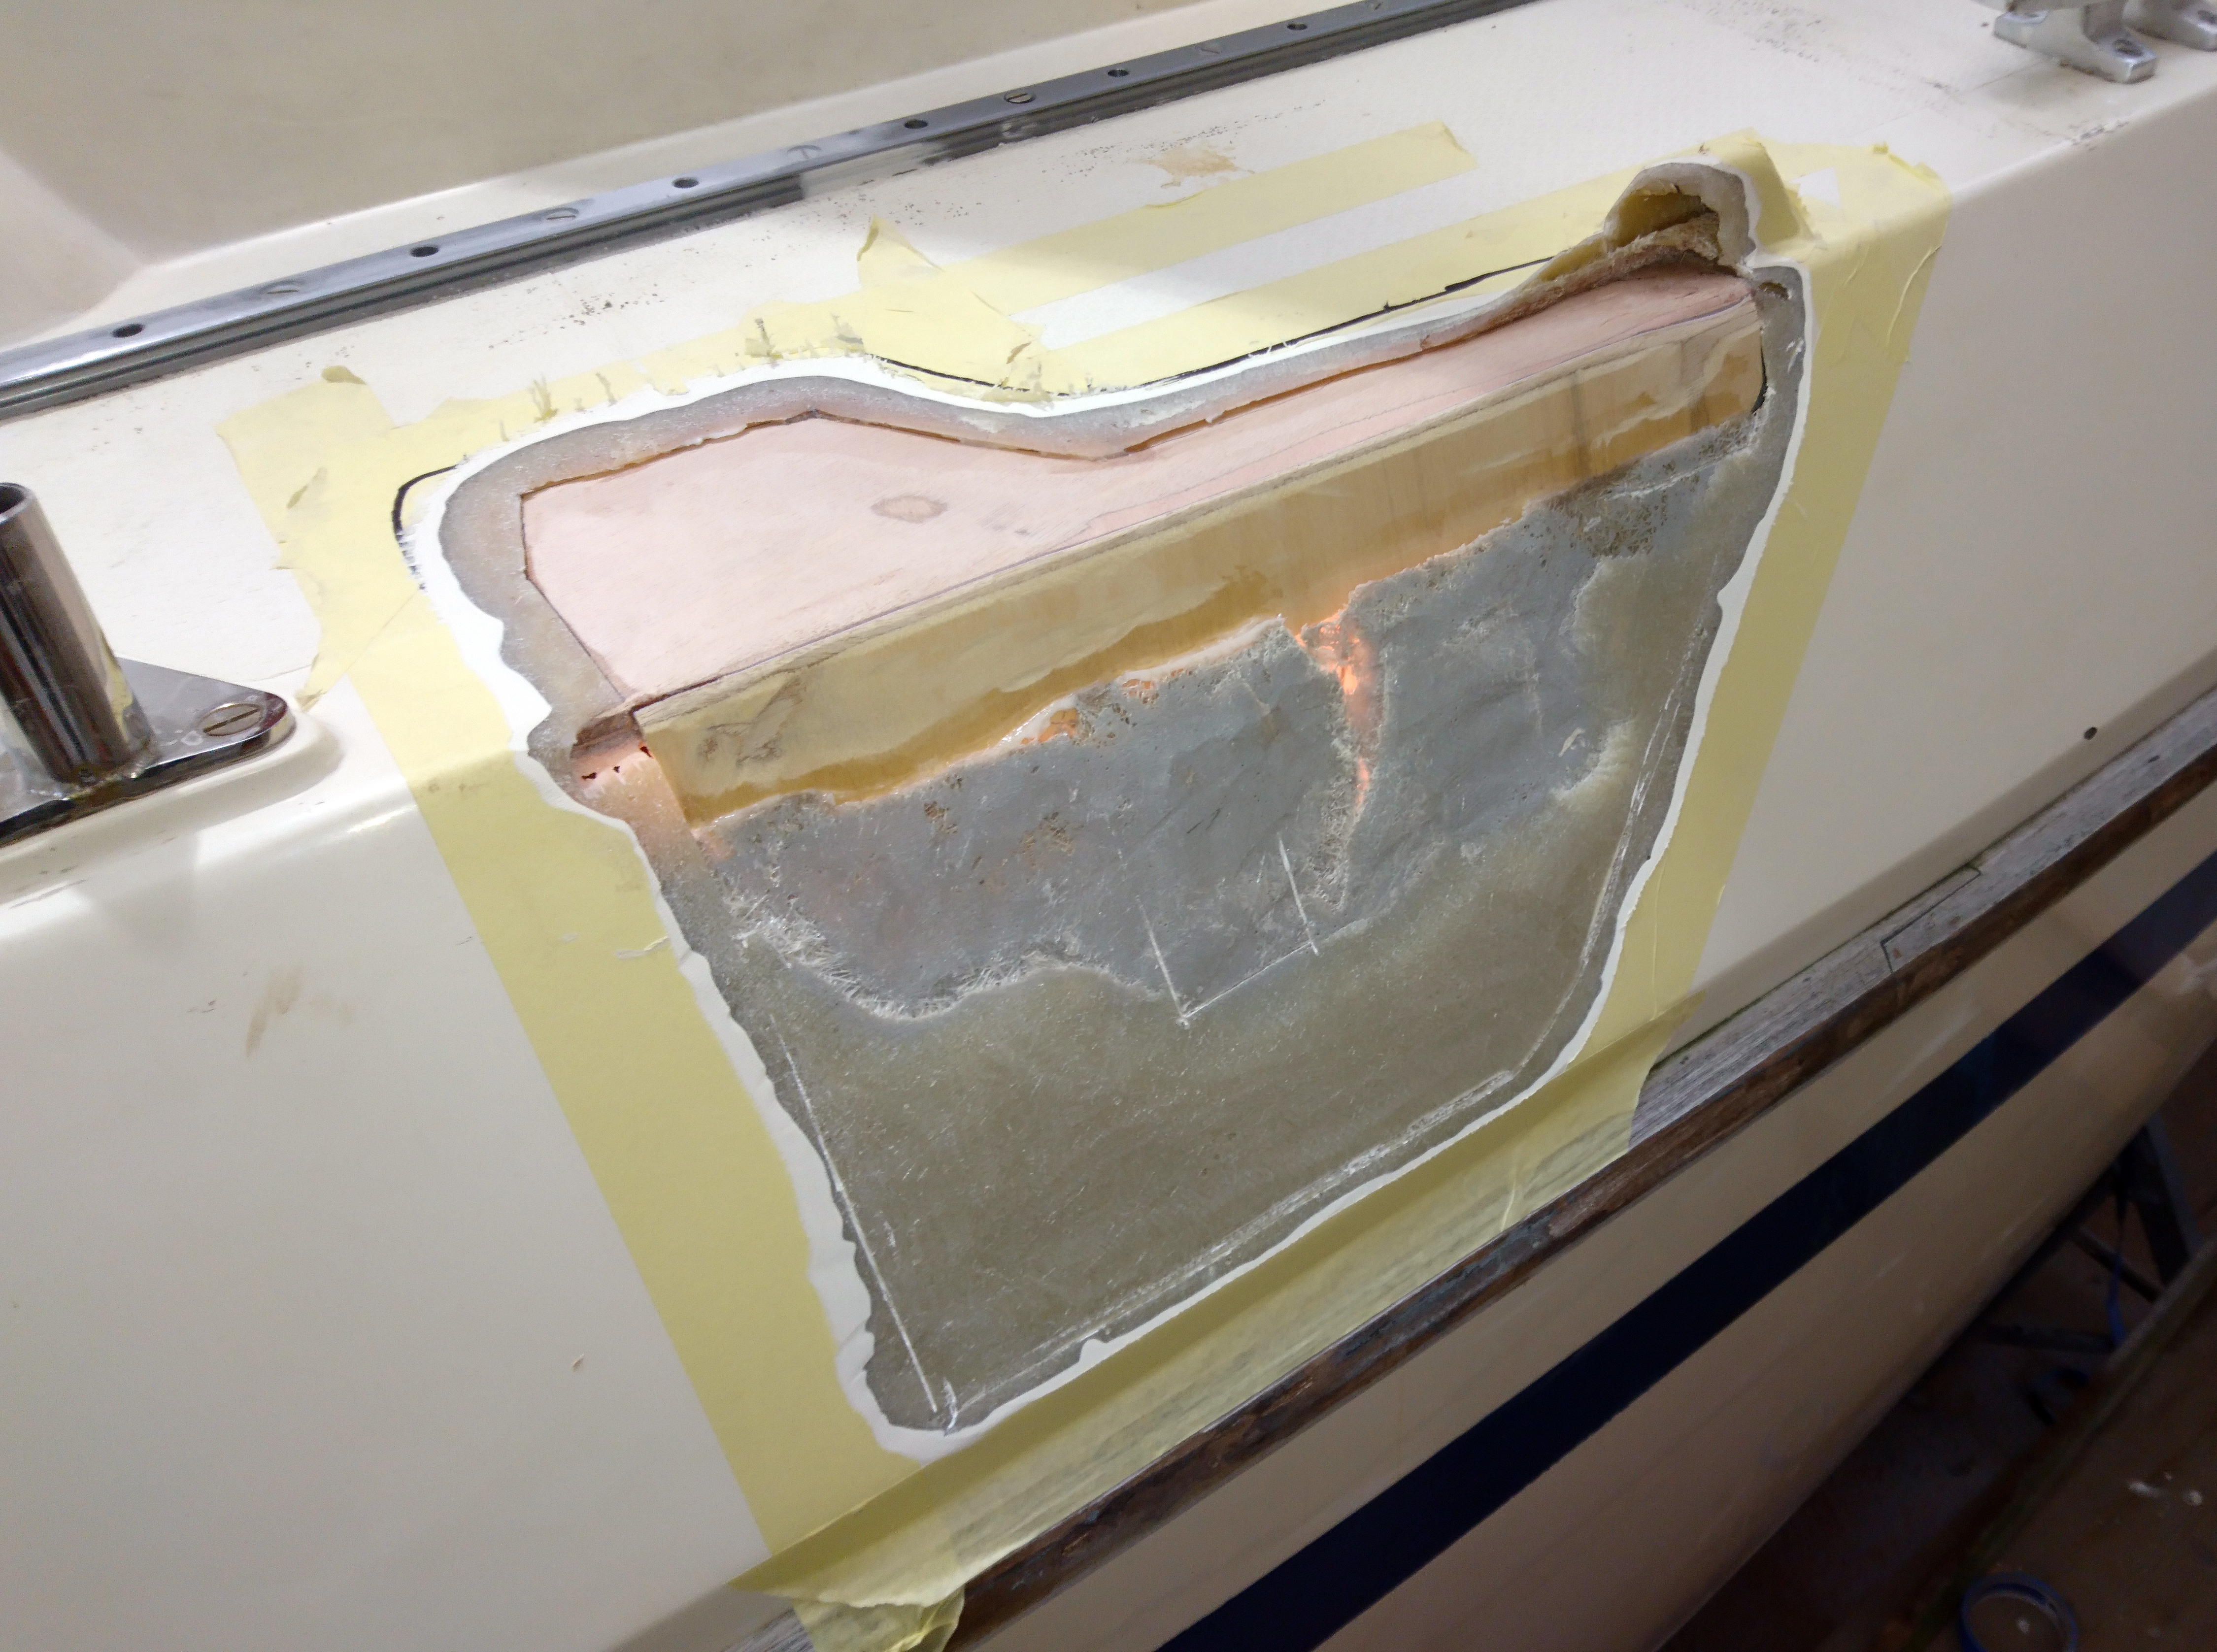
The plywood core was rebated by 30mm using a trusty multi tool, power file and various chisels.
A 12mm thick plywood infill section was made and dry fitted a number of times to get an exact fit.
The edges of the original deck core and the infill were sealed with neat West epoxy before being glued into position using a West epoxy/colloidal mix.
A 4mm vertical section of ply was also glued into place with epoxy to fill the gap and provide something to glass against.
It was very important to ensure that this was a clean bond and to ensure that there wouldn’t be any exposed epoxy either on the glass or plywood.
The reason for this is that polyester resin in not a good glue so for this job we use epoxy.
Trouble is Gelcoat is polyester based so the repair laminating will be using polyester resin.
The two are not great together so keep them separated.
Epoxy guru’s tell me that I can indeed use Polyester gel coat with epoxy but in this case I’m sticking with polyester.
Laminating with epoxy is a lot more time consuming with much longer curing times not to mention two or three times more expensive.
After the crushed wood and laminate has been removed a repair plan can be decided on.
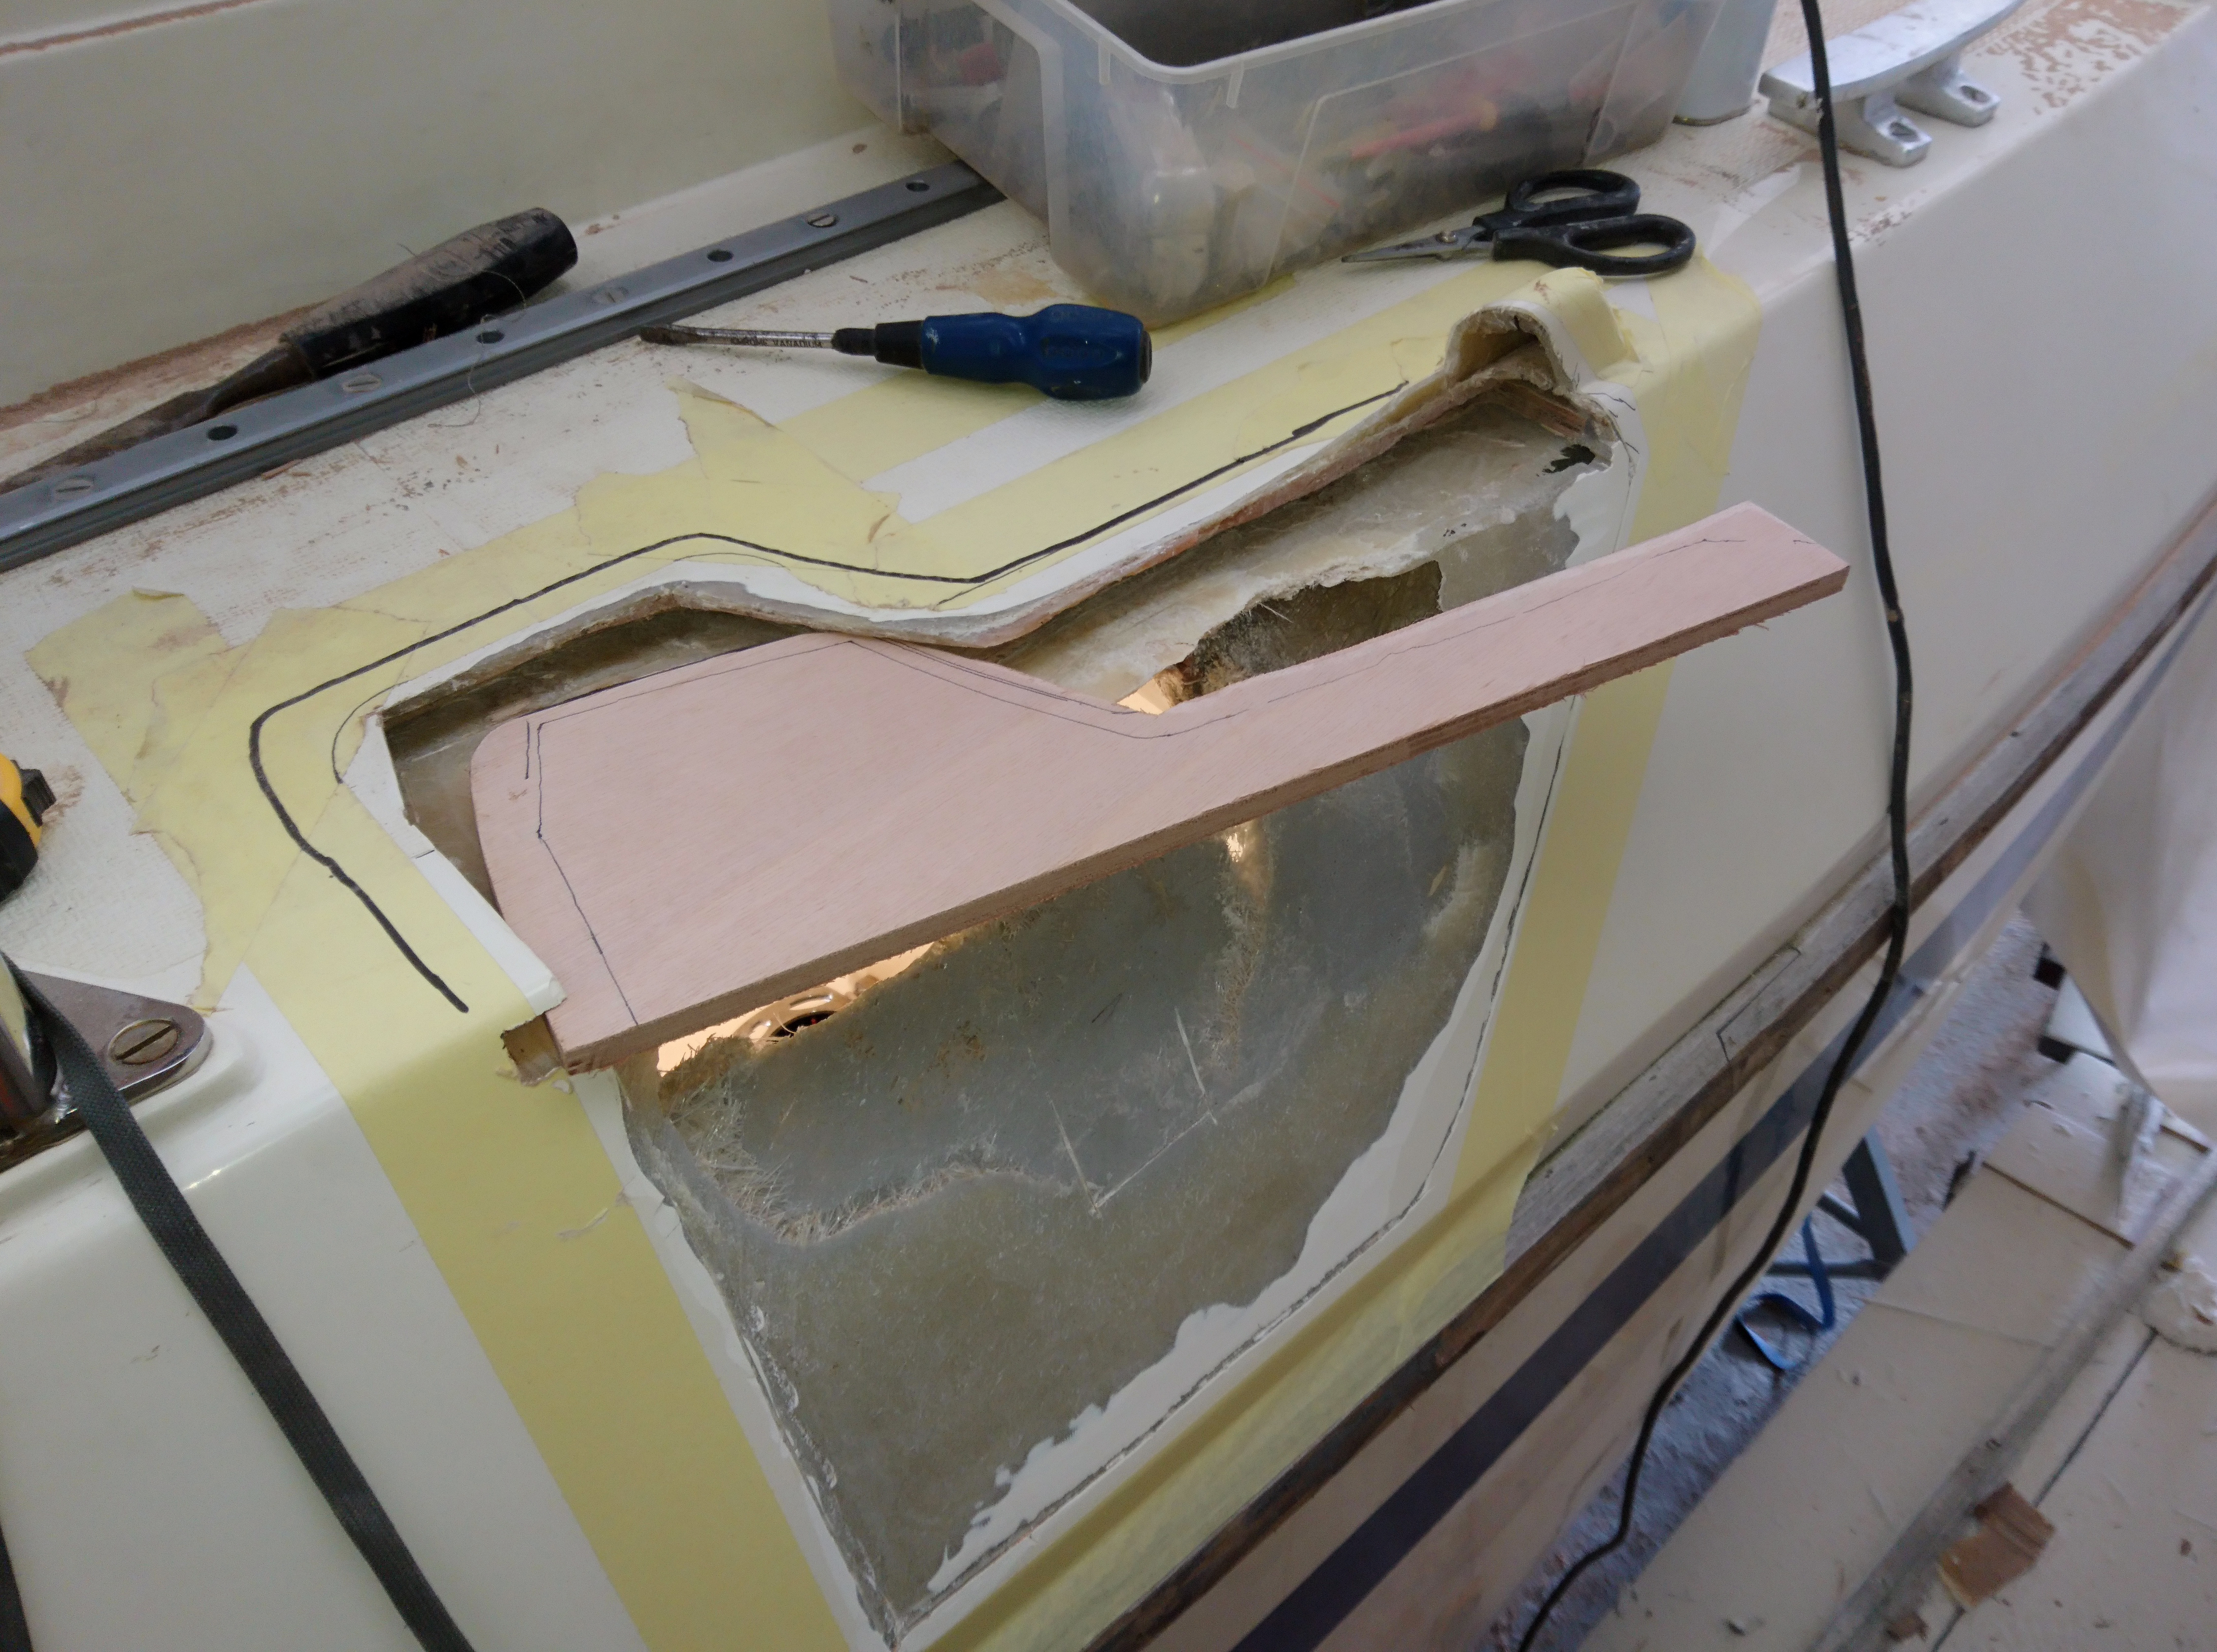
A new plywood core infill is shaped to fit into the rebate.
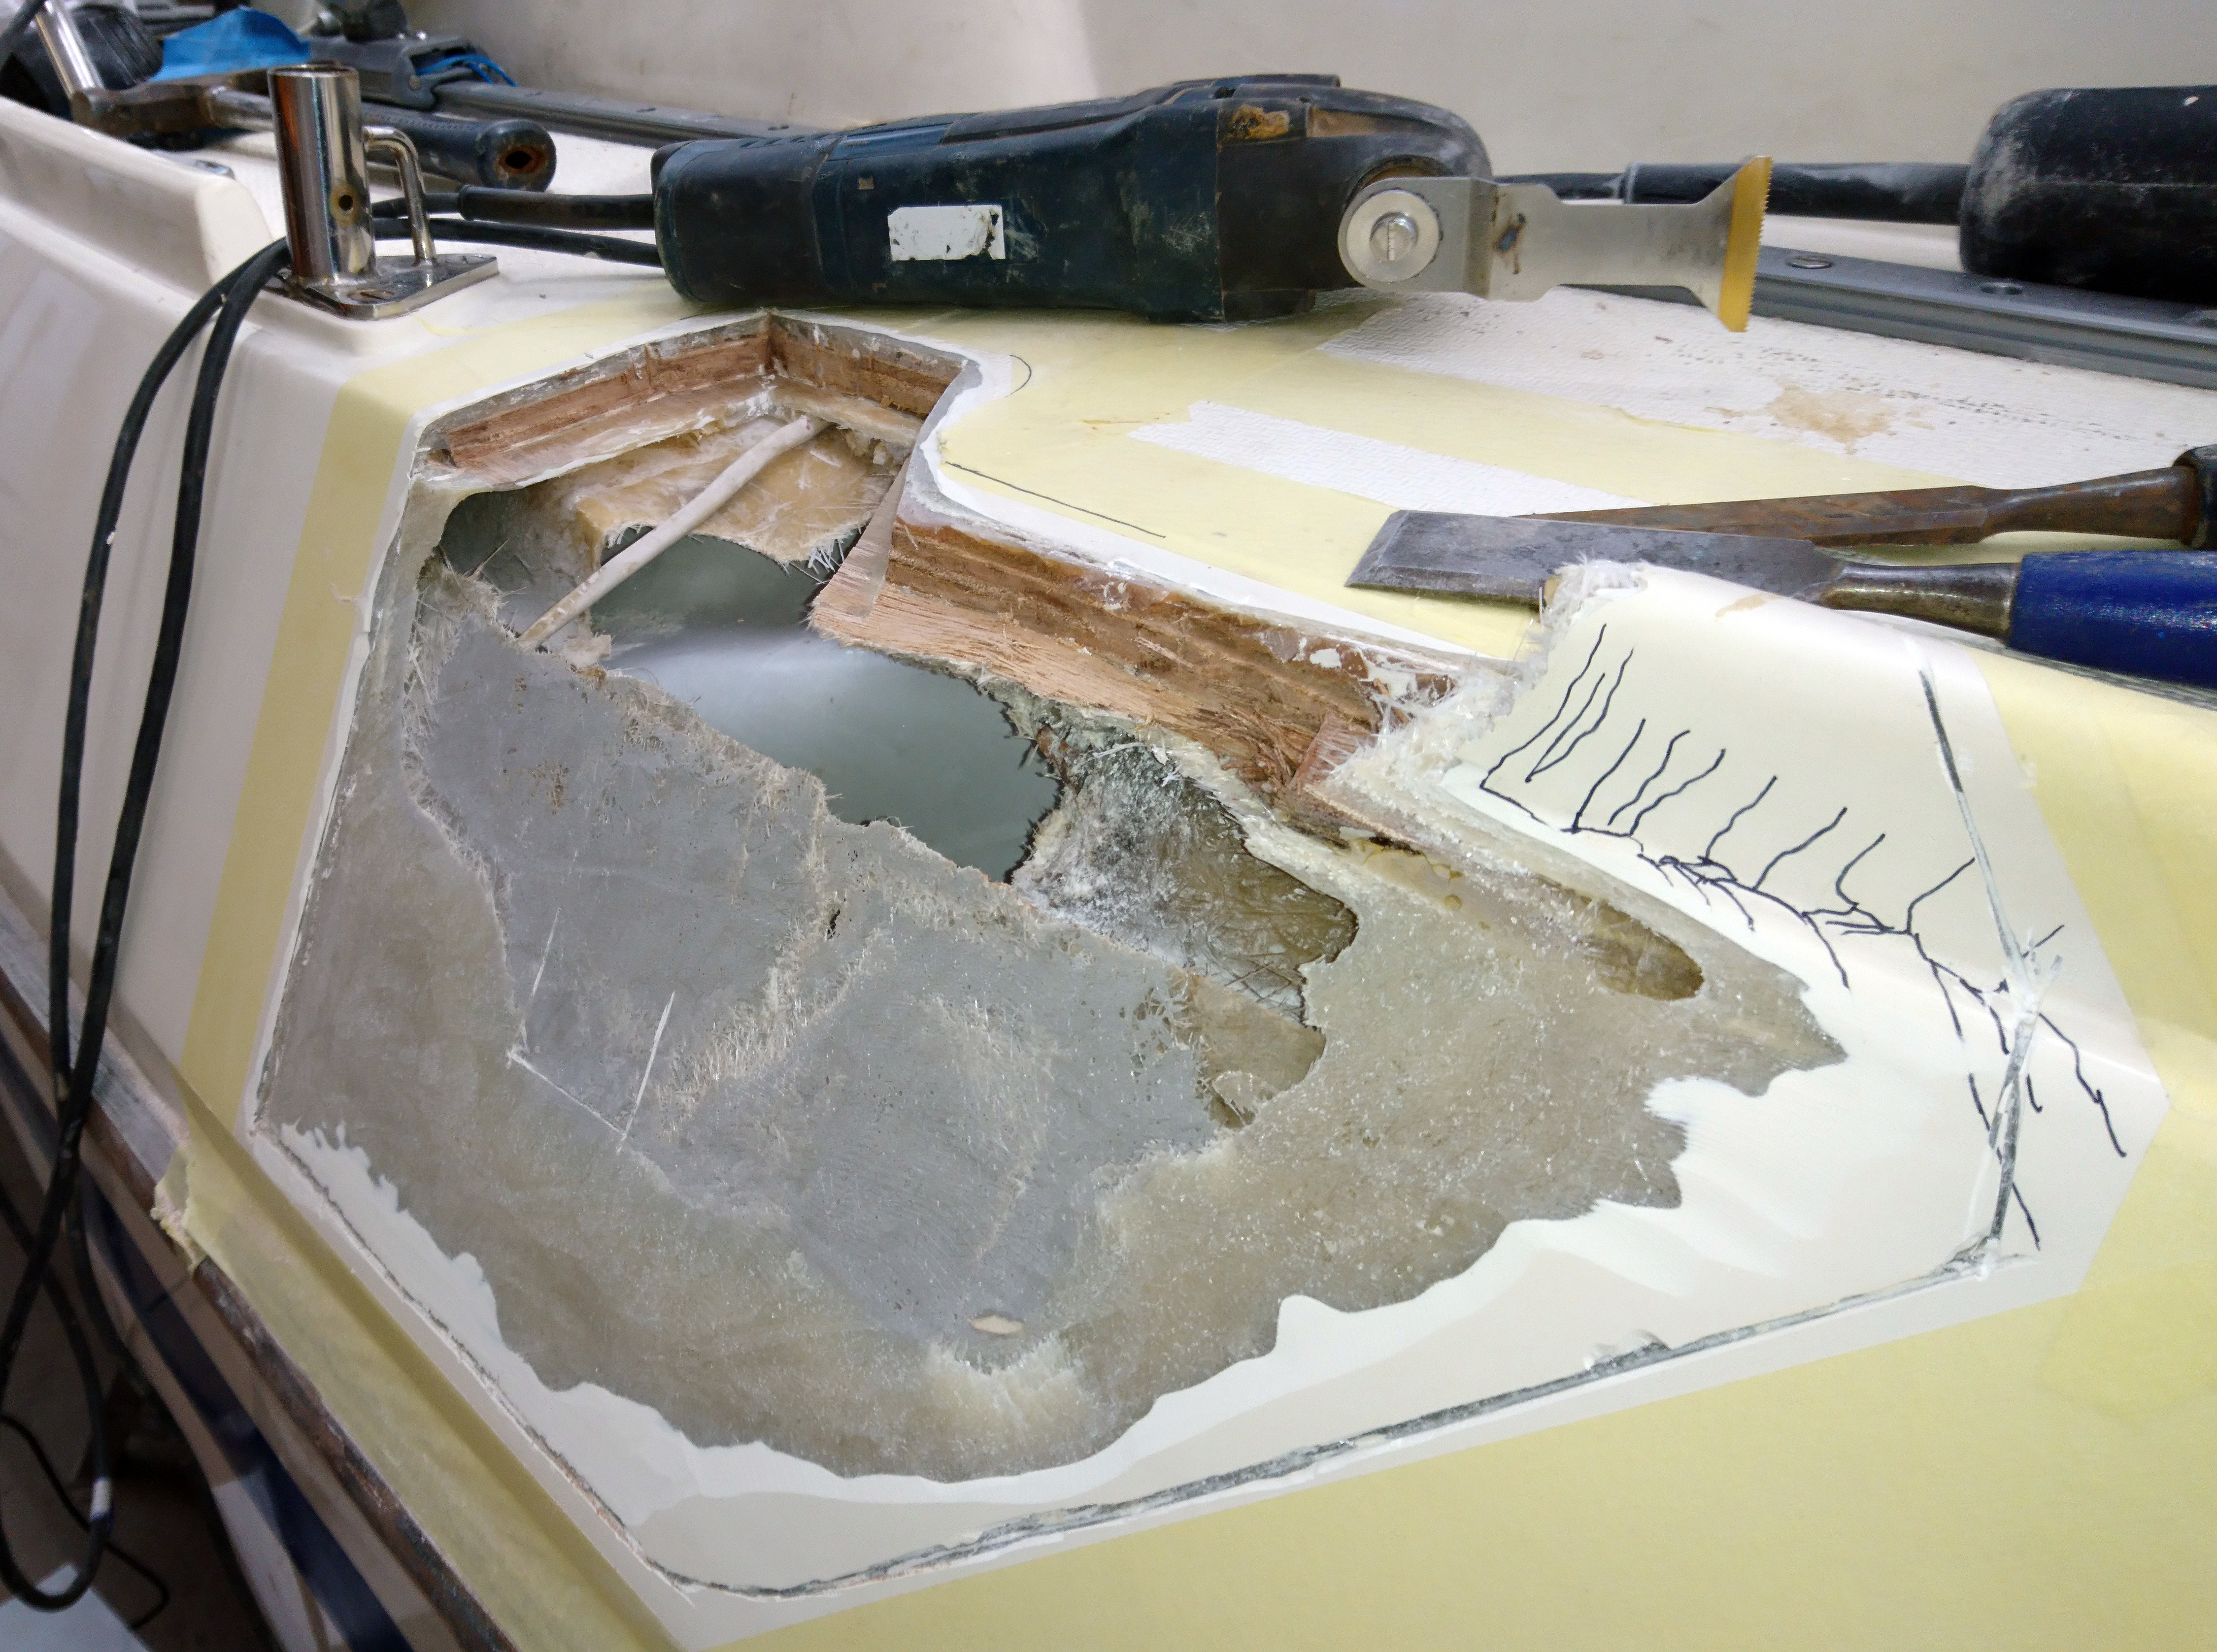
The plywood deck core is rebated by 30mm back to good undamaged material.
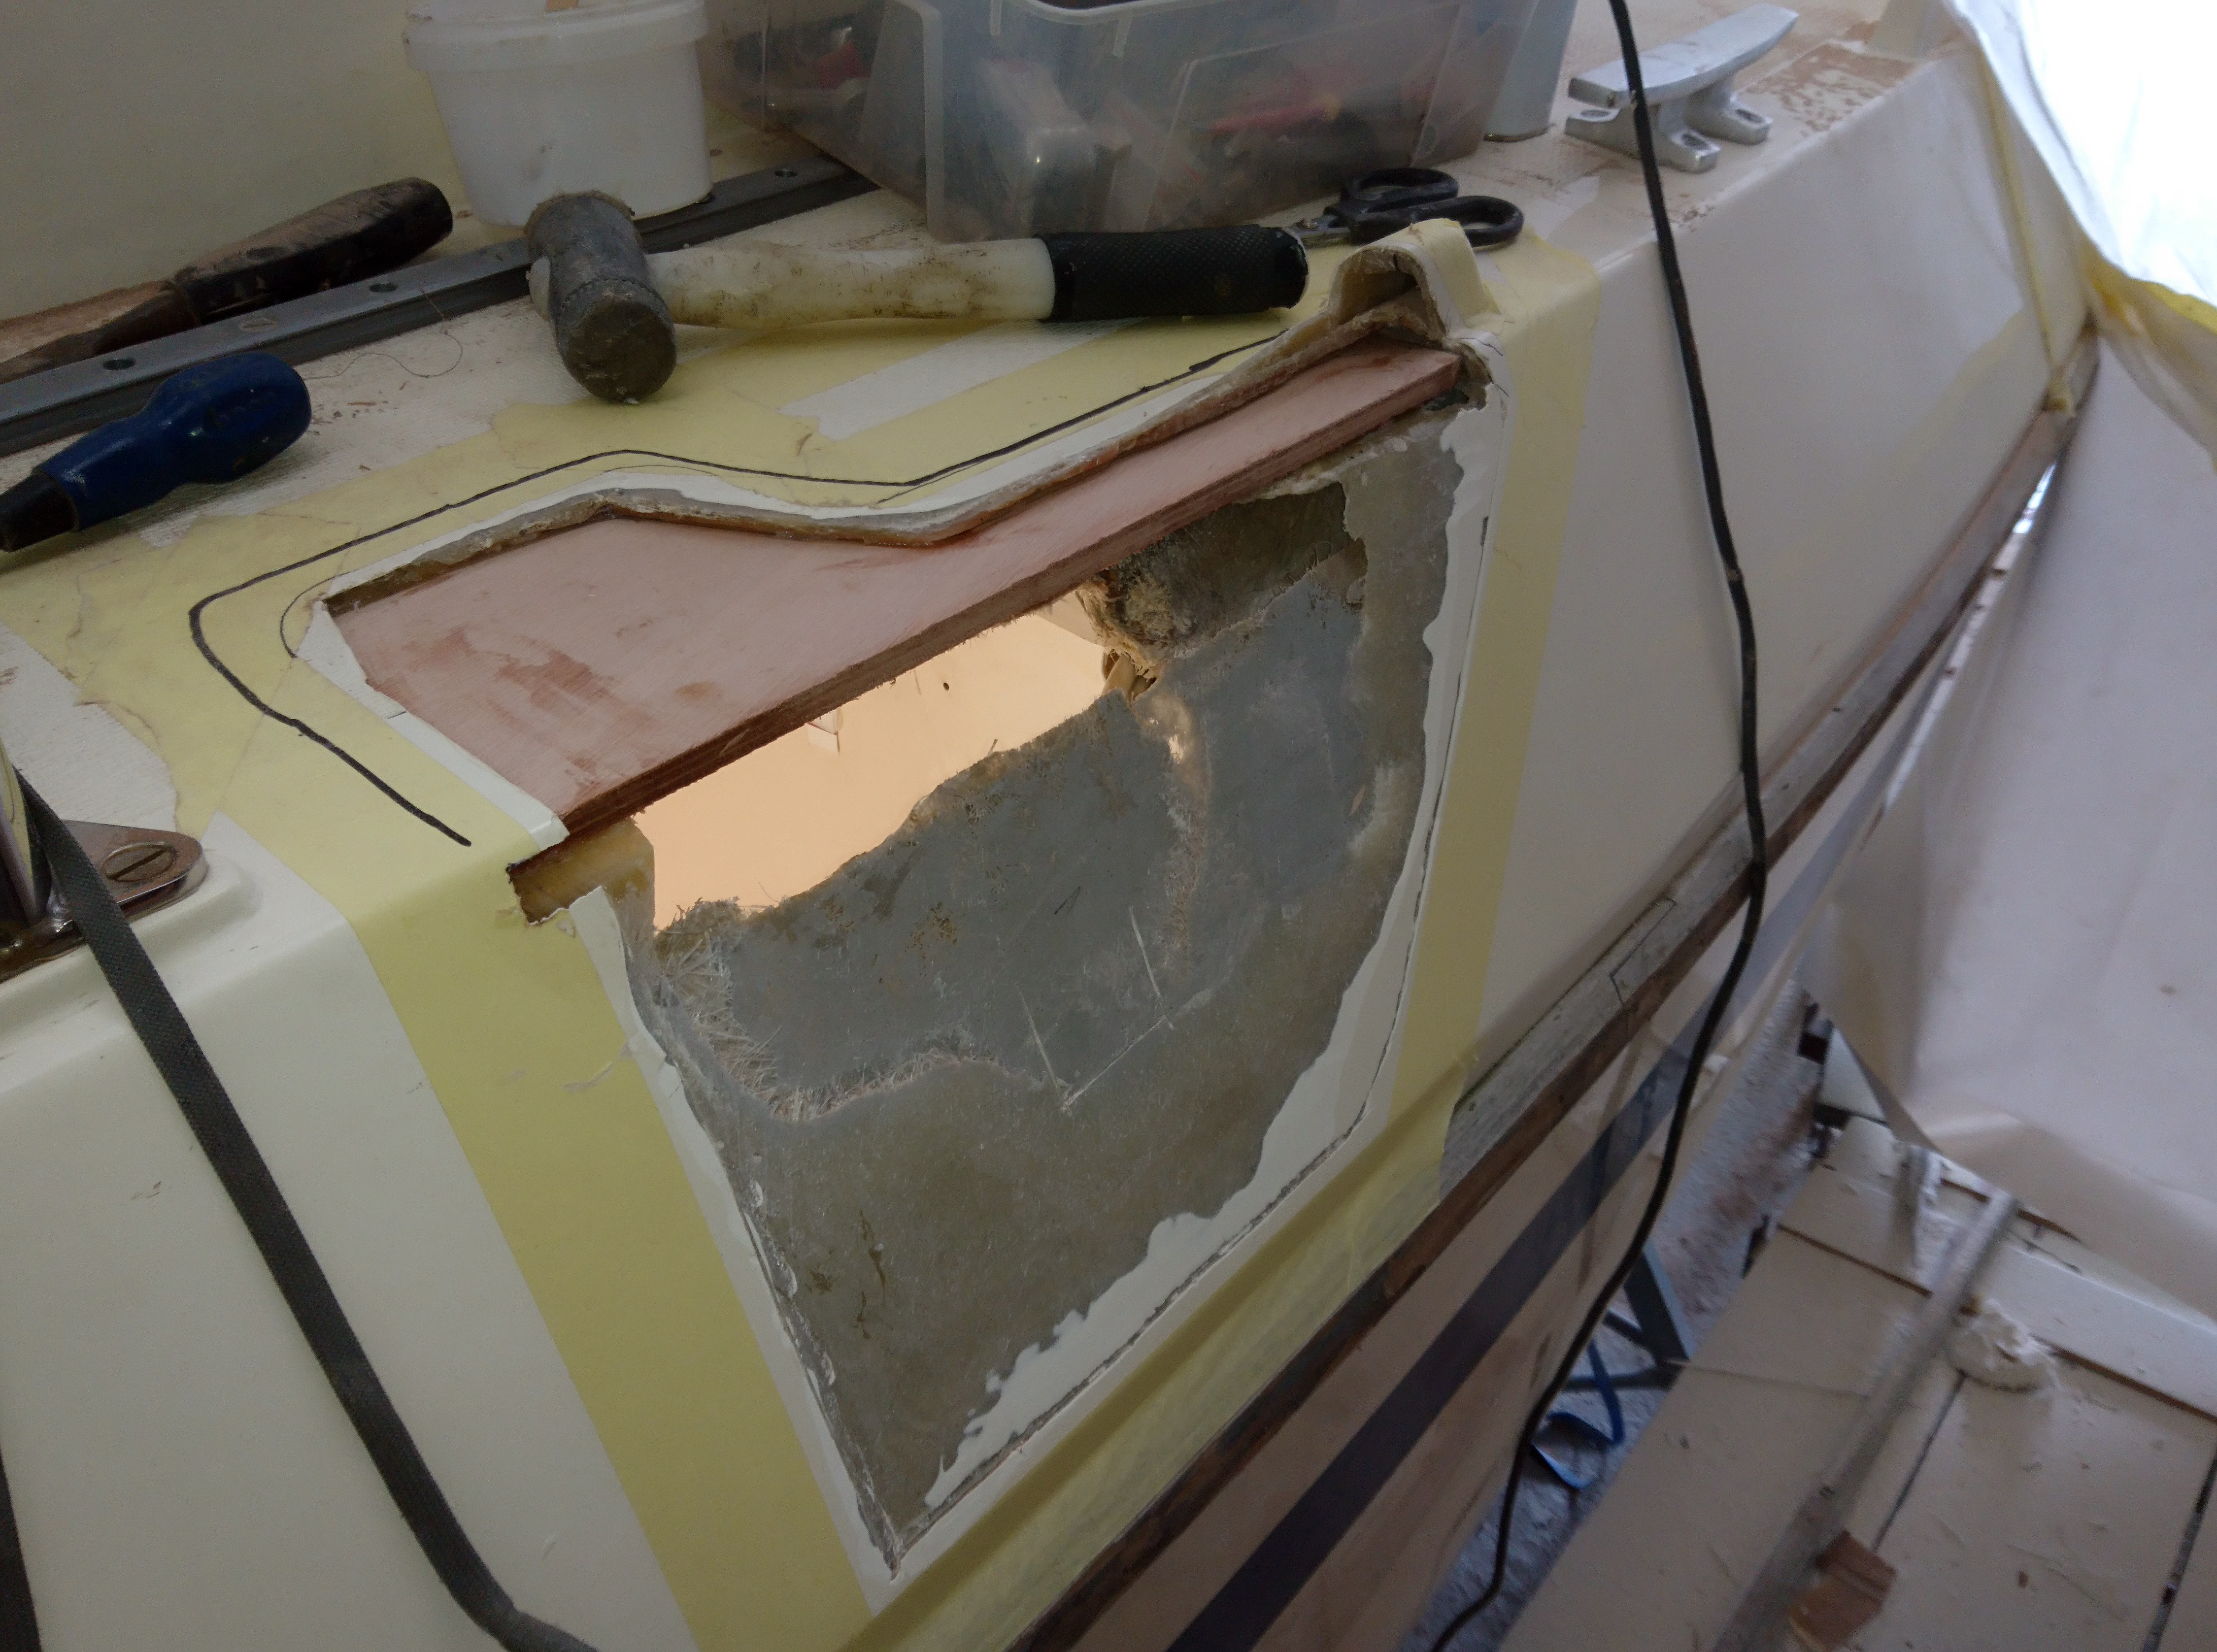
The new core is glued into place using West epoxy and colloidal silica.
Any damaged glass laminate is ground away and the remaining glass is keyed and cleaned.

Inside another vertical section of ply is glued to the core to provide a good backing to lay up against.
The edge of the rebated plywood core is coated and sealed with West epoxy.
All the edges are tapered and keyed and all evidence of surplus epoxy is ground away.
The laminating process is pretty straight forward.
Wetting out the repair area first before laying on a layer of 450g chopped strand mat (csm).
I always tend to use csm for the initial layers as you get a stronger bond.
In this case I applied three layers of csm, ensuring each layer was well rolled and consolidated which in turn uses much less resin and will result in a stronger laminate.
Remember, resin rich layups are always more brittle and less strong, so be frugal with the amount of resin you use but at the same time ensure every fiber is whetted out.
A straight edge will show you where you have highs and lows in the laminate.
I mark these areas with marker pen and then its just a case of adding more localised layers.
Once there’s a good initial flat layup I can start adding a couple of layers of 350g woven biaxial cloth.
There was a lot more scope for additional layers on the inside repair, as this area will be hidden by internal trim.
So I added a number of extra layers of 450g woven tape which will add significant strength to the overall repair.
I use a masking tape border around the repair to avoid splashes and drips of resin landing outside the repair area.
I’ve seen others who need significantly more protection.
I take a lot of care about cleanliness during laminating, especially when using a consolidation roller and later in gel coating.
If you are not careful you can get into an almighty mess and then transfer that mess everywhere, so my top tip here is develop ocd type tendencies when laminating, although there are others who wish I could extend this tendency to other areas of my life.
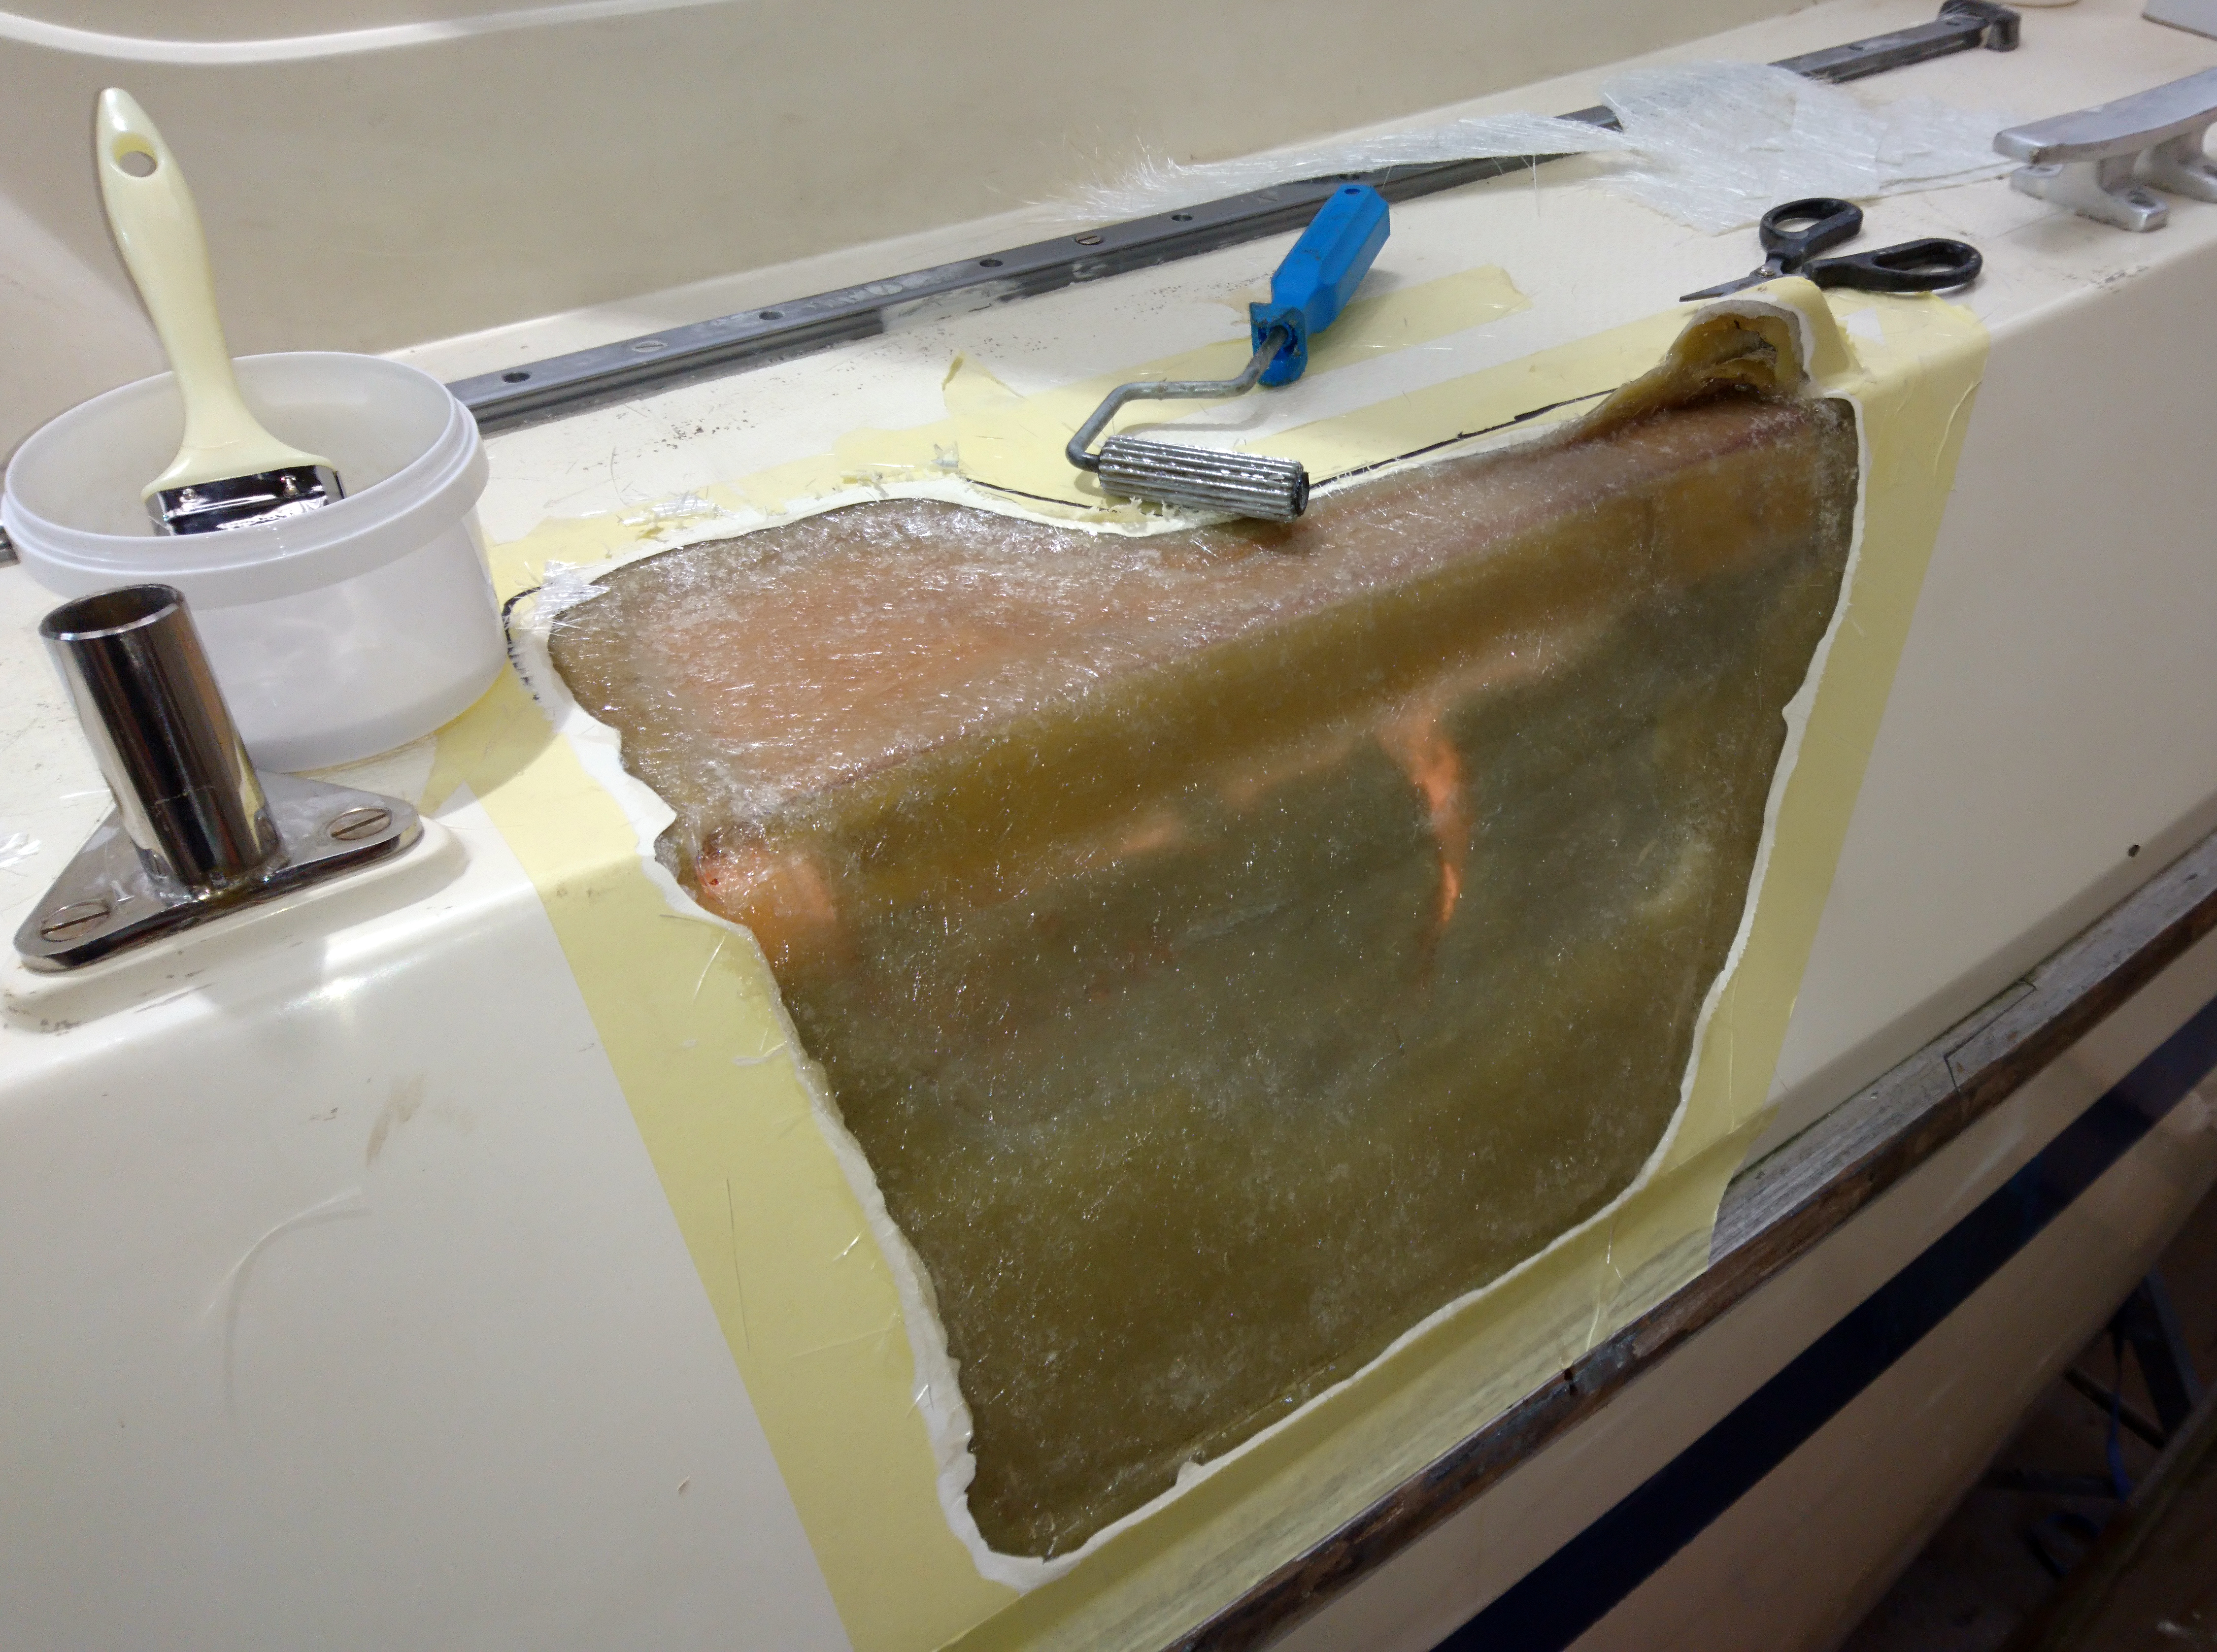
First layers of CSM can be laminated.
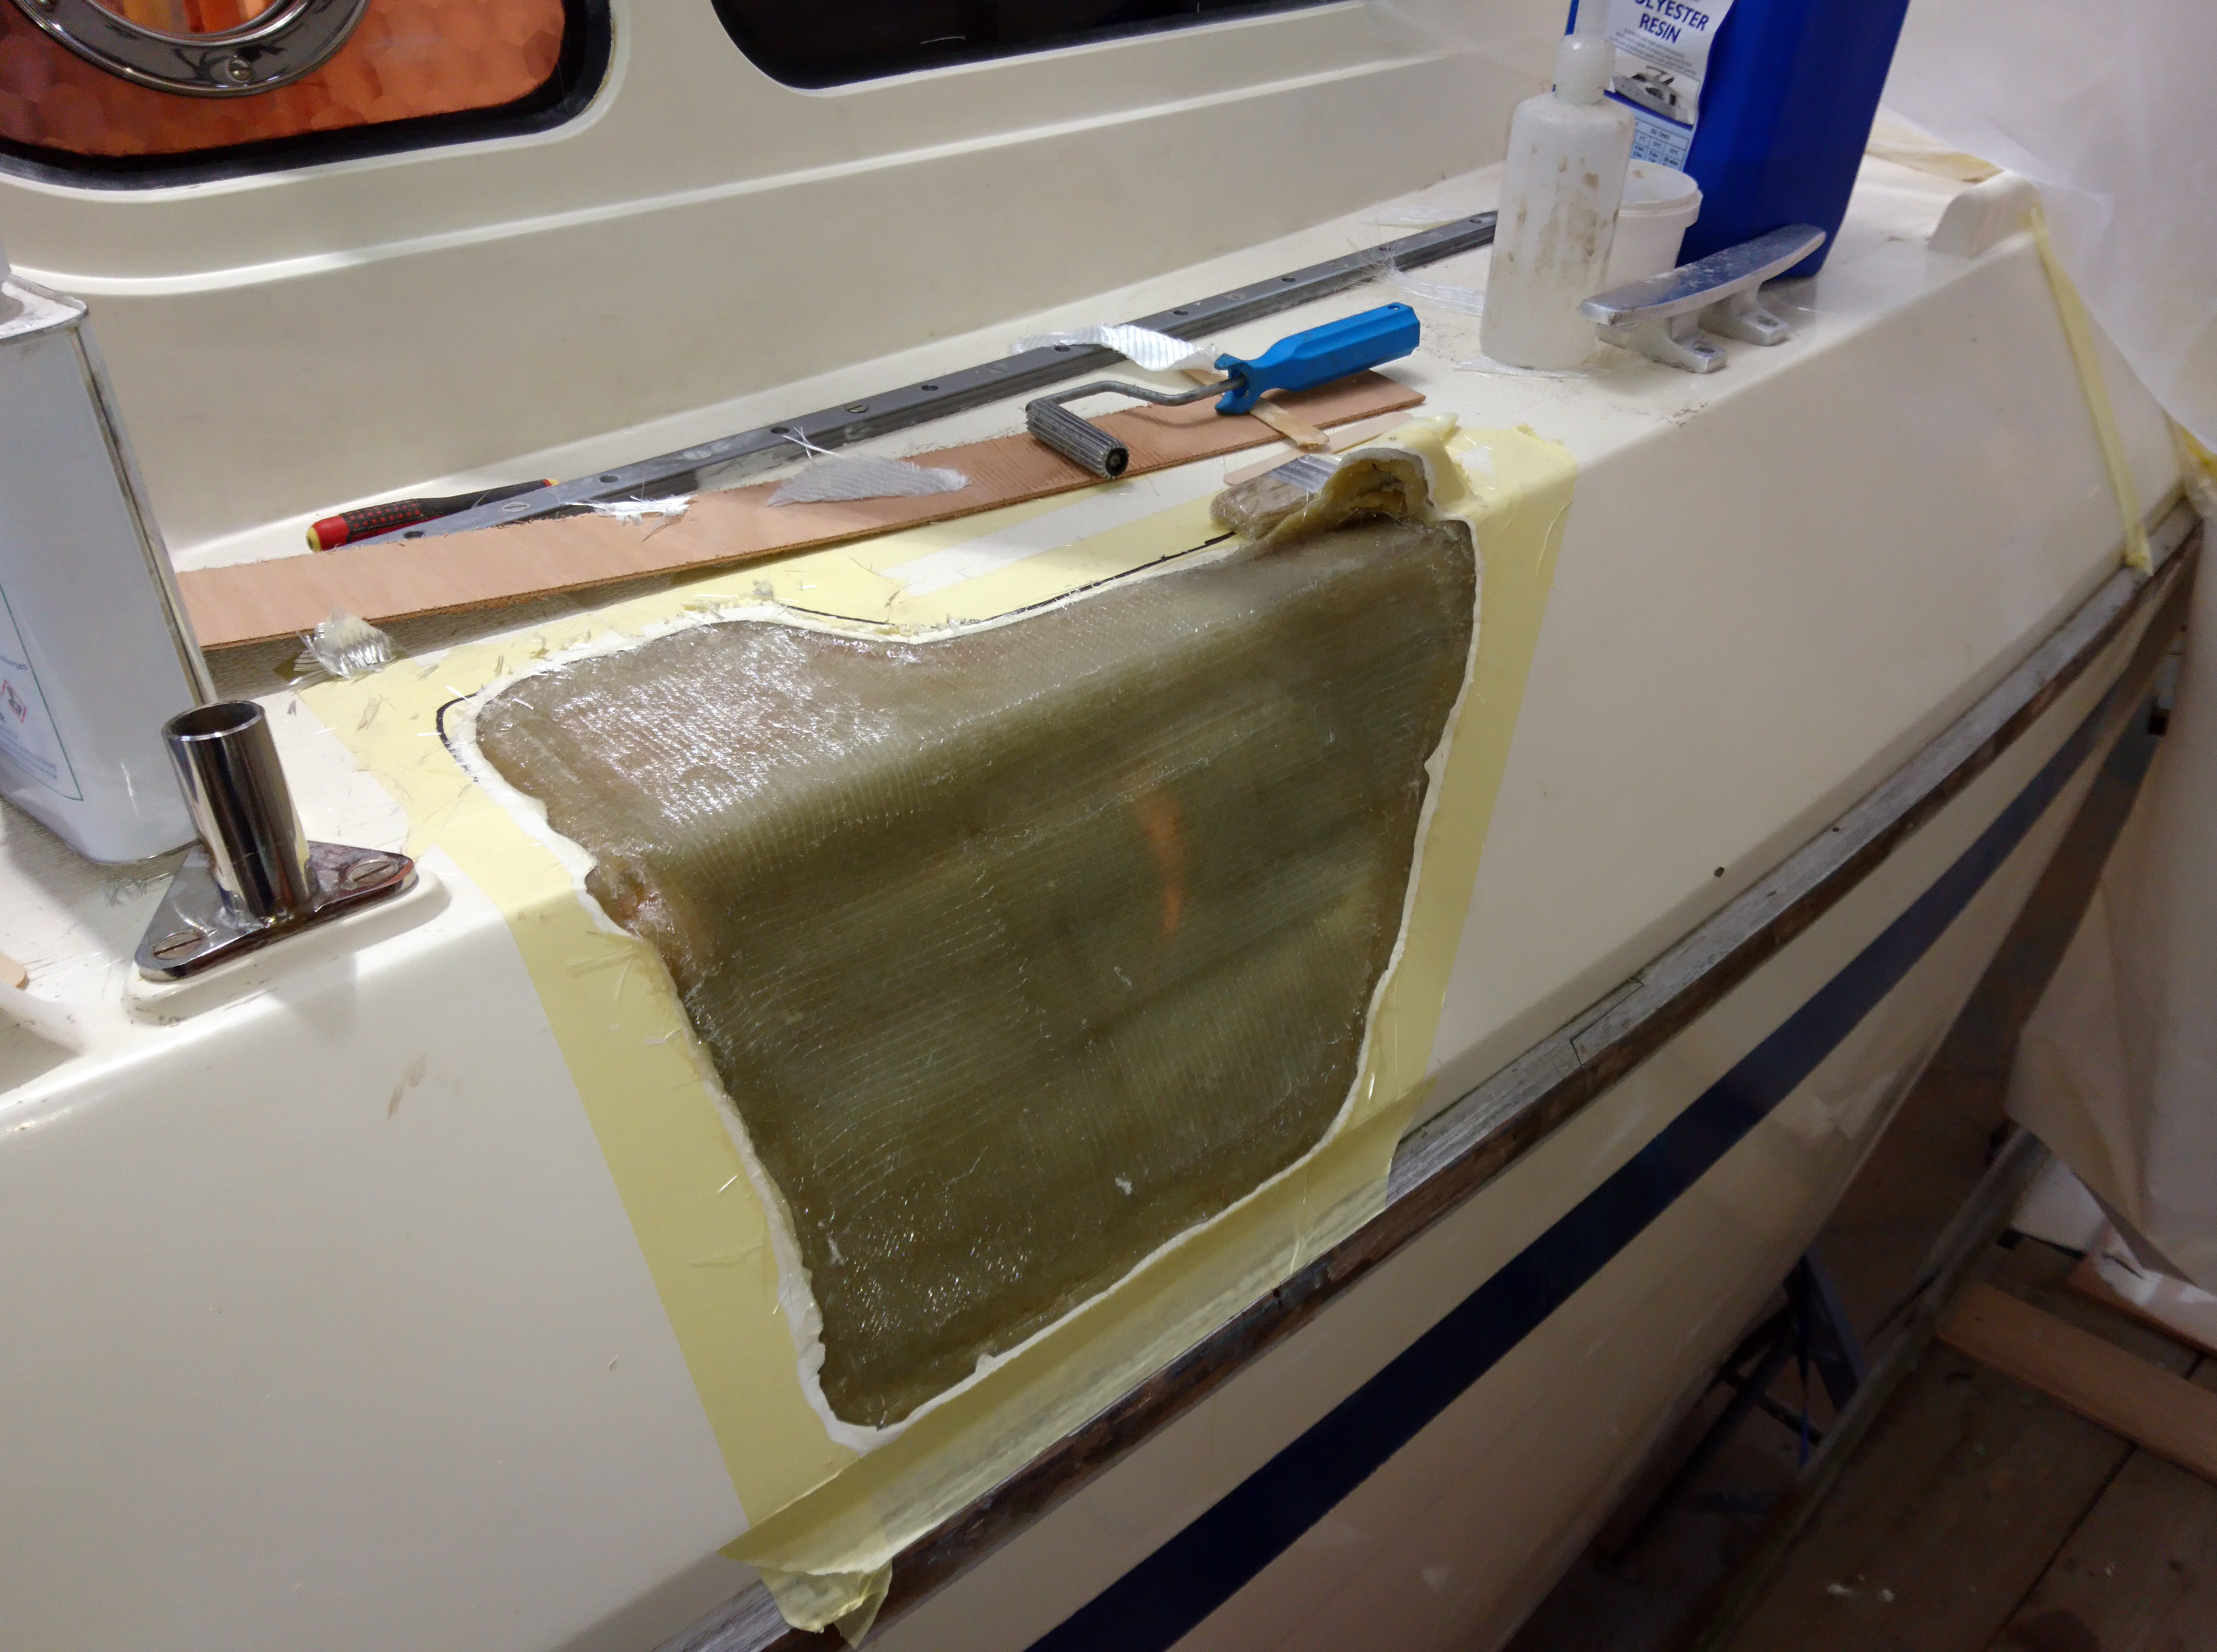
Further layers of woven biaxial cloth are added.
Highs and lows are marked and filled using more glass to get a reasonably flat surface.

I added a few extra layers of 450g woven tape below decks.
After a quick trim and sand with 80 grit paper to remove the odd stray fiber it was time to apply the first coats of gelcoat.
The boat was inside our shed No3 and in early September the conditions were such that I could apply at least five or six coats of gel coat in a day.
Avoid the temptation to apply thick coats of gelcoat, which is very possible as gelcoat is much thicker than resin.
The issue is that during both the mixing process and the application you will introduce air bubbles into the mix which, if applied in a thick layer, will not work their way out to the surface.
Later sanding and compounding will expose these tiny bubbles which are impossible to fill.
The remedy to this is to apply multiple, thin layers of gelcoat.
I was getting gel cure times of around 1 hour, so I applied 5 thin coats during the day, followed by a coat with added wax in styrene which was then left to set hard overnight.
Next day the area was sanded with 240 grit paper using a flat foam block.
The initial hills and valleys are easy to spot as the valleys will remain gloss whilst the rest will be matt.
The trick here is to ring each valley with a marker pen and then remove the gloss using 80 grit to provide a good key.
Additional thin layers of gelcoat were then applied to fill the valleys before another coat over the whole area with added wax.
Its much harder to spot the highs and lows at these later stages so I scribble all over the area with a marker before sanding off using finer and finer grades of paper.
I find 240 grit is my rough starter paper.
This is followed by 600 grit, then 1000, 1500 and if I’m feeling enthusiastic I’ll scribble and sand off using 2000 grit wet and dry paper.
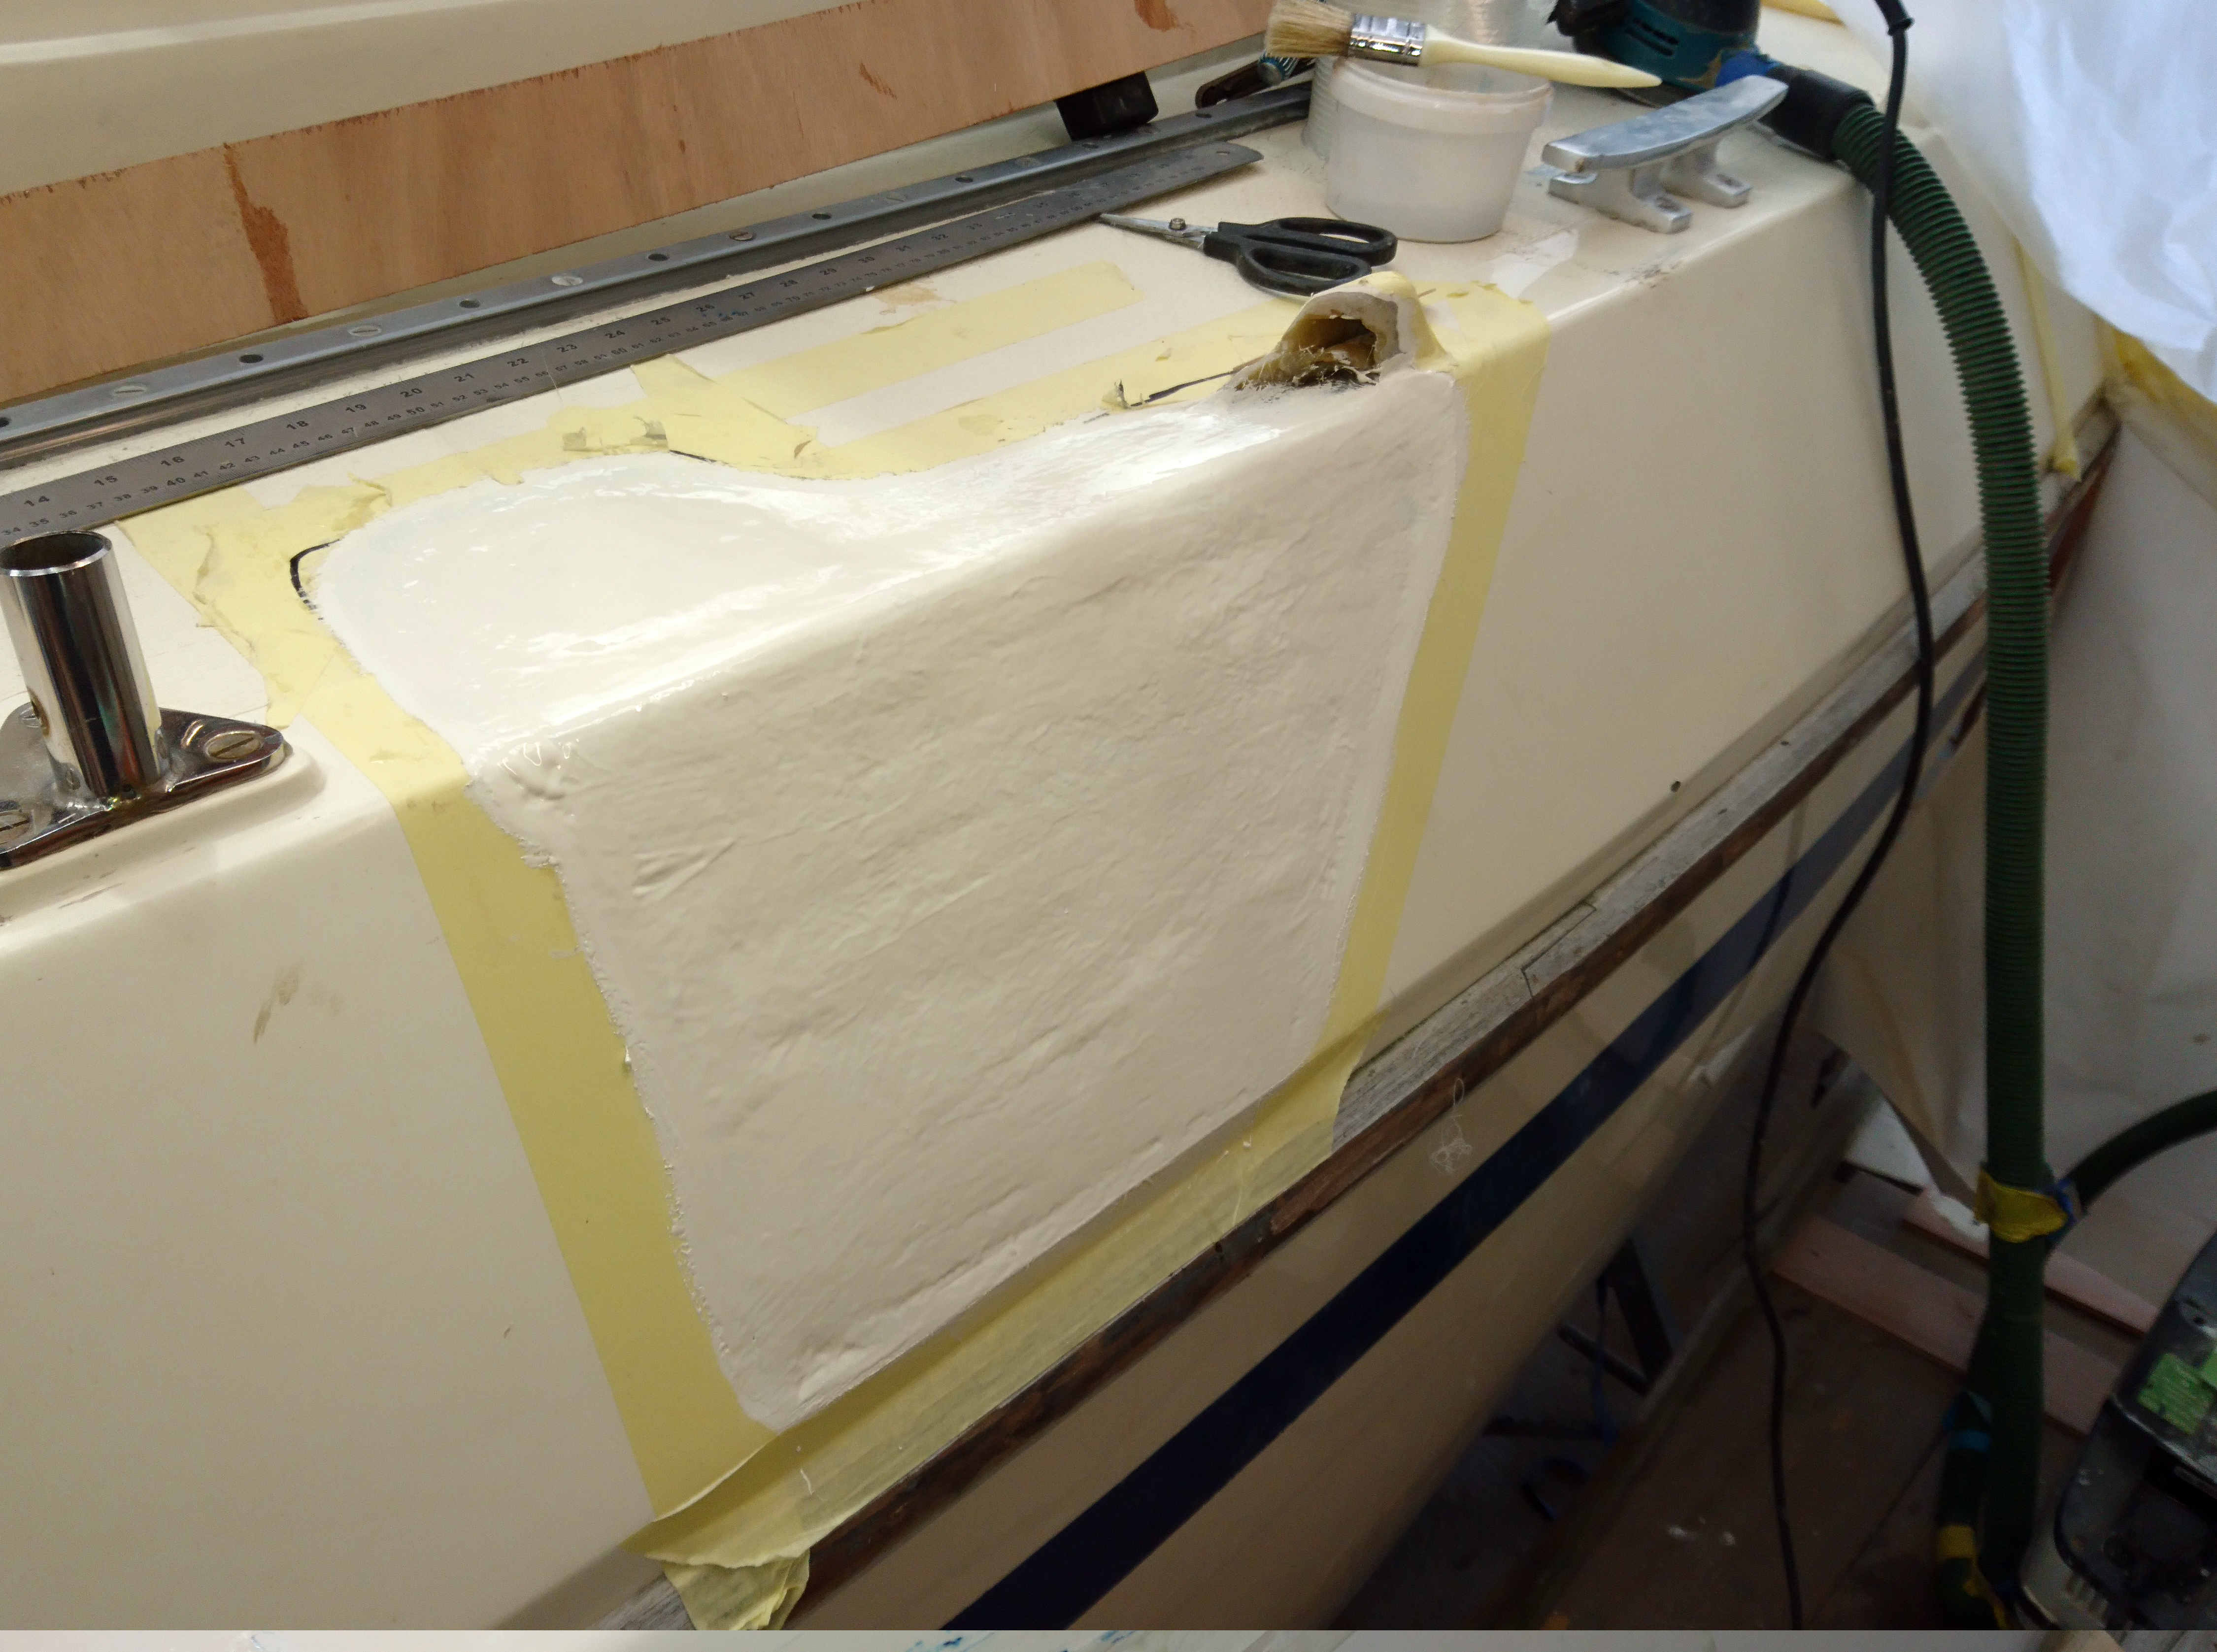
Numerous thin layers of gel coat are applied to build up the profile.
Numerous thin layers of gel coat are applied to build up the profile.
A coat with added wax is added so the surface can be sanded and checked for highs and lows.
The next stage was to create a new toe rail.
For this I decided to take a mold from the opposite port side toe rail.
The port side toe rail was cleaned, compounded, polished and then had four coats of mirror wax applied and finally buffed to a high shine.
The area around the toe rail was taped using resin proof tape to ensure I could easily get wedges under the mould to release it later.
For the mould I used a contrasting dark blue gelcoat.
This is done so that when making the final part you ensure you get a good coverage of gelcoat as if it’s too thin you will be able to see the blue showing through.
Six layers of glass was laminated over the gel coat.
The next day the mould was popped off using wooden wedges, trimmed and internally waxed and polished.
A new toe rail was then laminated, trimmed and offered up.
Toe rail is cleaned, polished and waxed.

The mould can then be trimmed and internally waxed and polished.

Contrasting gelcoat applied.
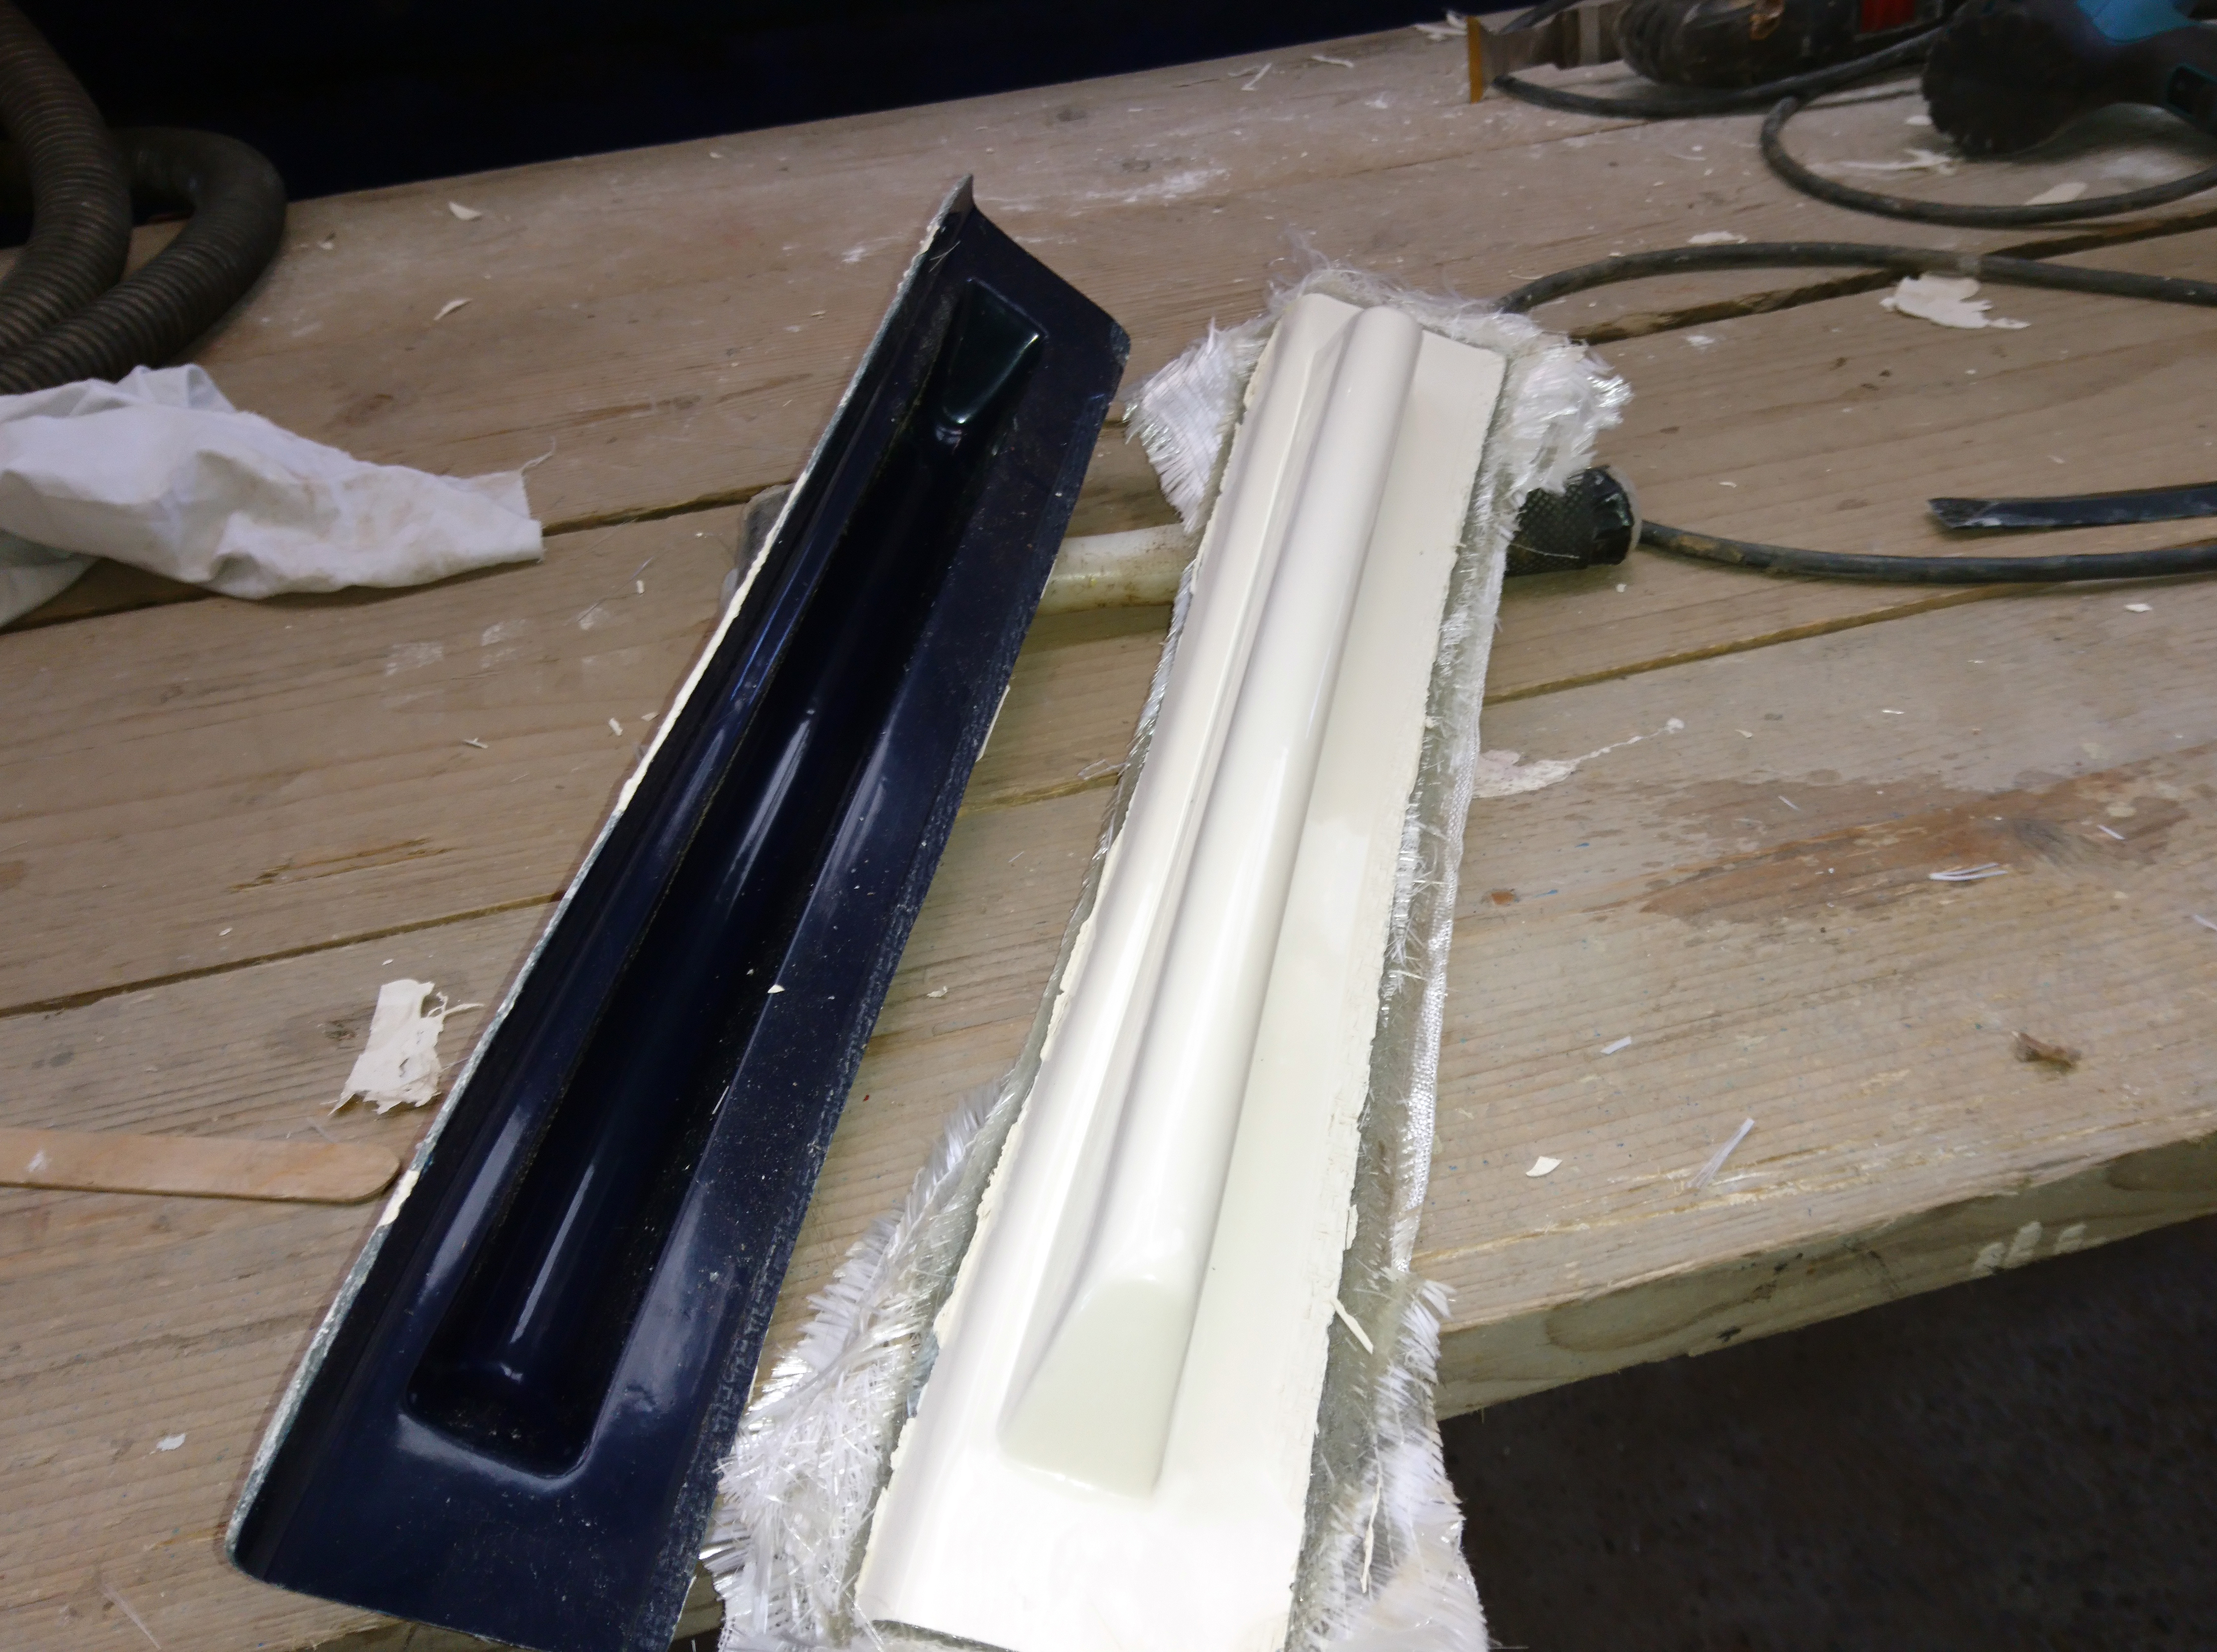
New toe rail popped out of the mould.
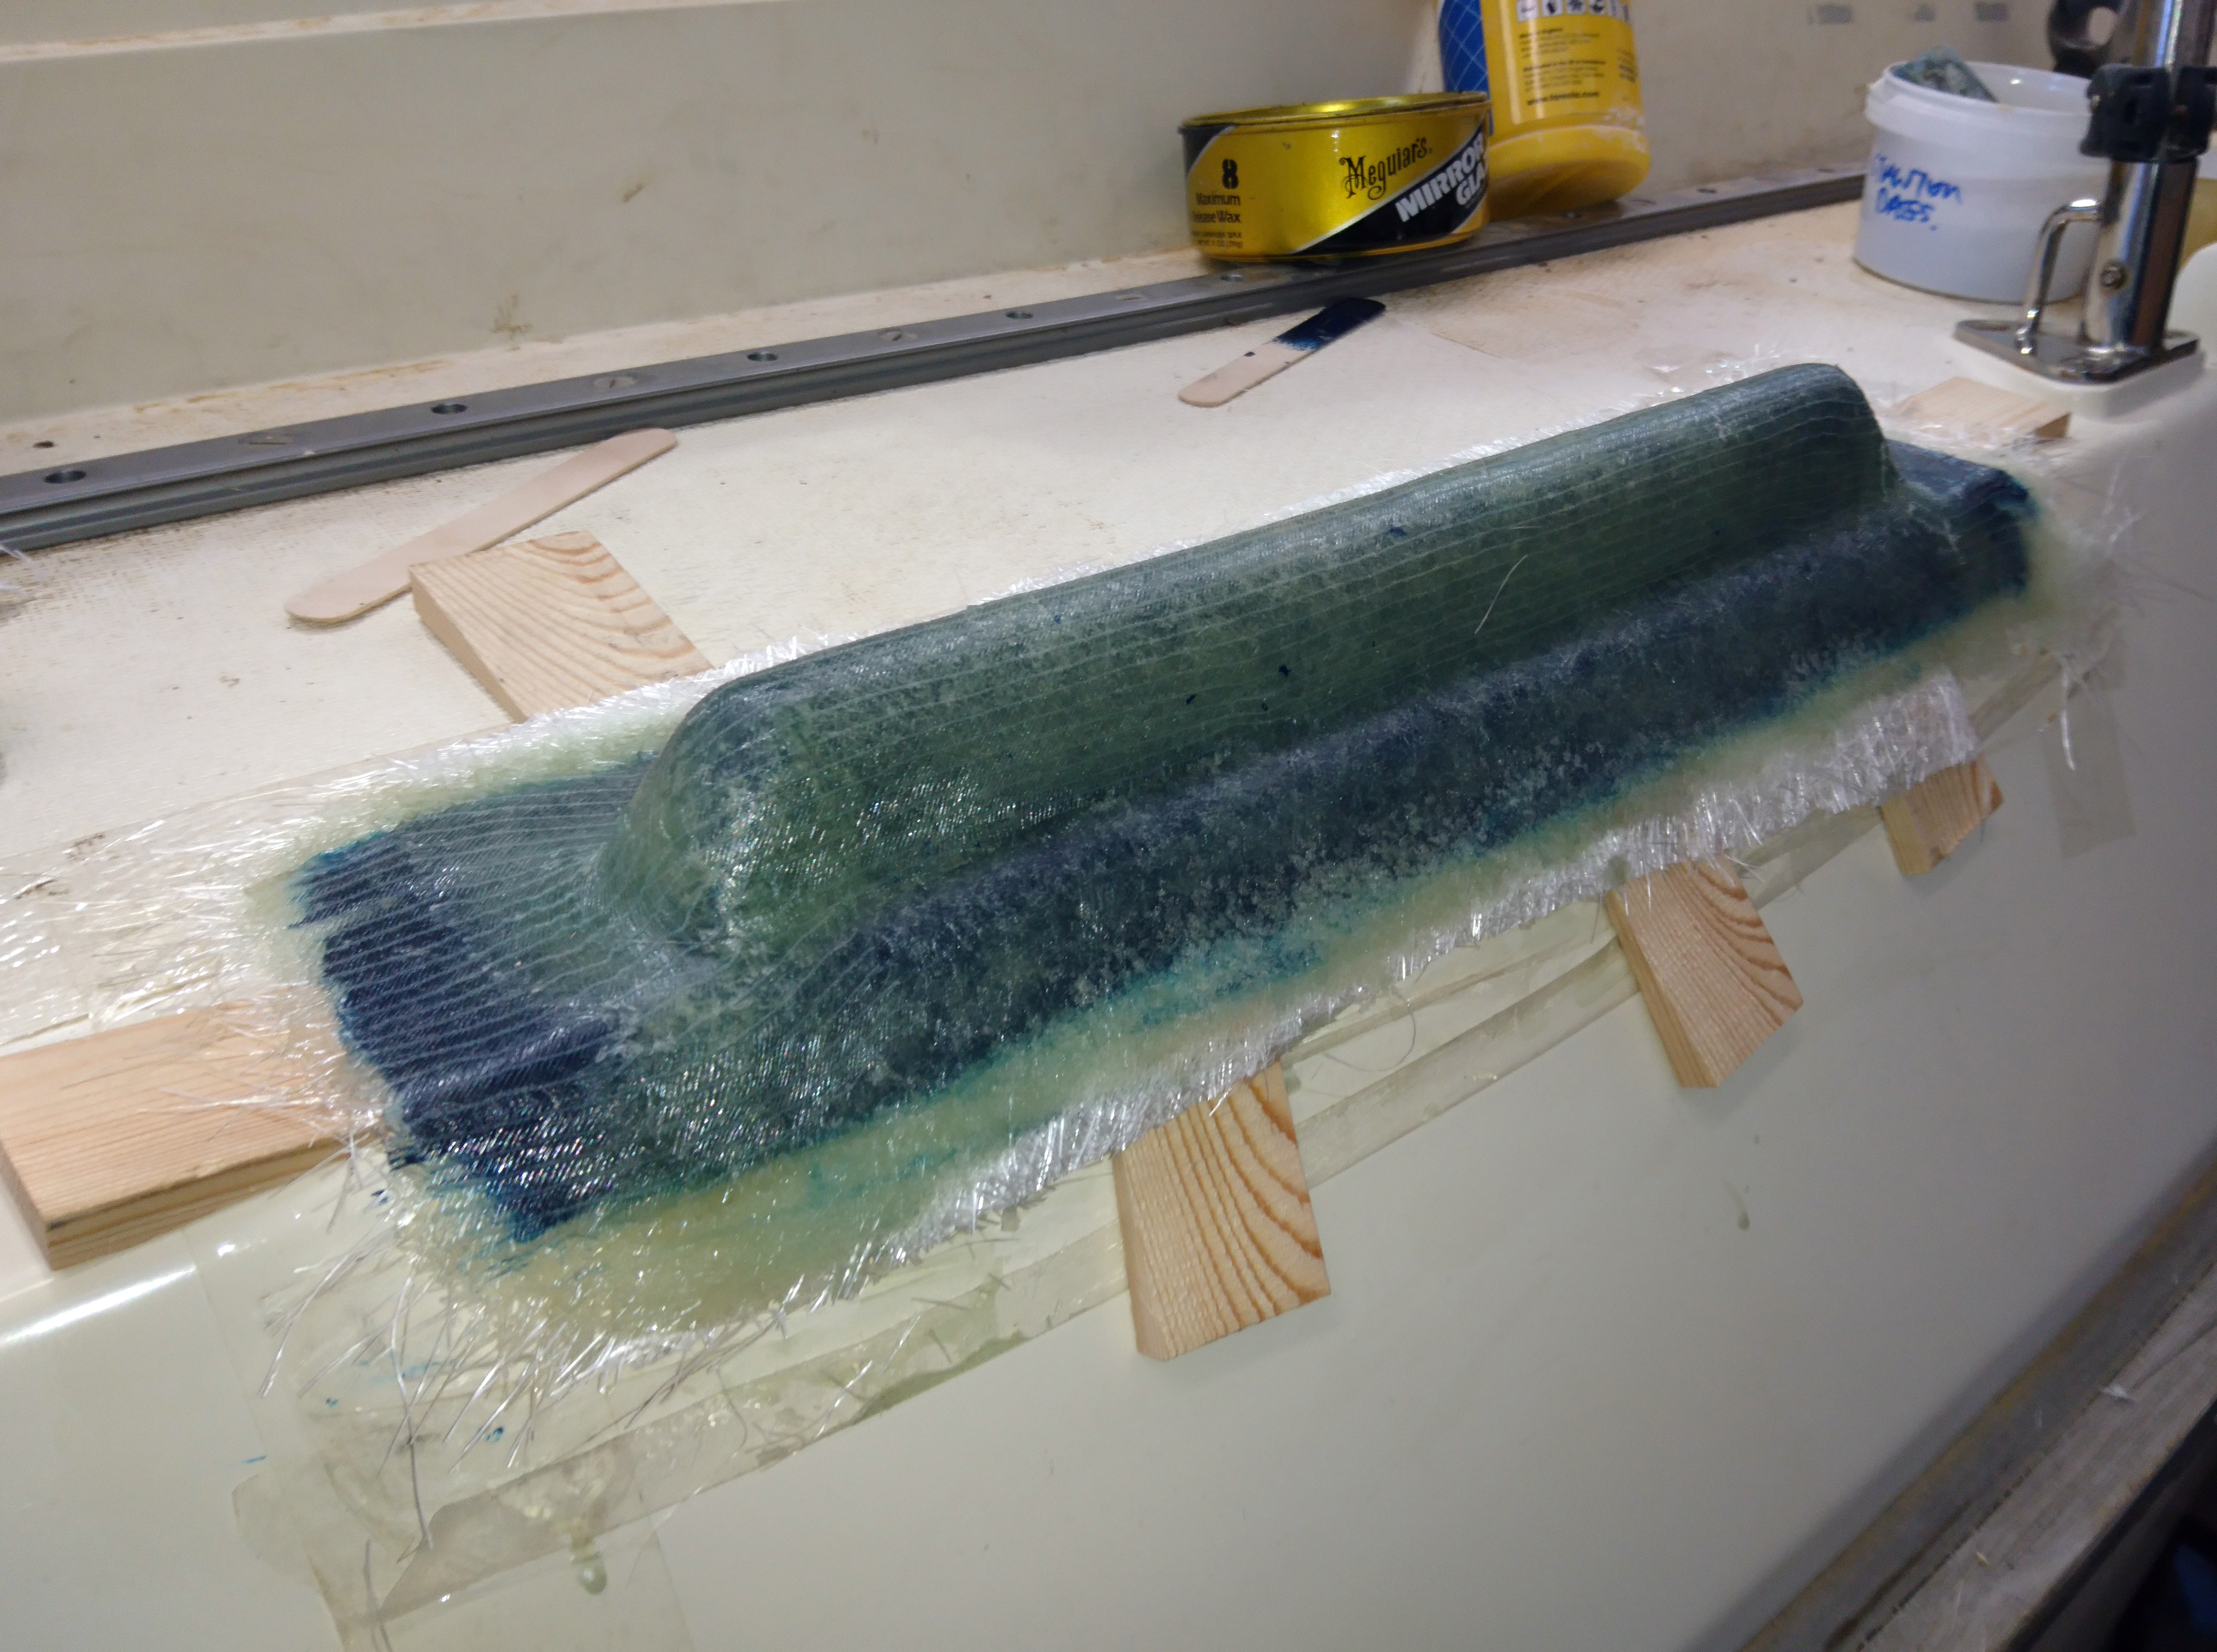
Half a dozen layers of 250g csm was used for the mould which was popped off using wooden wedges.
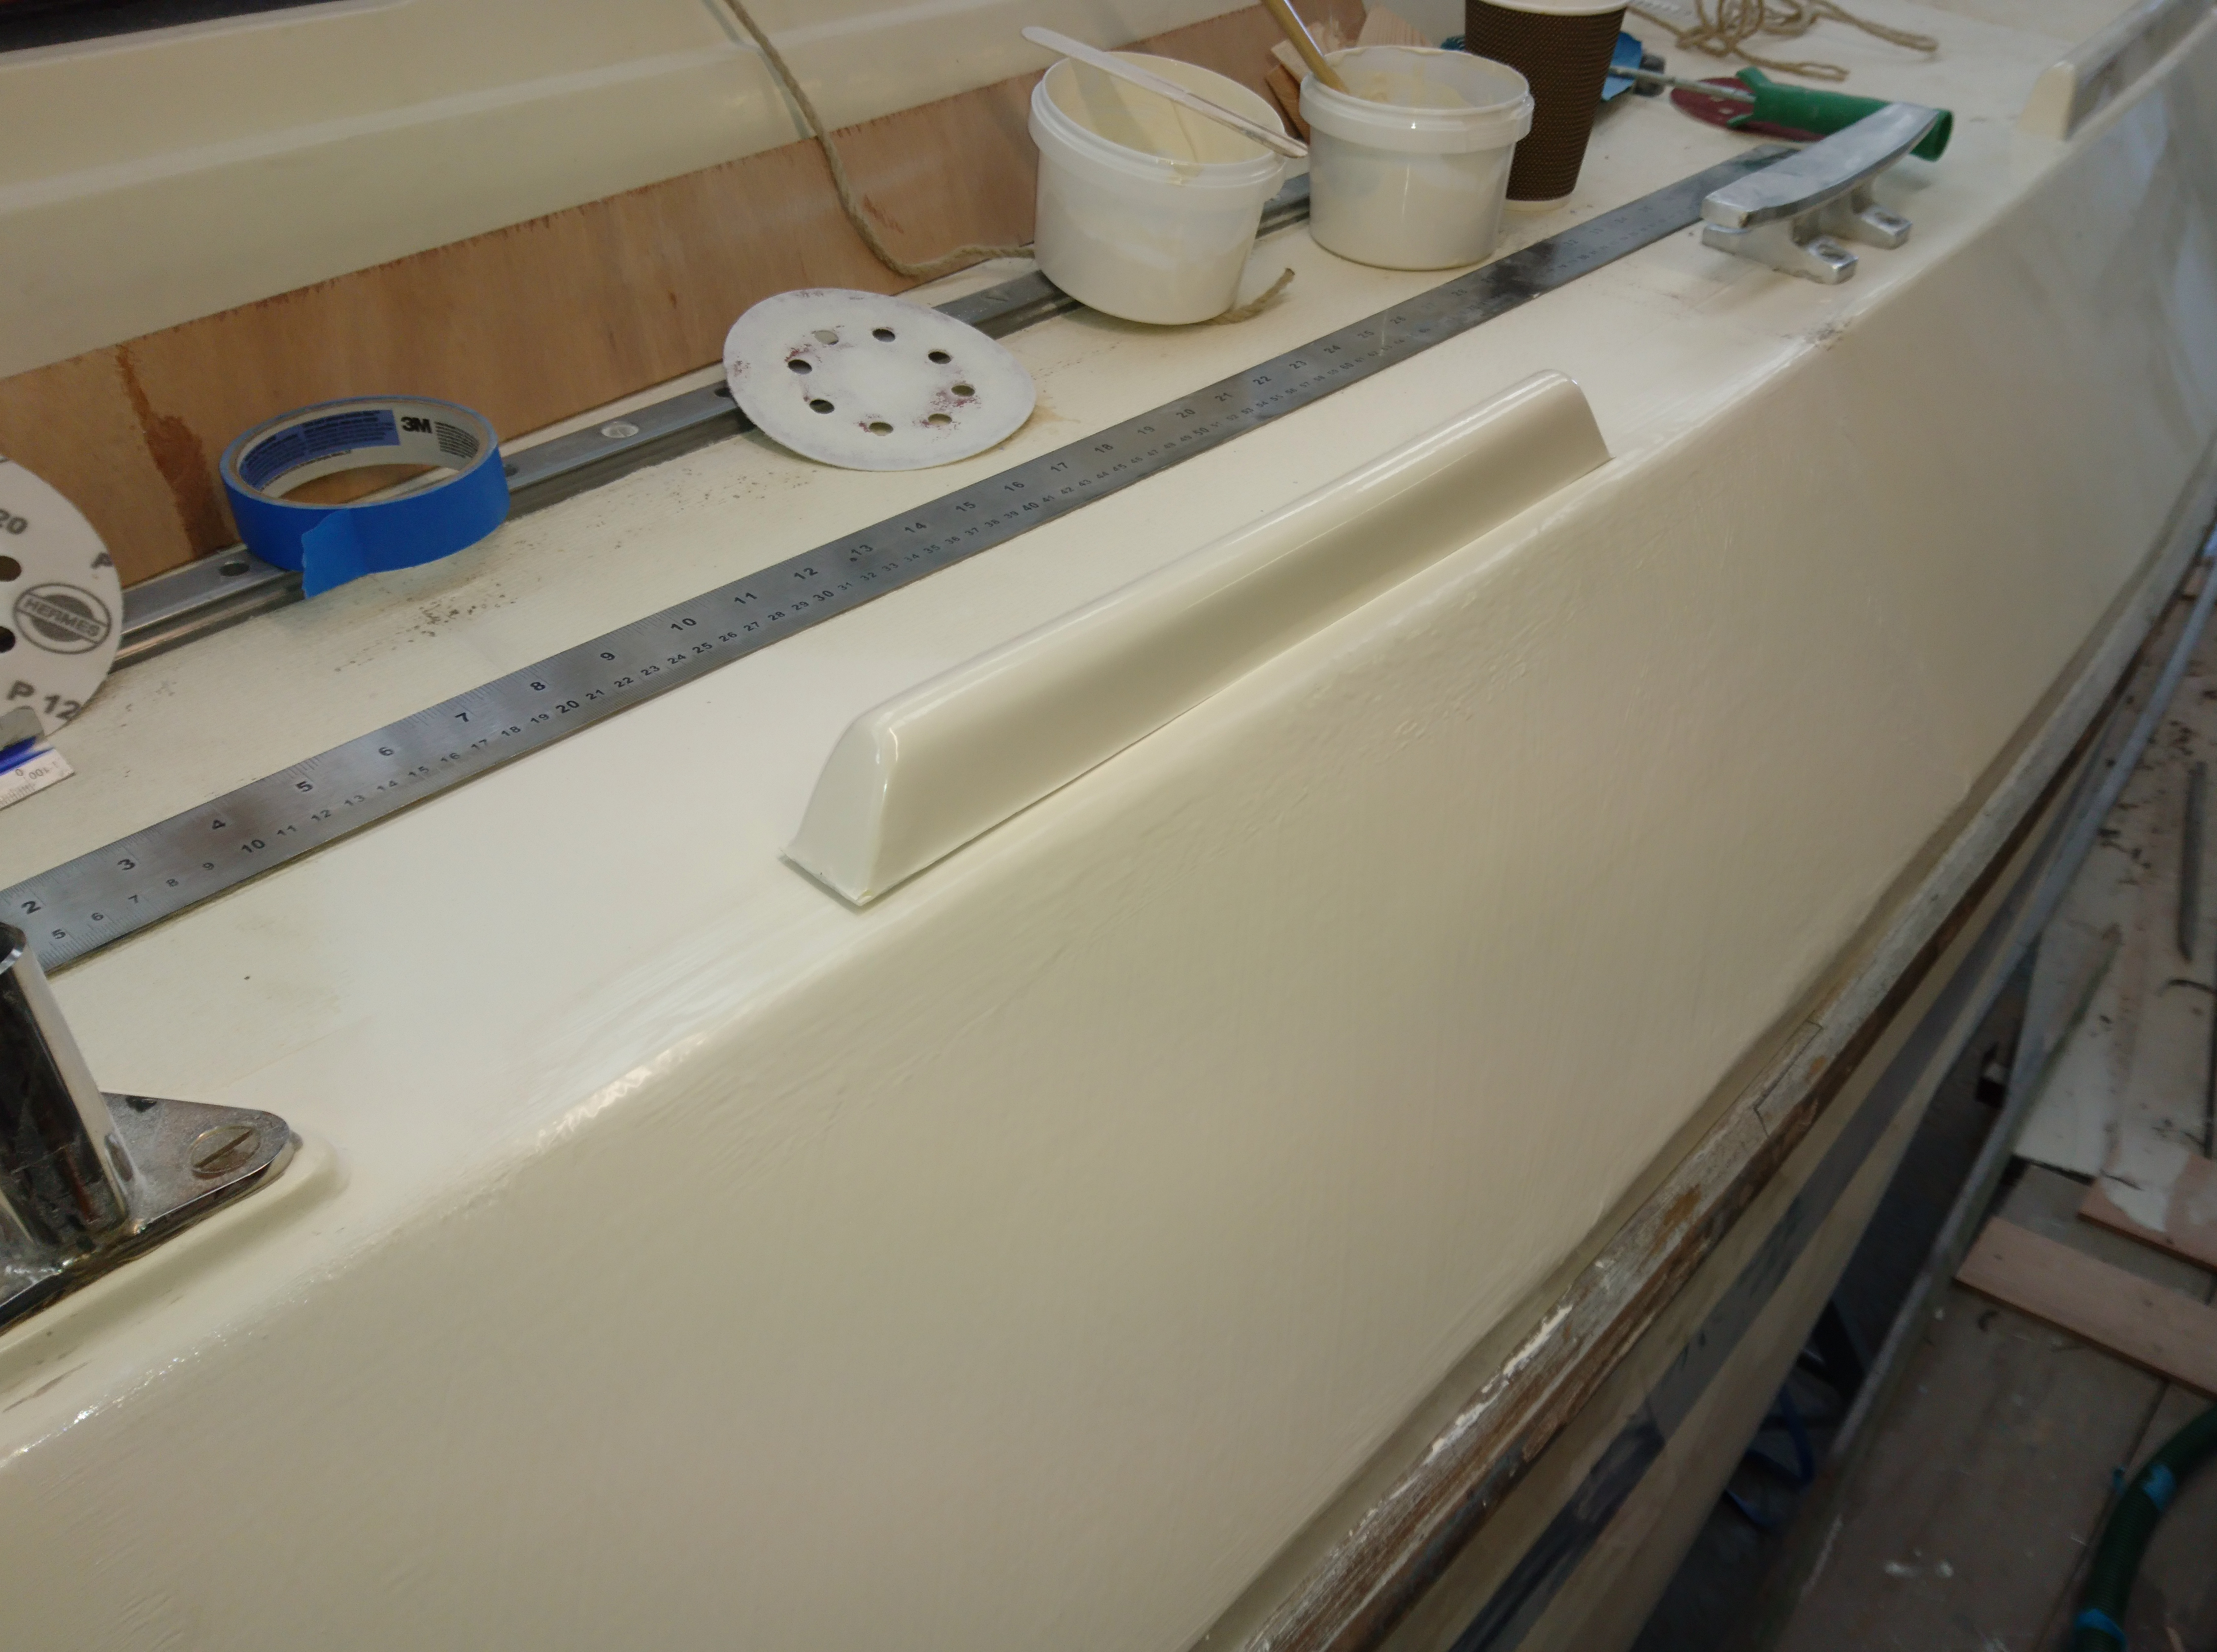
After trimming the toe rail is placed into position for marking up mounting points.
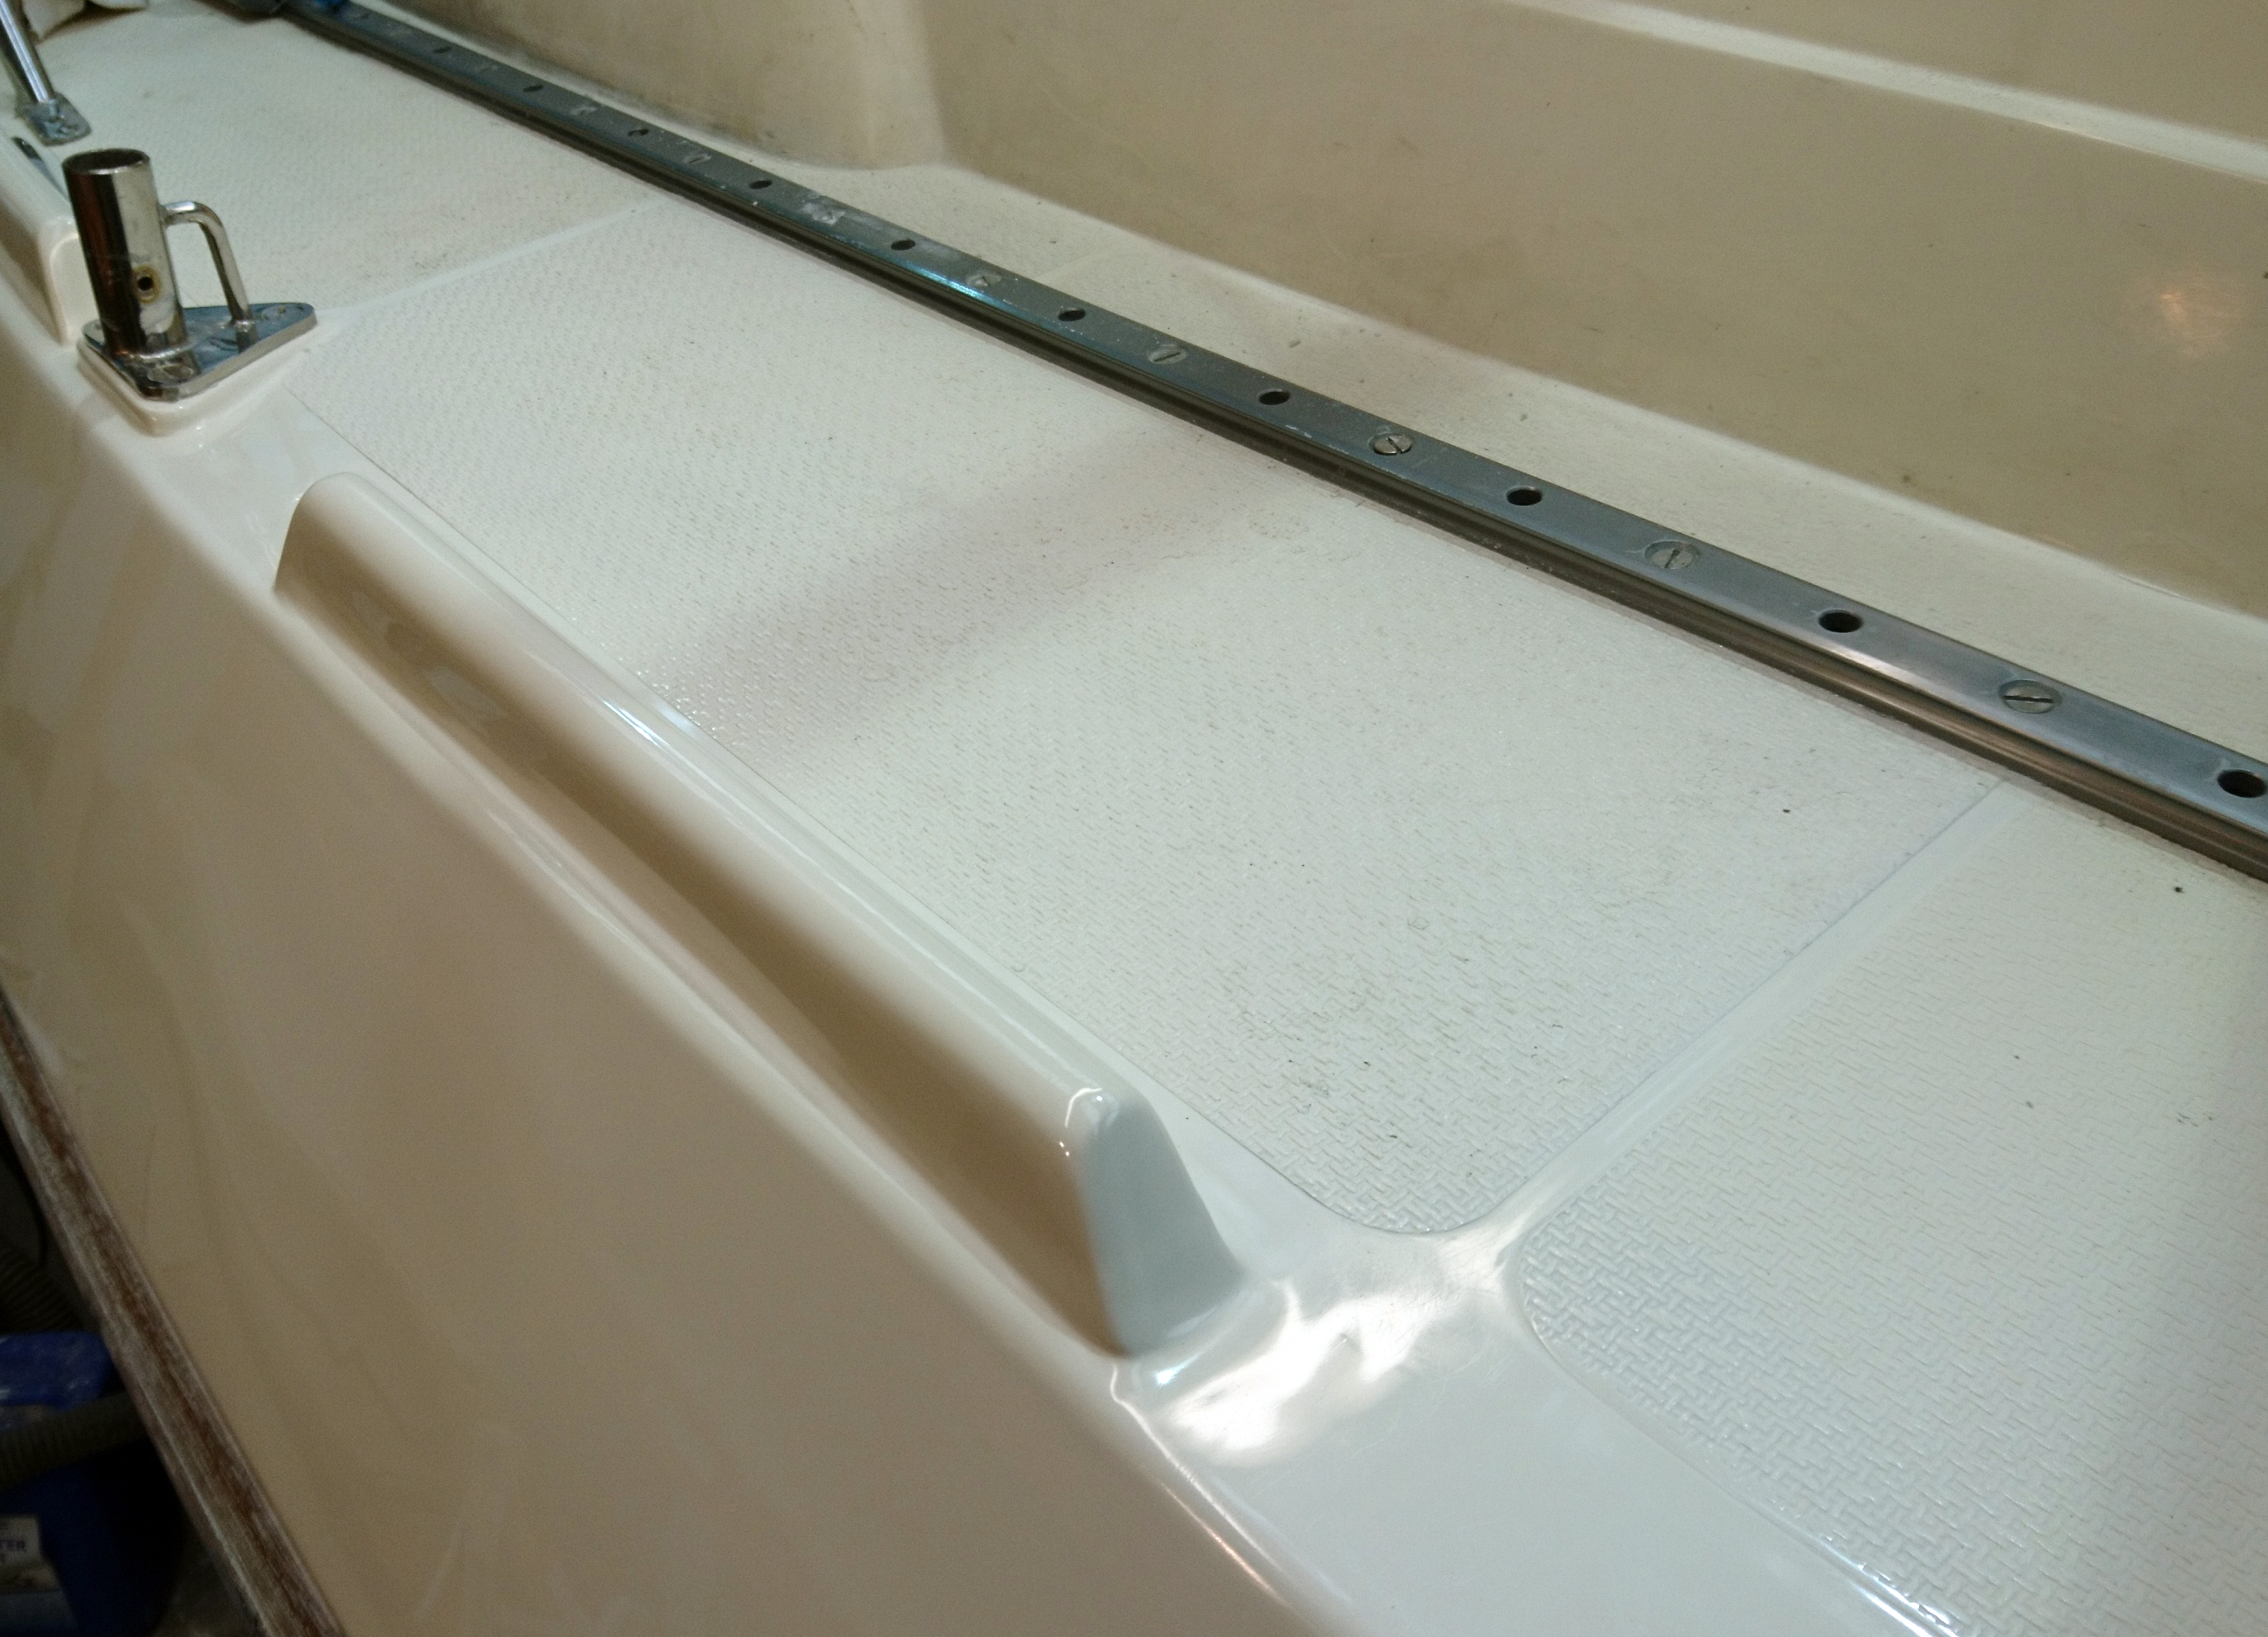
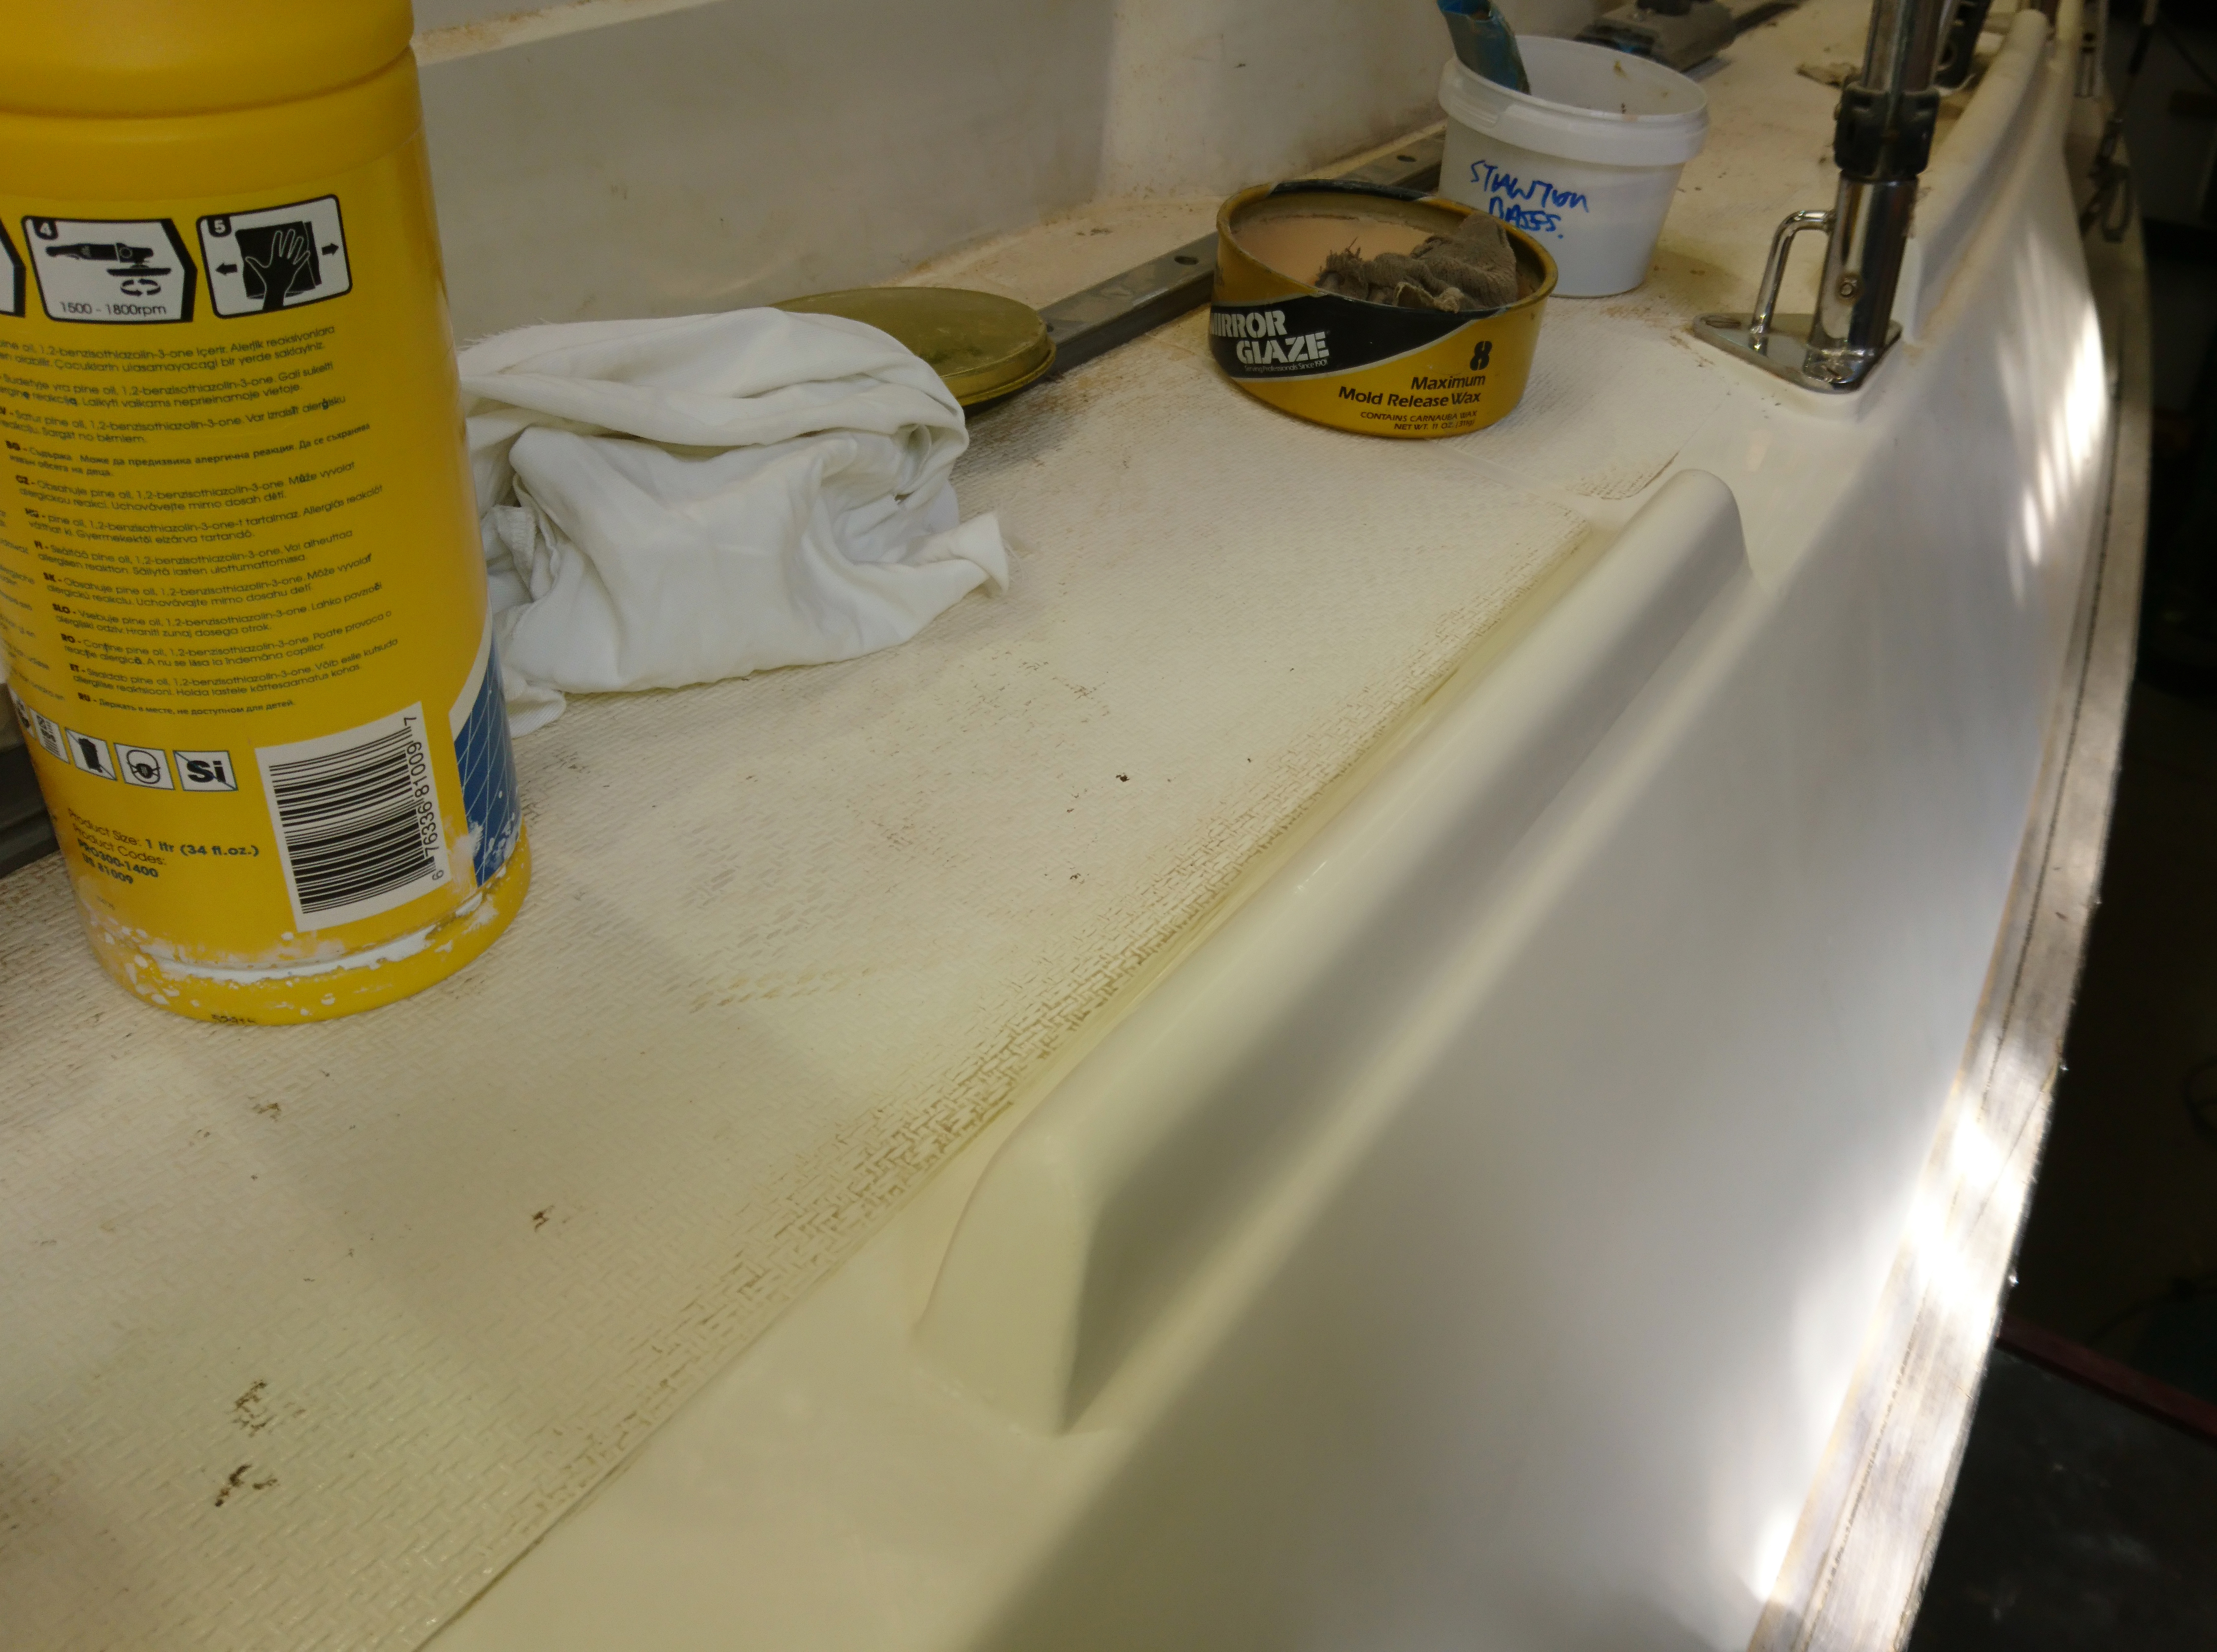
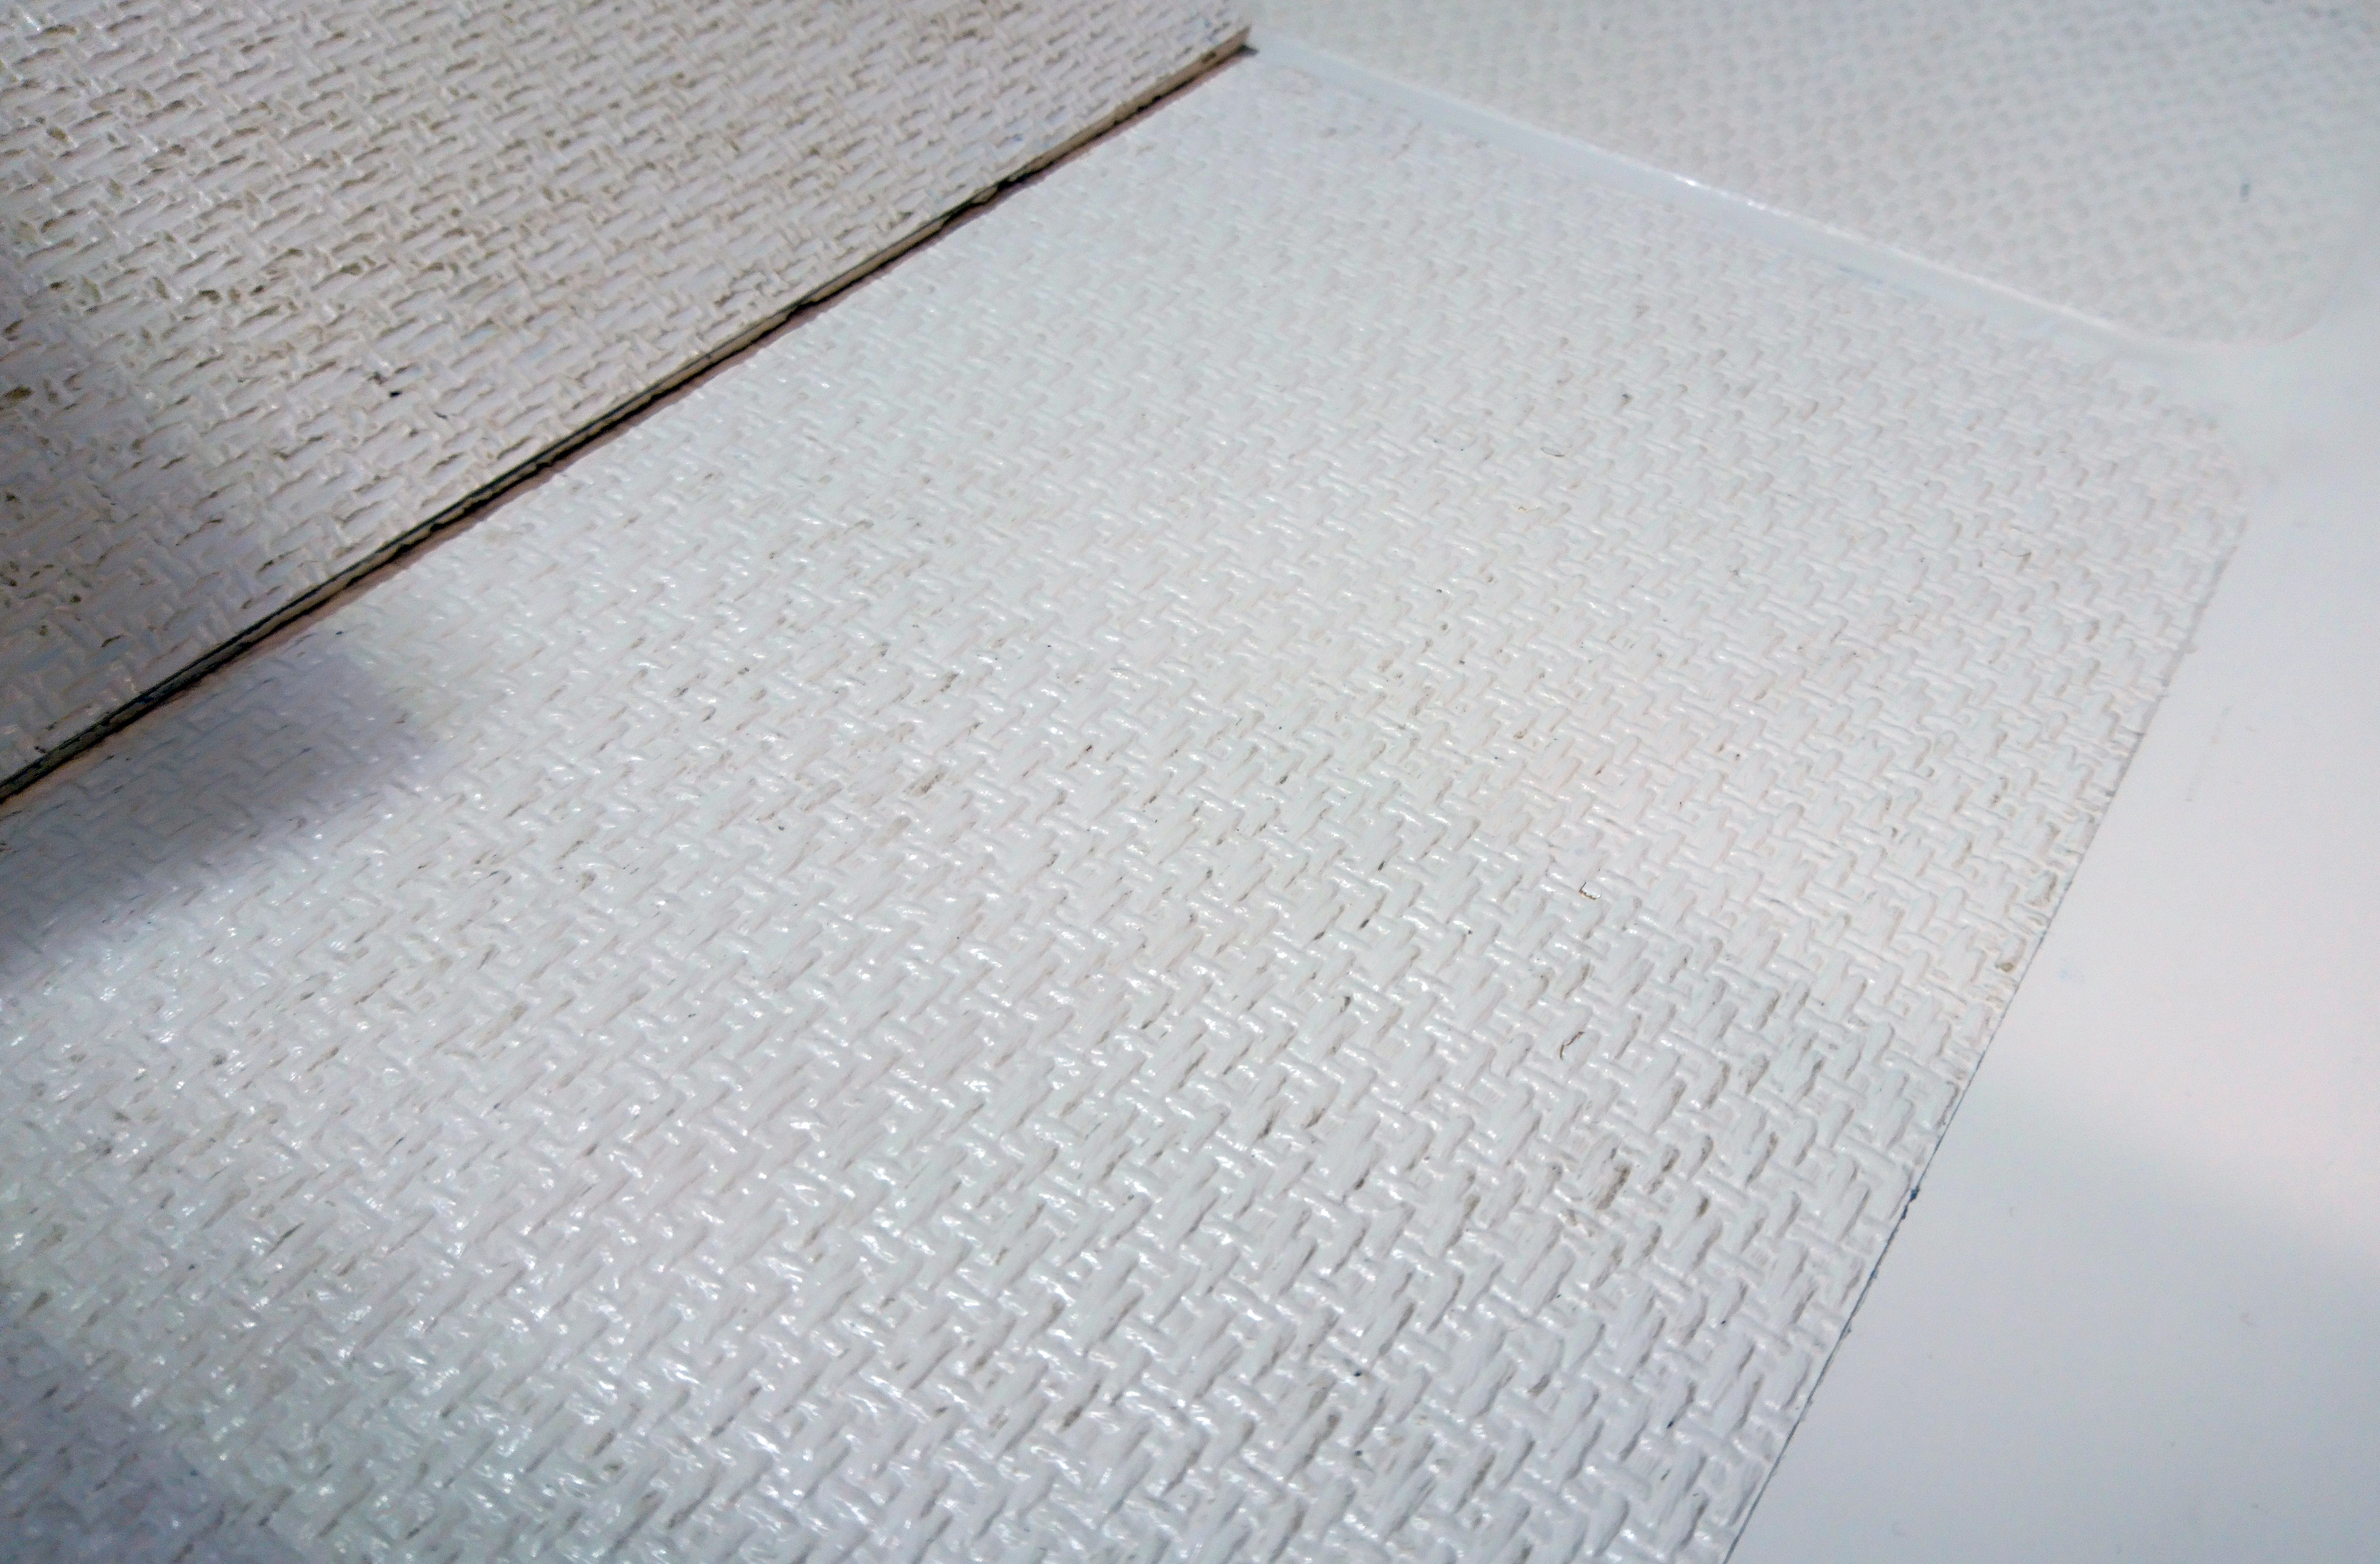
Possibly the most challenging part of this repair was to reinstate the molded in, non-slip texture on the deck.
A section of foredeck that had both the same pattern angle and roughly the same pitch was selected and the area was thoroughly cleaned, waxed and polished.
This was a lot harder to do than say as the wax tended to fill up the indentations so I used a stiff scrubbing brush over a soft cloth to ensure the wax was removed and polished.
I applied two coats of gelcoat followed by three layers of csm.
This resulted in a flexible mould that would flex to match the slightly different deck profile of the repair.
The mould was trimmed to the exact size and shape of the section of deck I wanted to recreate.
The corresponding area of deck was sanded hard to remove the old moulded grip and provide a good key.
As the non-slip stands up slightly from the surrounding gelcoat I needed to have a practice on a scrap piece of hardboard to judge how much gelcoat I would need as this repair would need to be done in one hit.
I found that a light coat on the deck and on the mould was just about right.
Starting from one end the mould was placed down onto the deck and by using the flex in the mould it was bent to avoid trapping any air as the two surfaces touched together.
A couple of push cramps and a lead weight were enough to hold the mould in position.
Once the gel had set, the mould was carefully peeled off revealing the non slip surface and a sigh of relief.
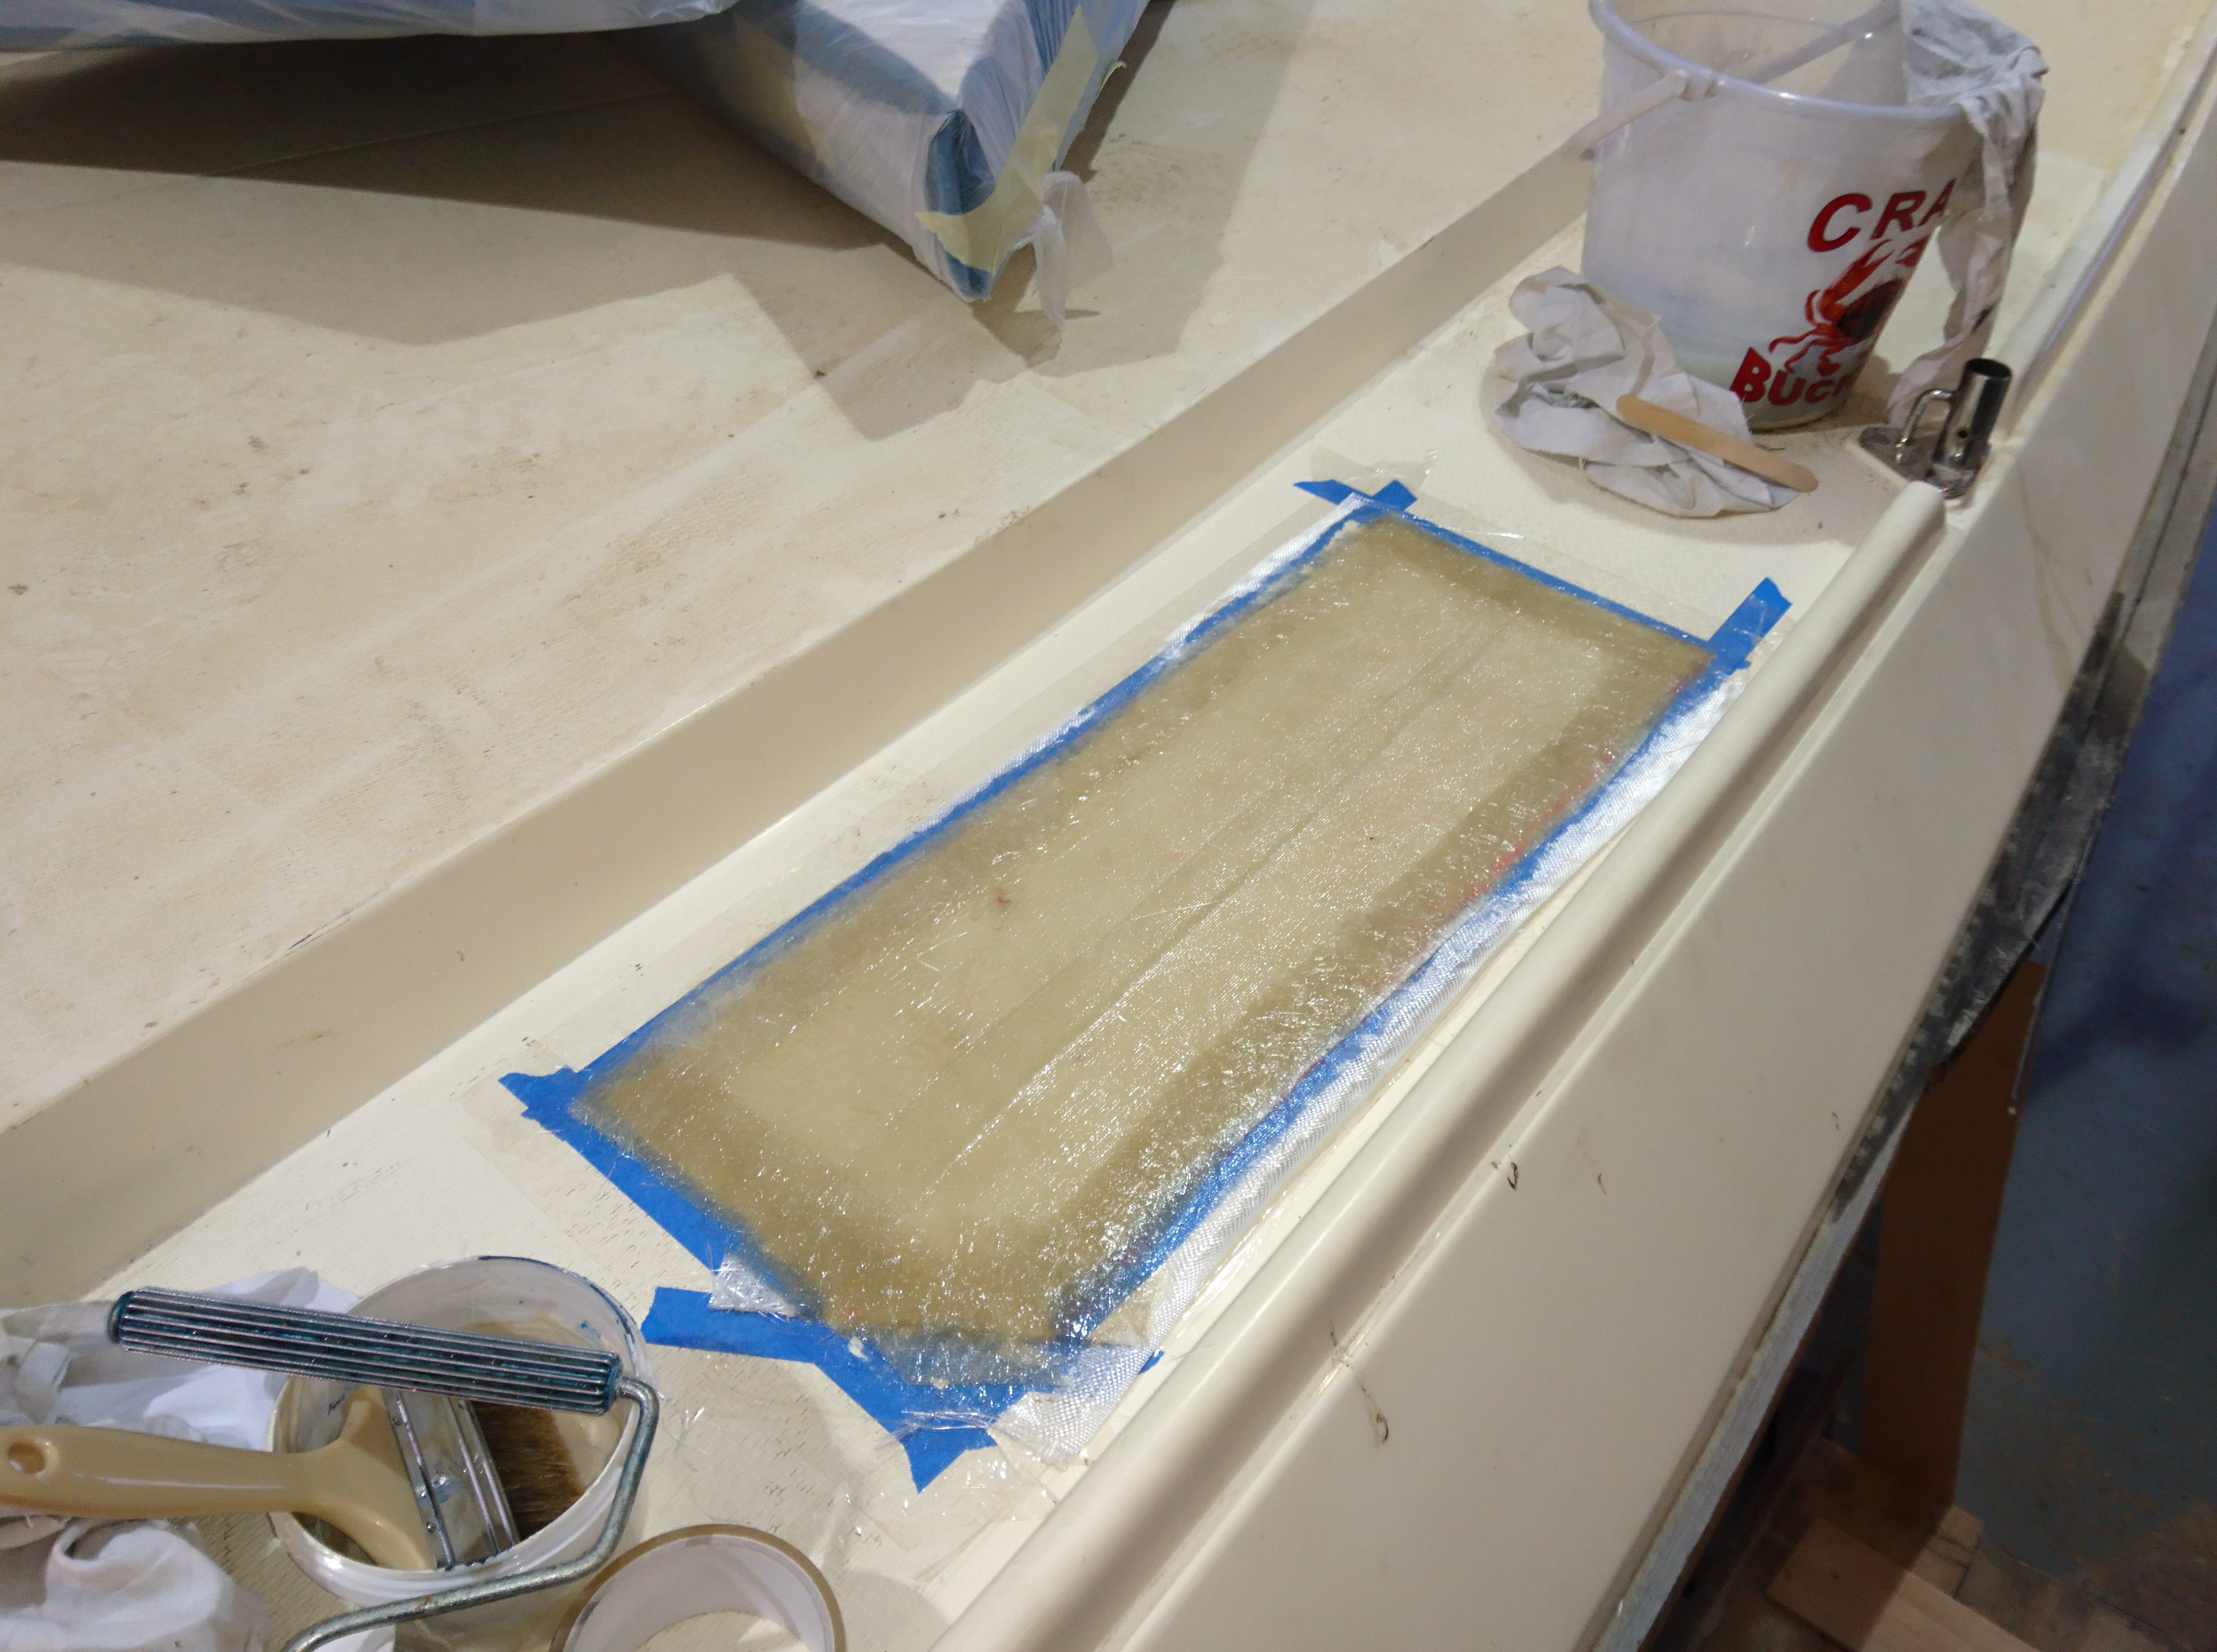
A mould was taken of the non slip pattern on the foredeck.
When released the deck pattern should be imprinted in the new layer of gelcoat.
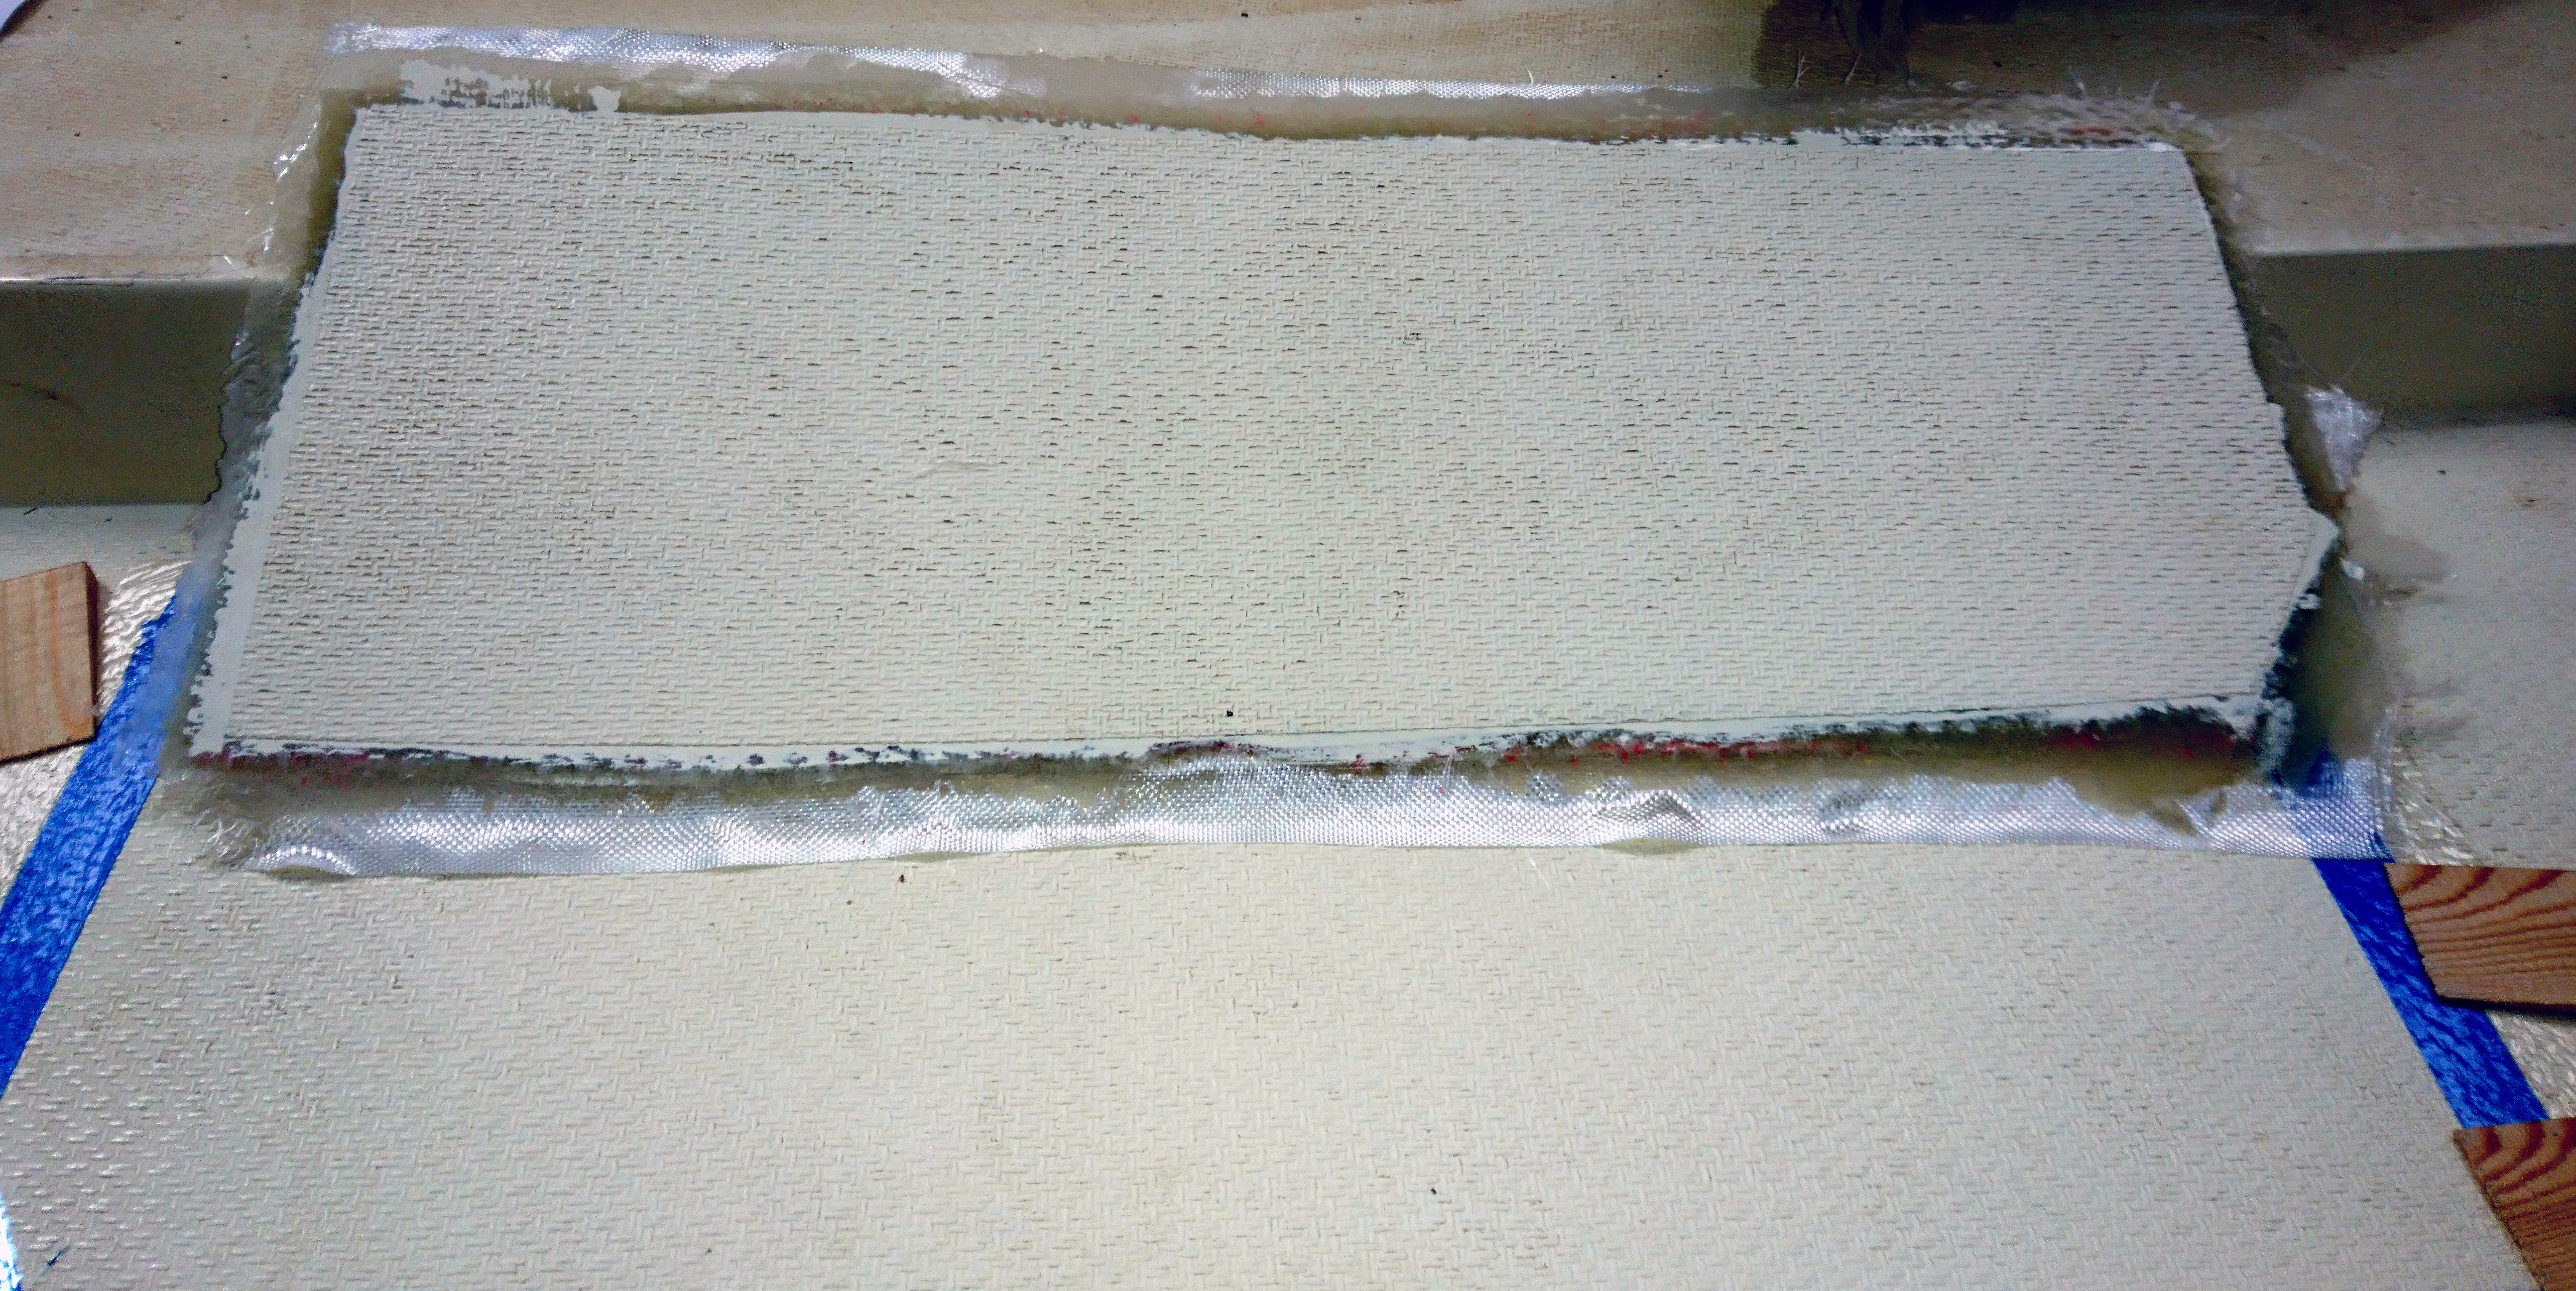
This thin and flexible mould was released and trimmed to size.
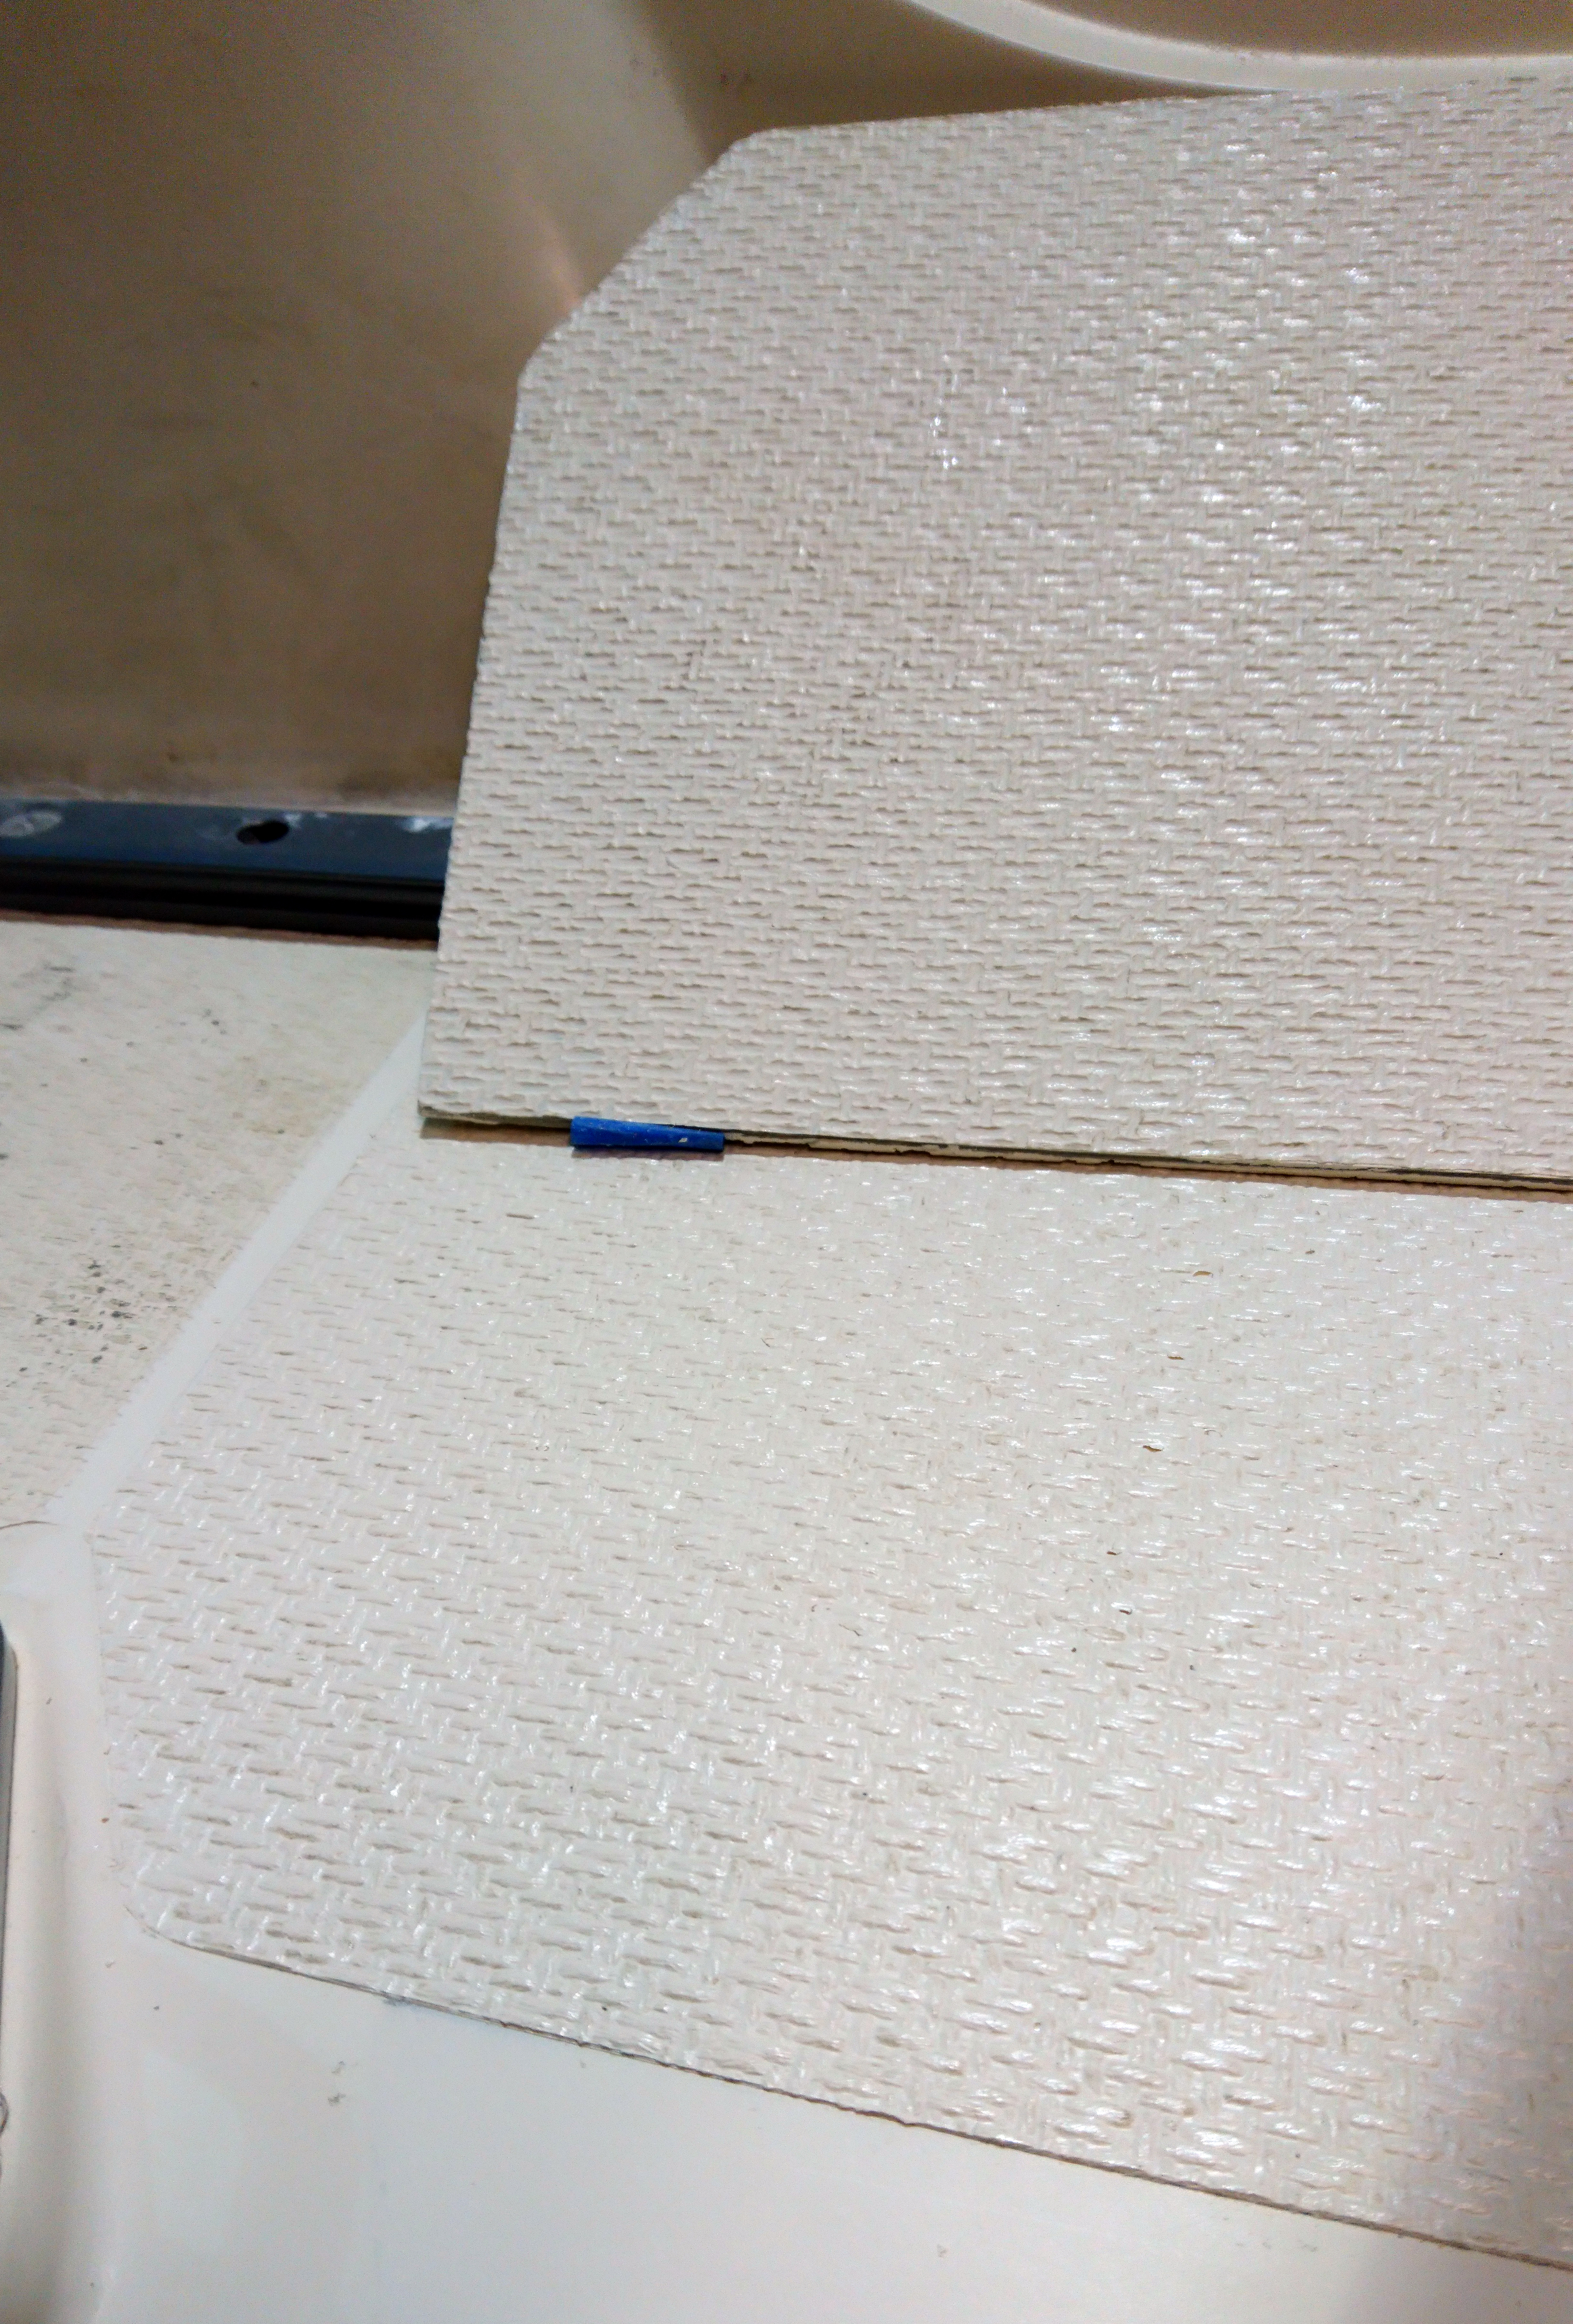
When released the deck pattern should be imprinted in the new layer of gelcoat.
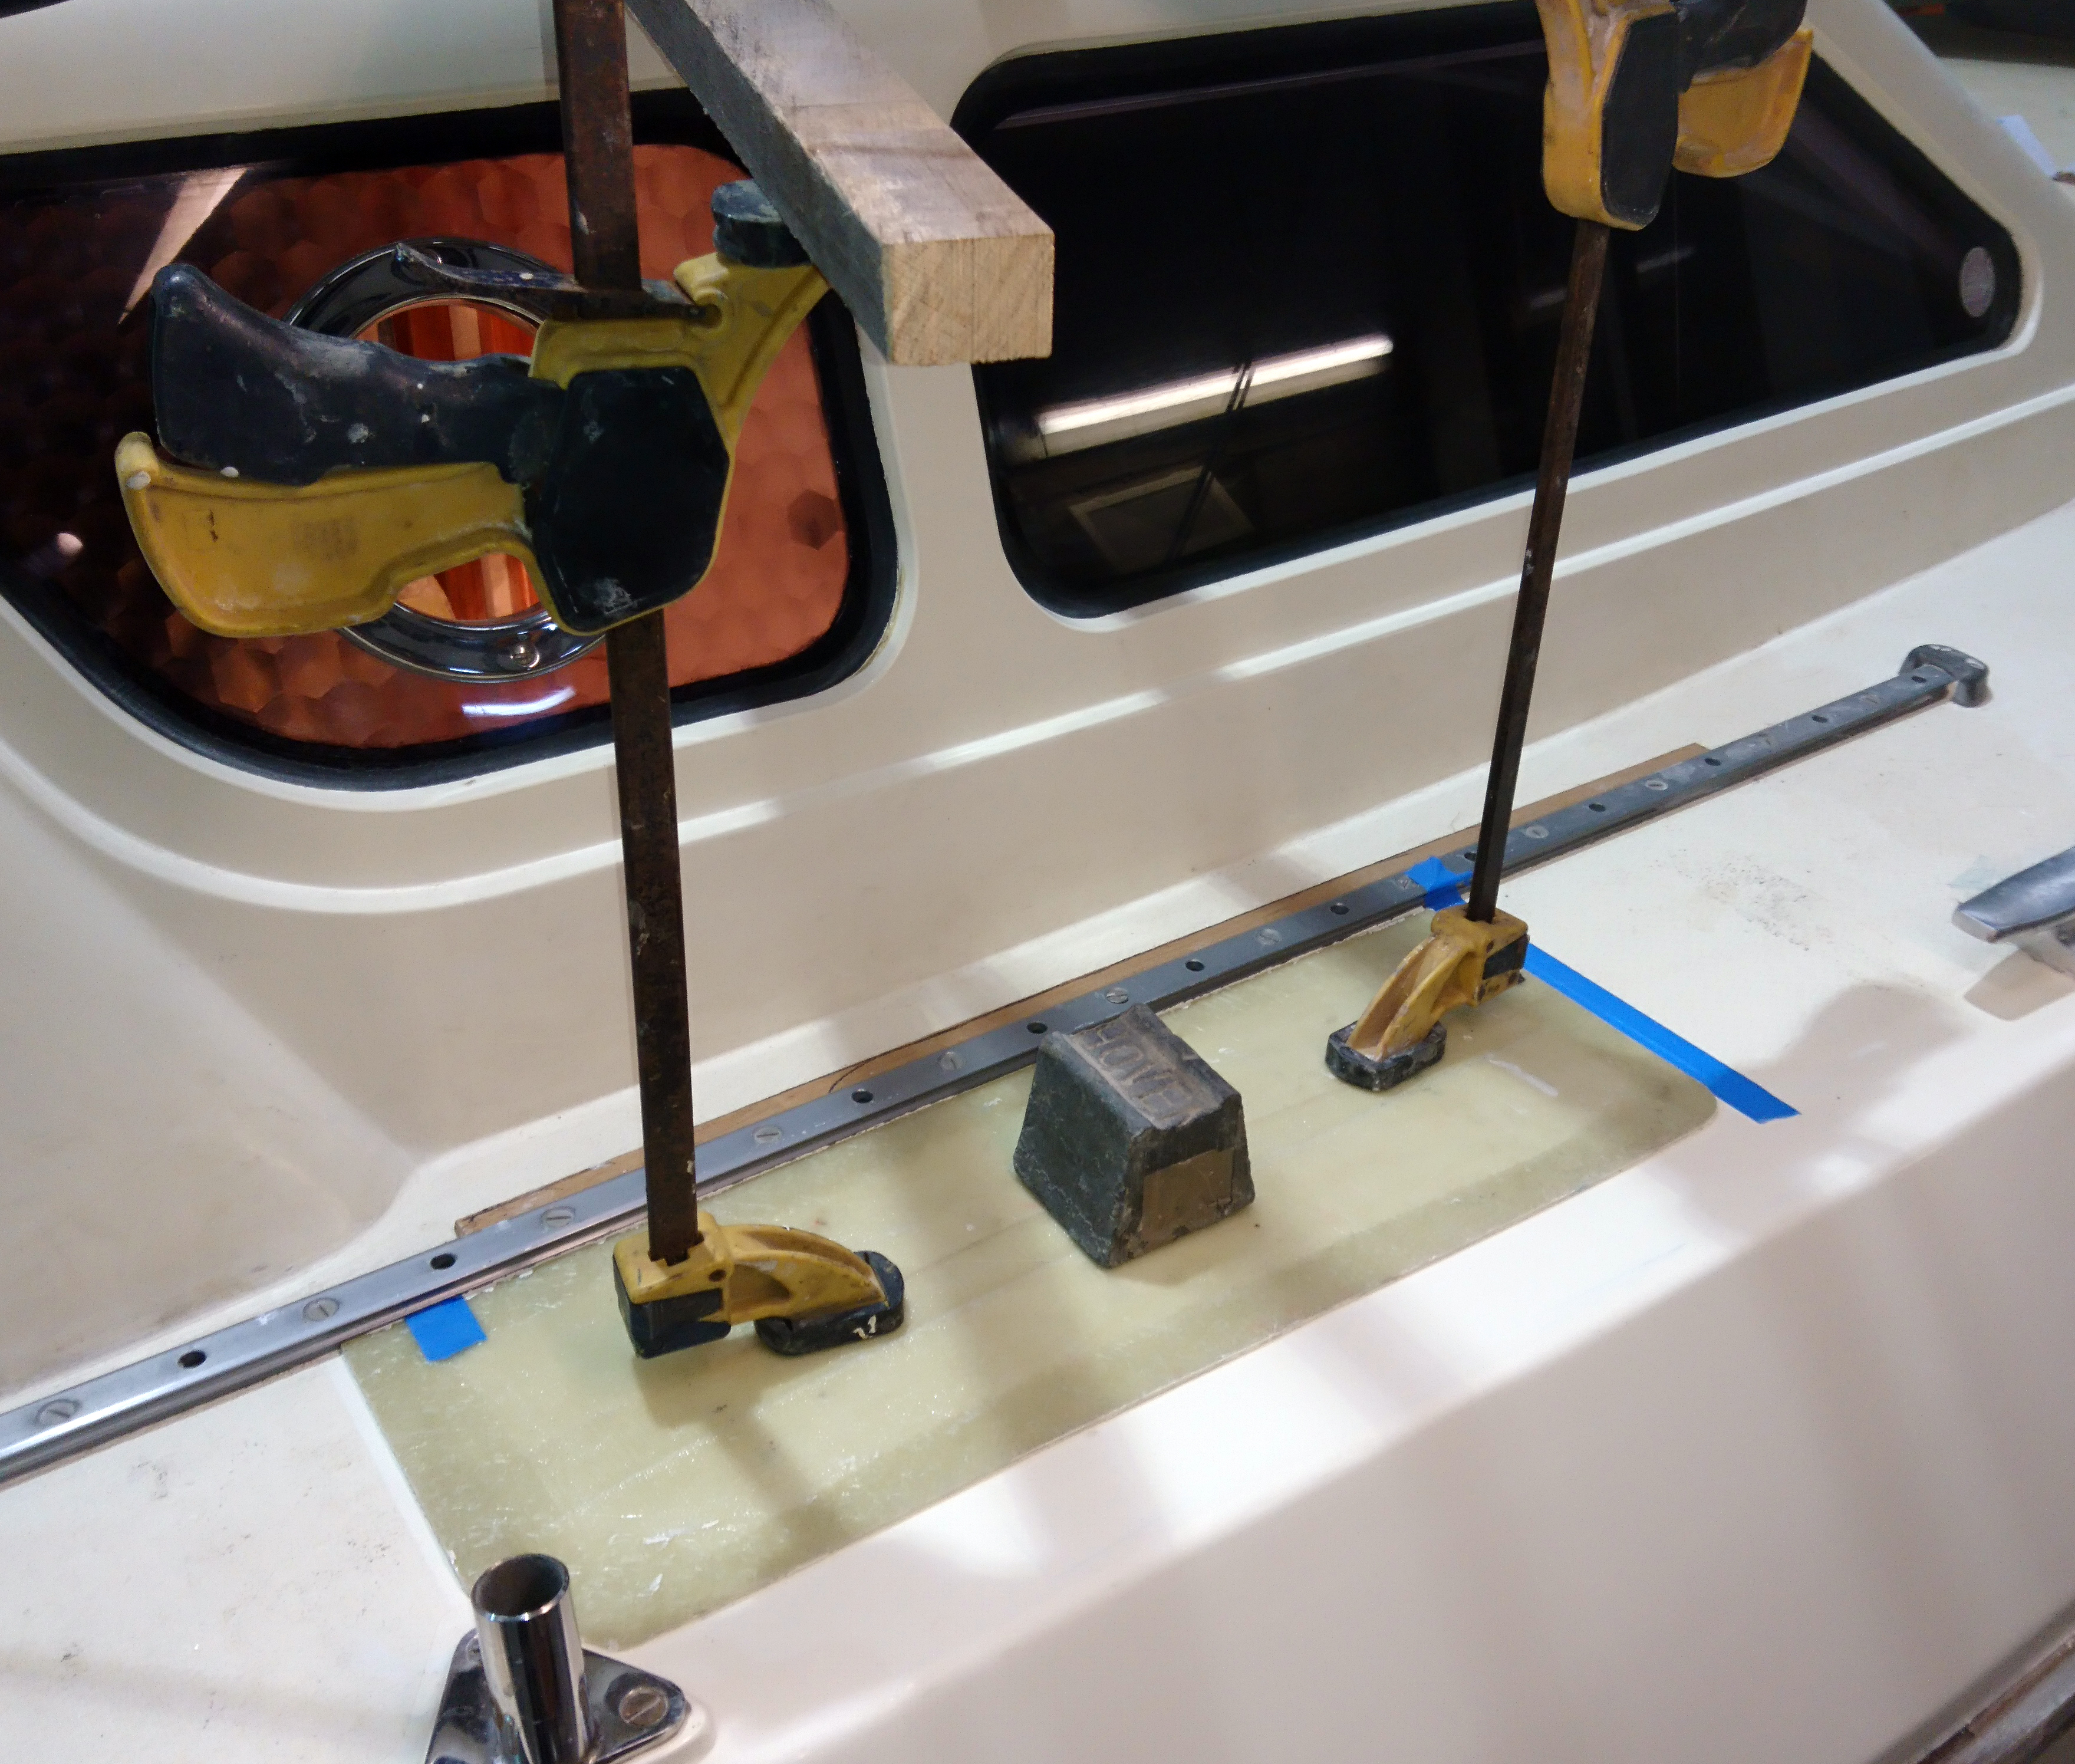
The mould was pressed down in position over a thin layer of gelcoat.
With the deck repair complete the toe rail needed to be secured to the deck.
I chose to make an internal wedge out of glass and this was bolted and glued to the deck using Sabatack.
In turn the wedge was coated with Saba and the toe rail pushed down over it.
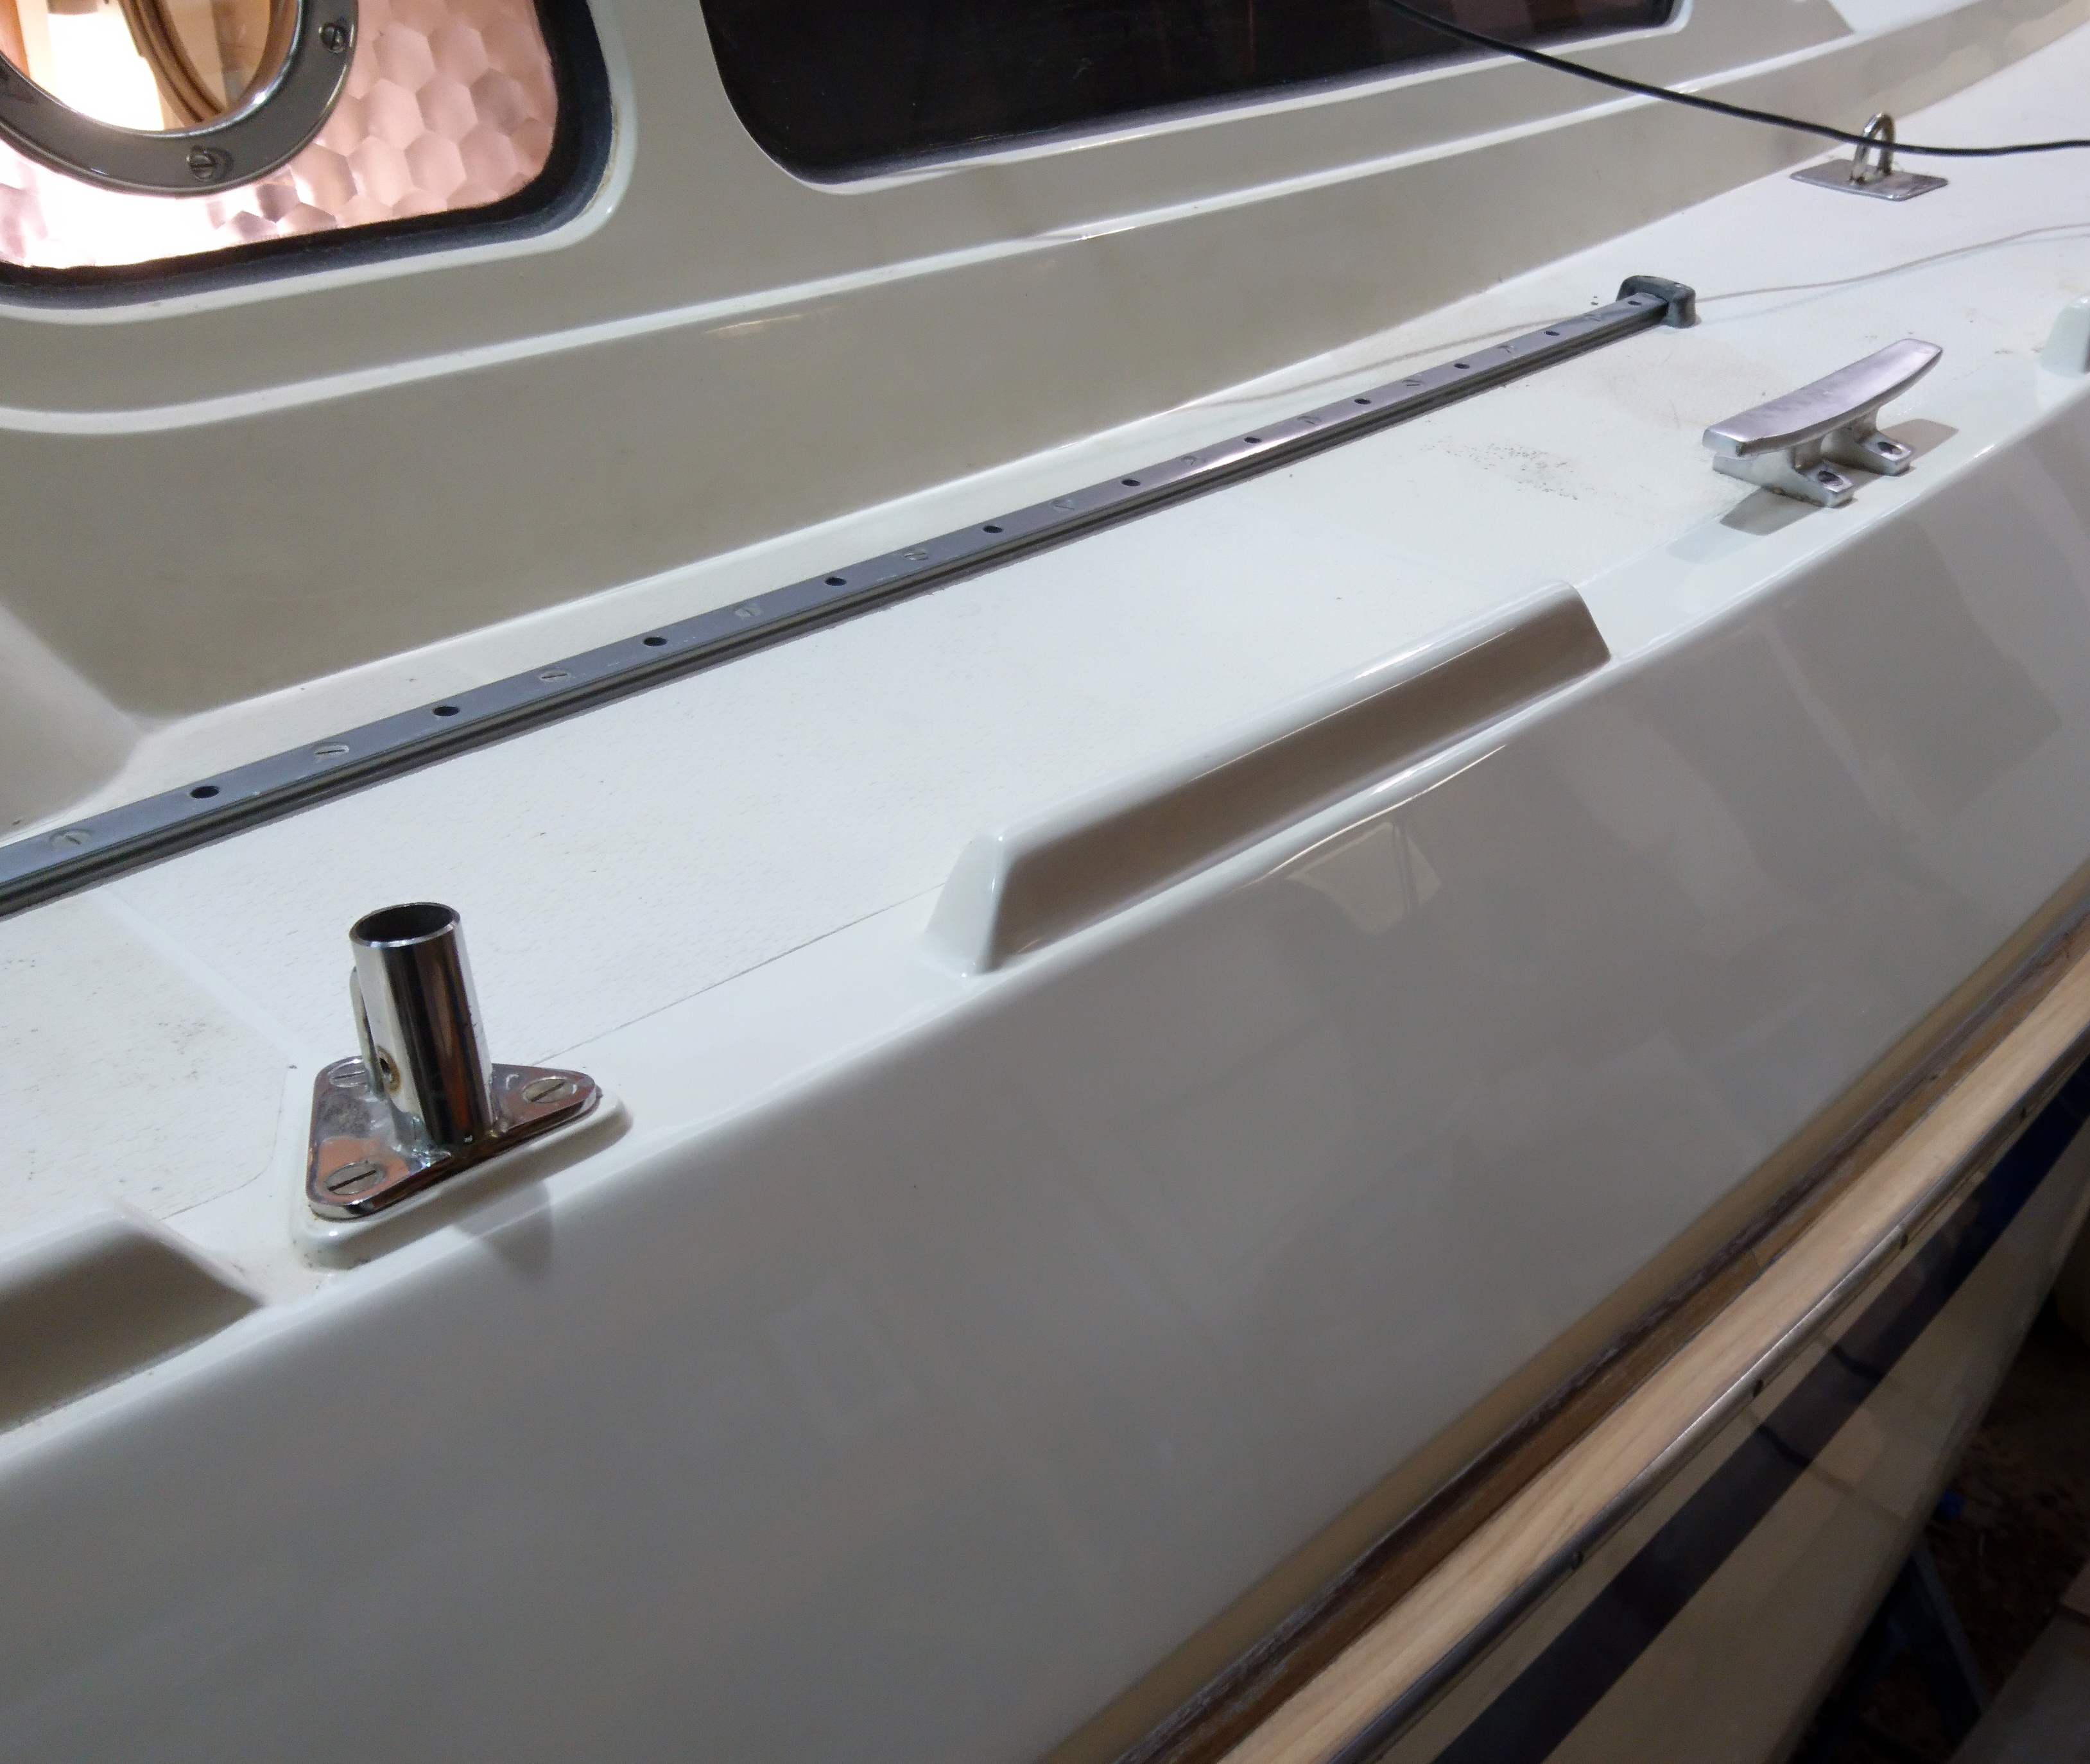
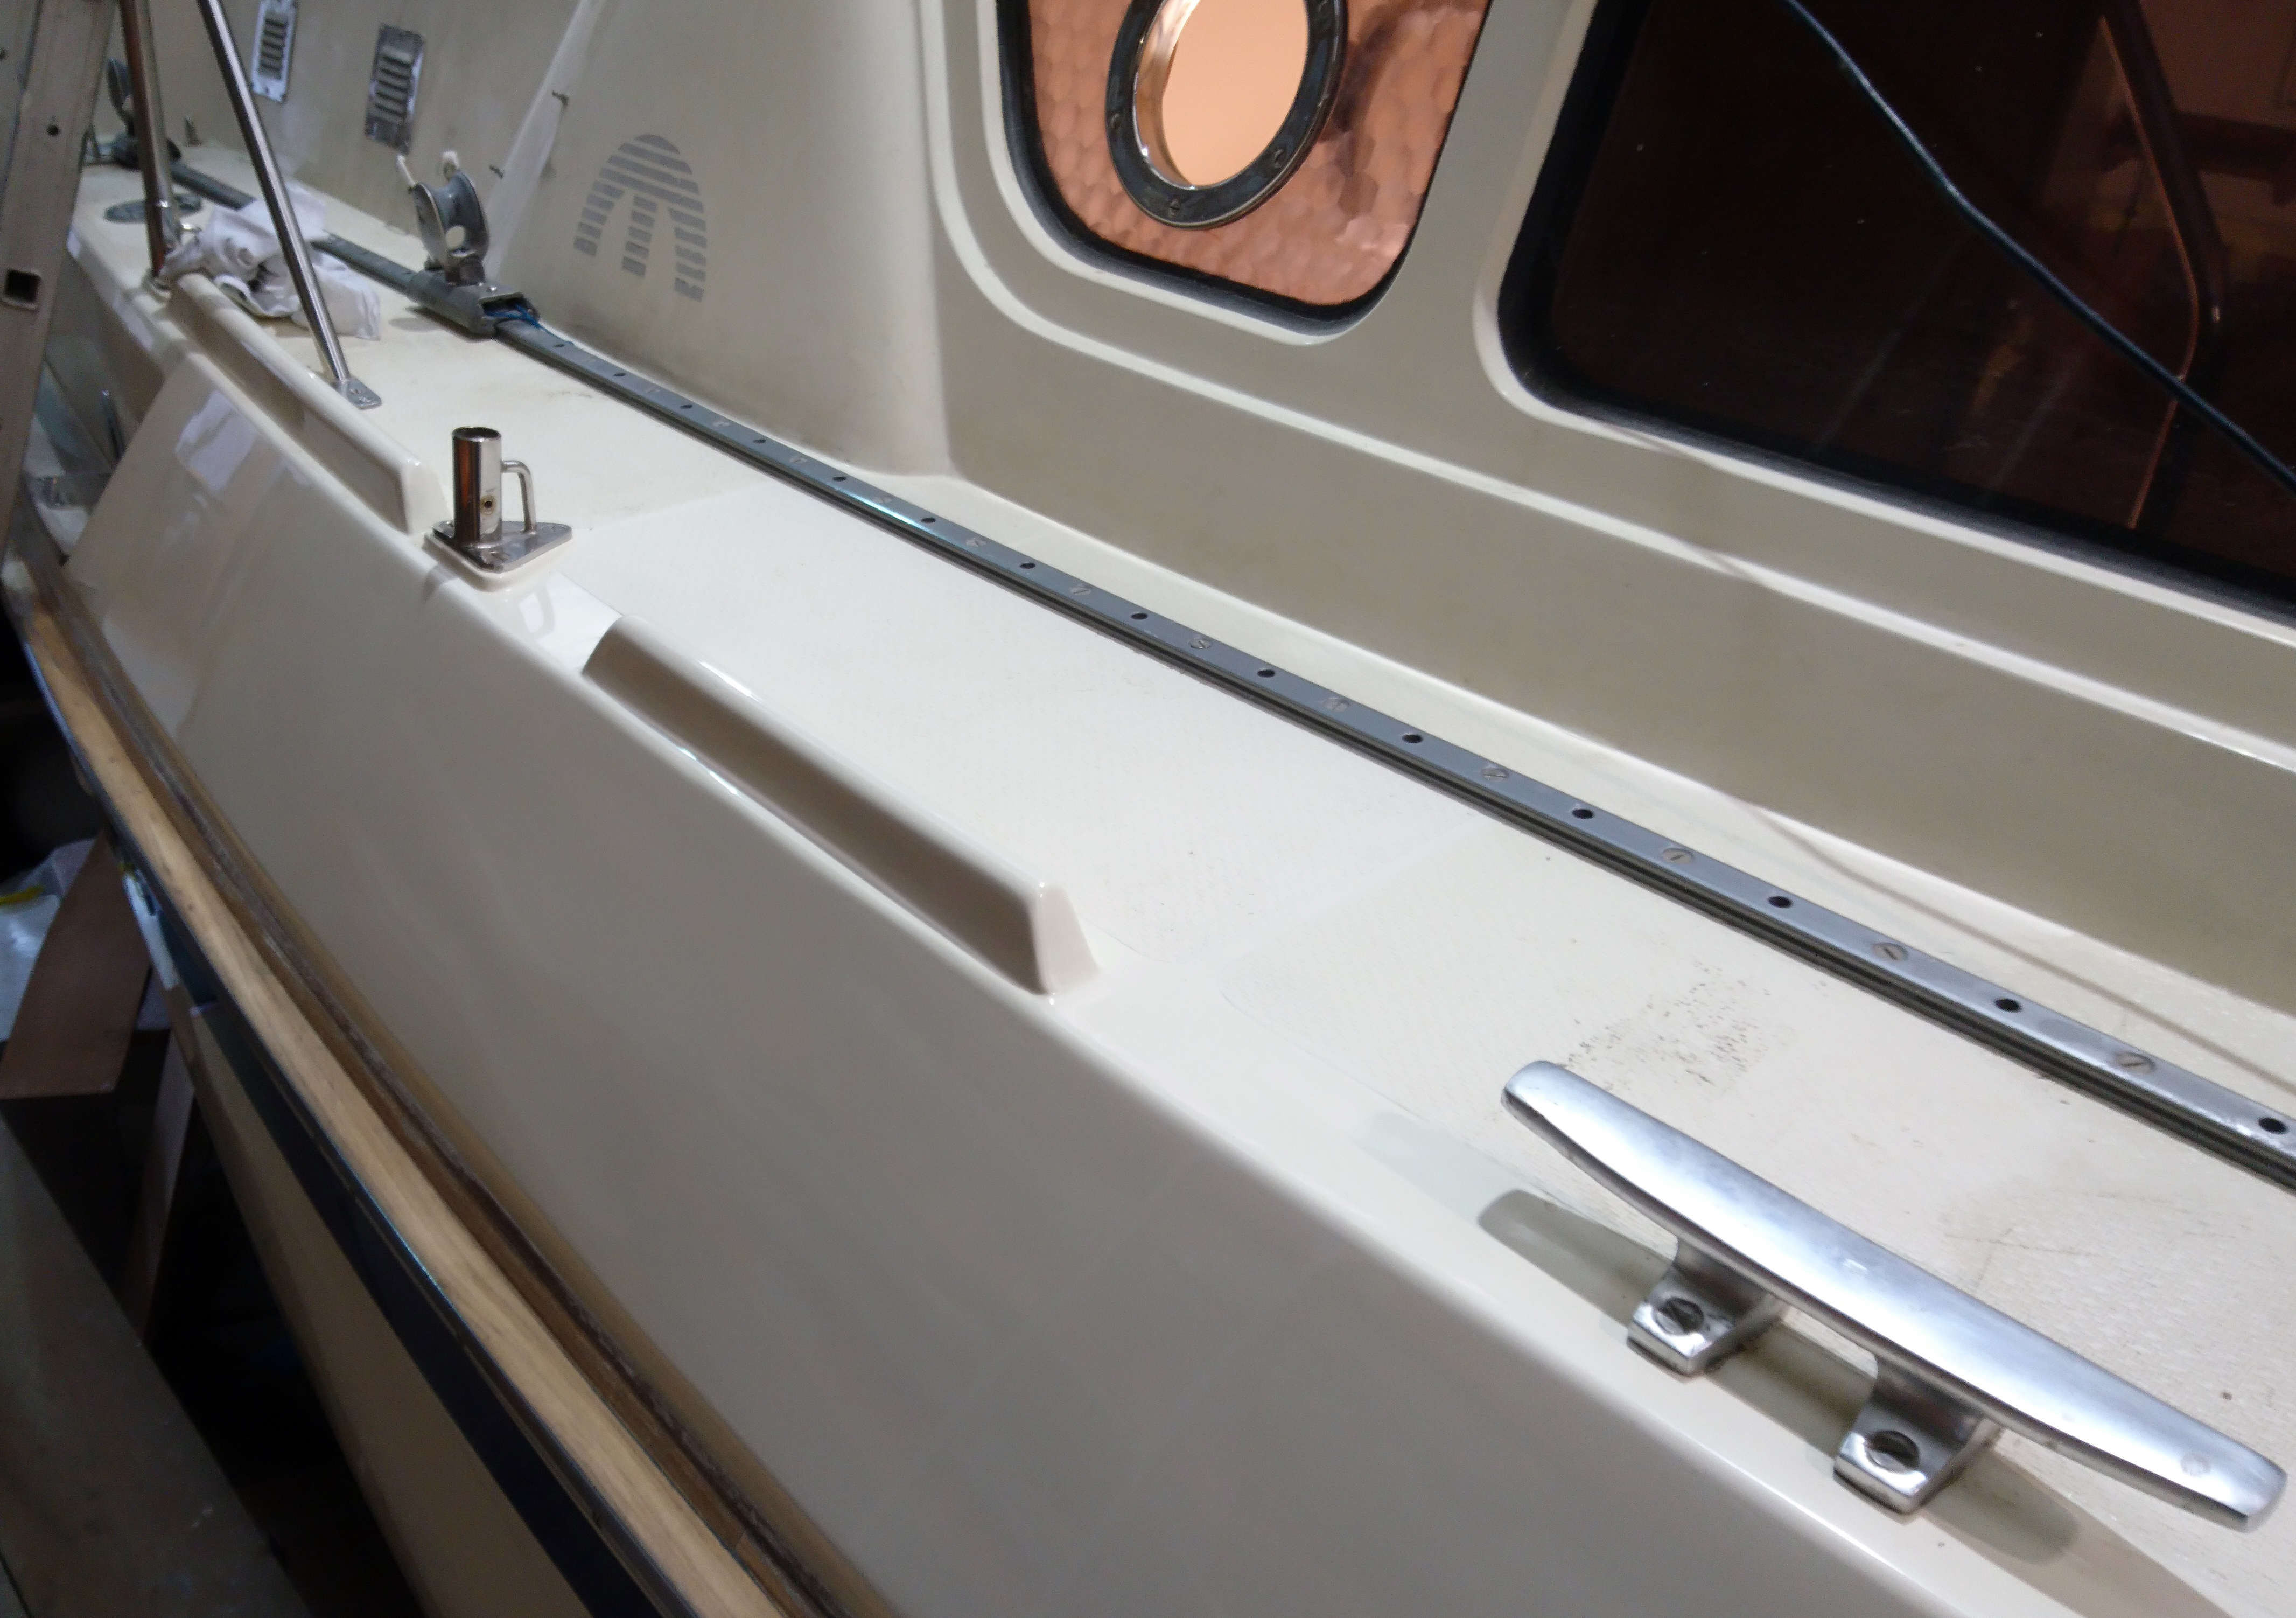
It was just a case of adding a gelcoat fillet around the toe rail to merge it into the deck followed by the usual sanding, marking, sanding, polishing routine.
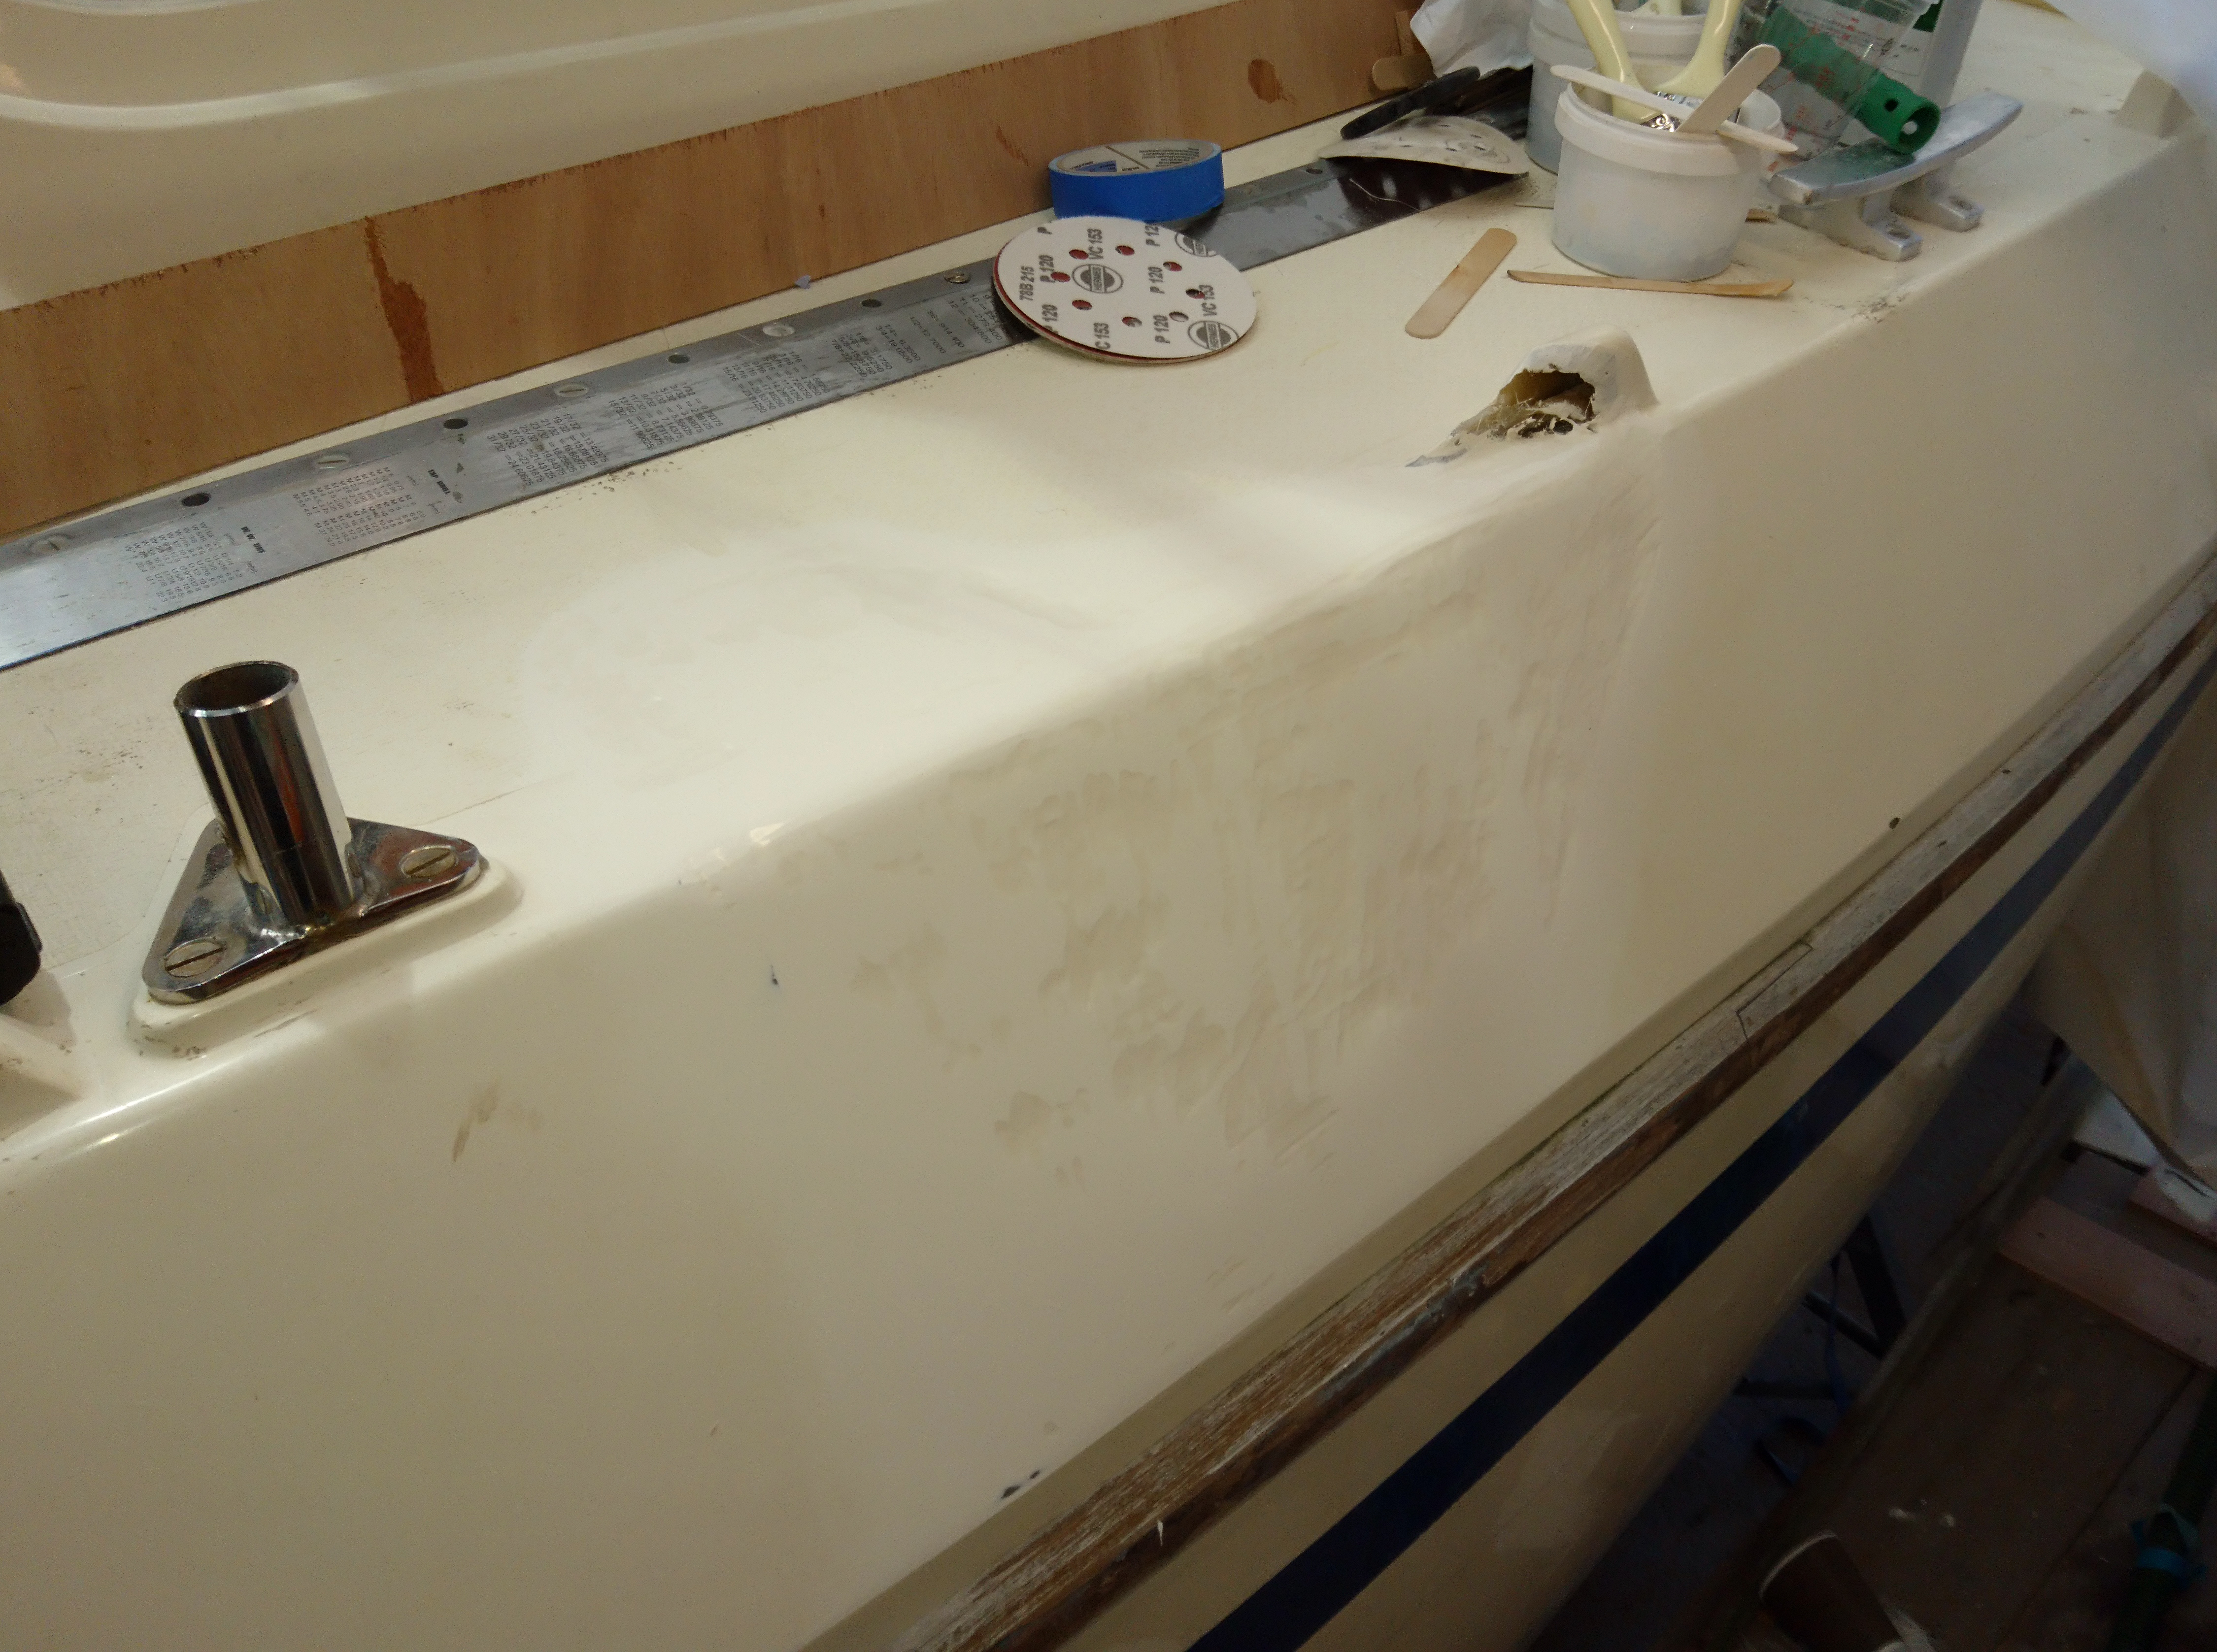
A final compound with 300 cut Farecla compound and then UV wax and it was time to grab one of the guys in the yard to see if they could spot the repair.
If you have to point out where the repair was made then you know you’ve been successful.
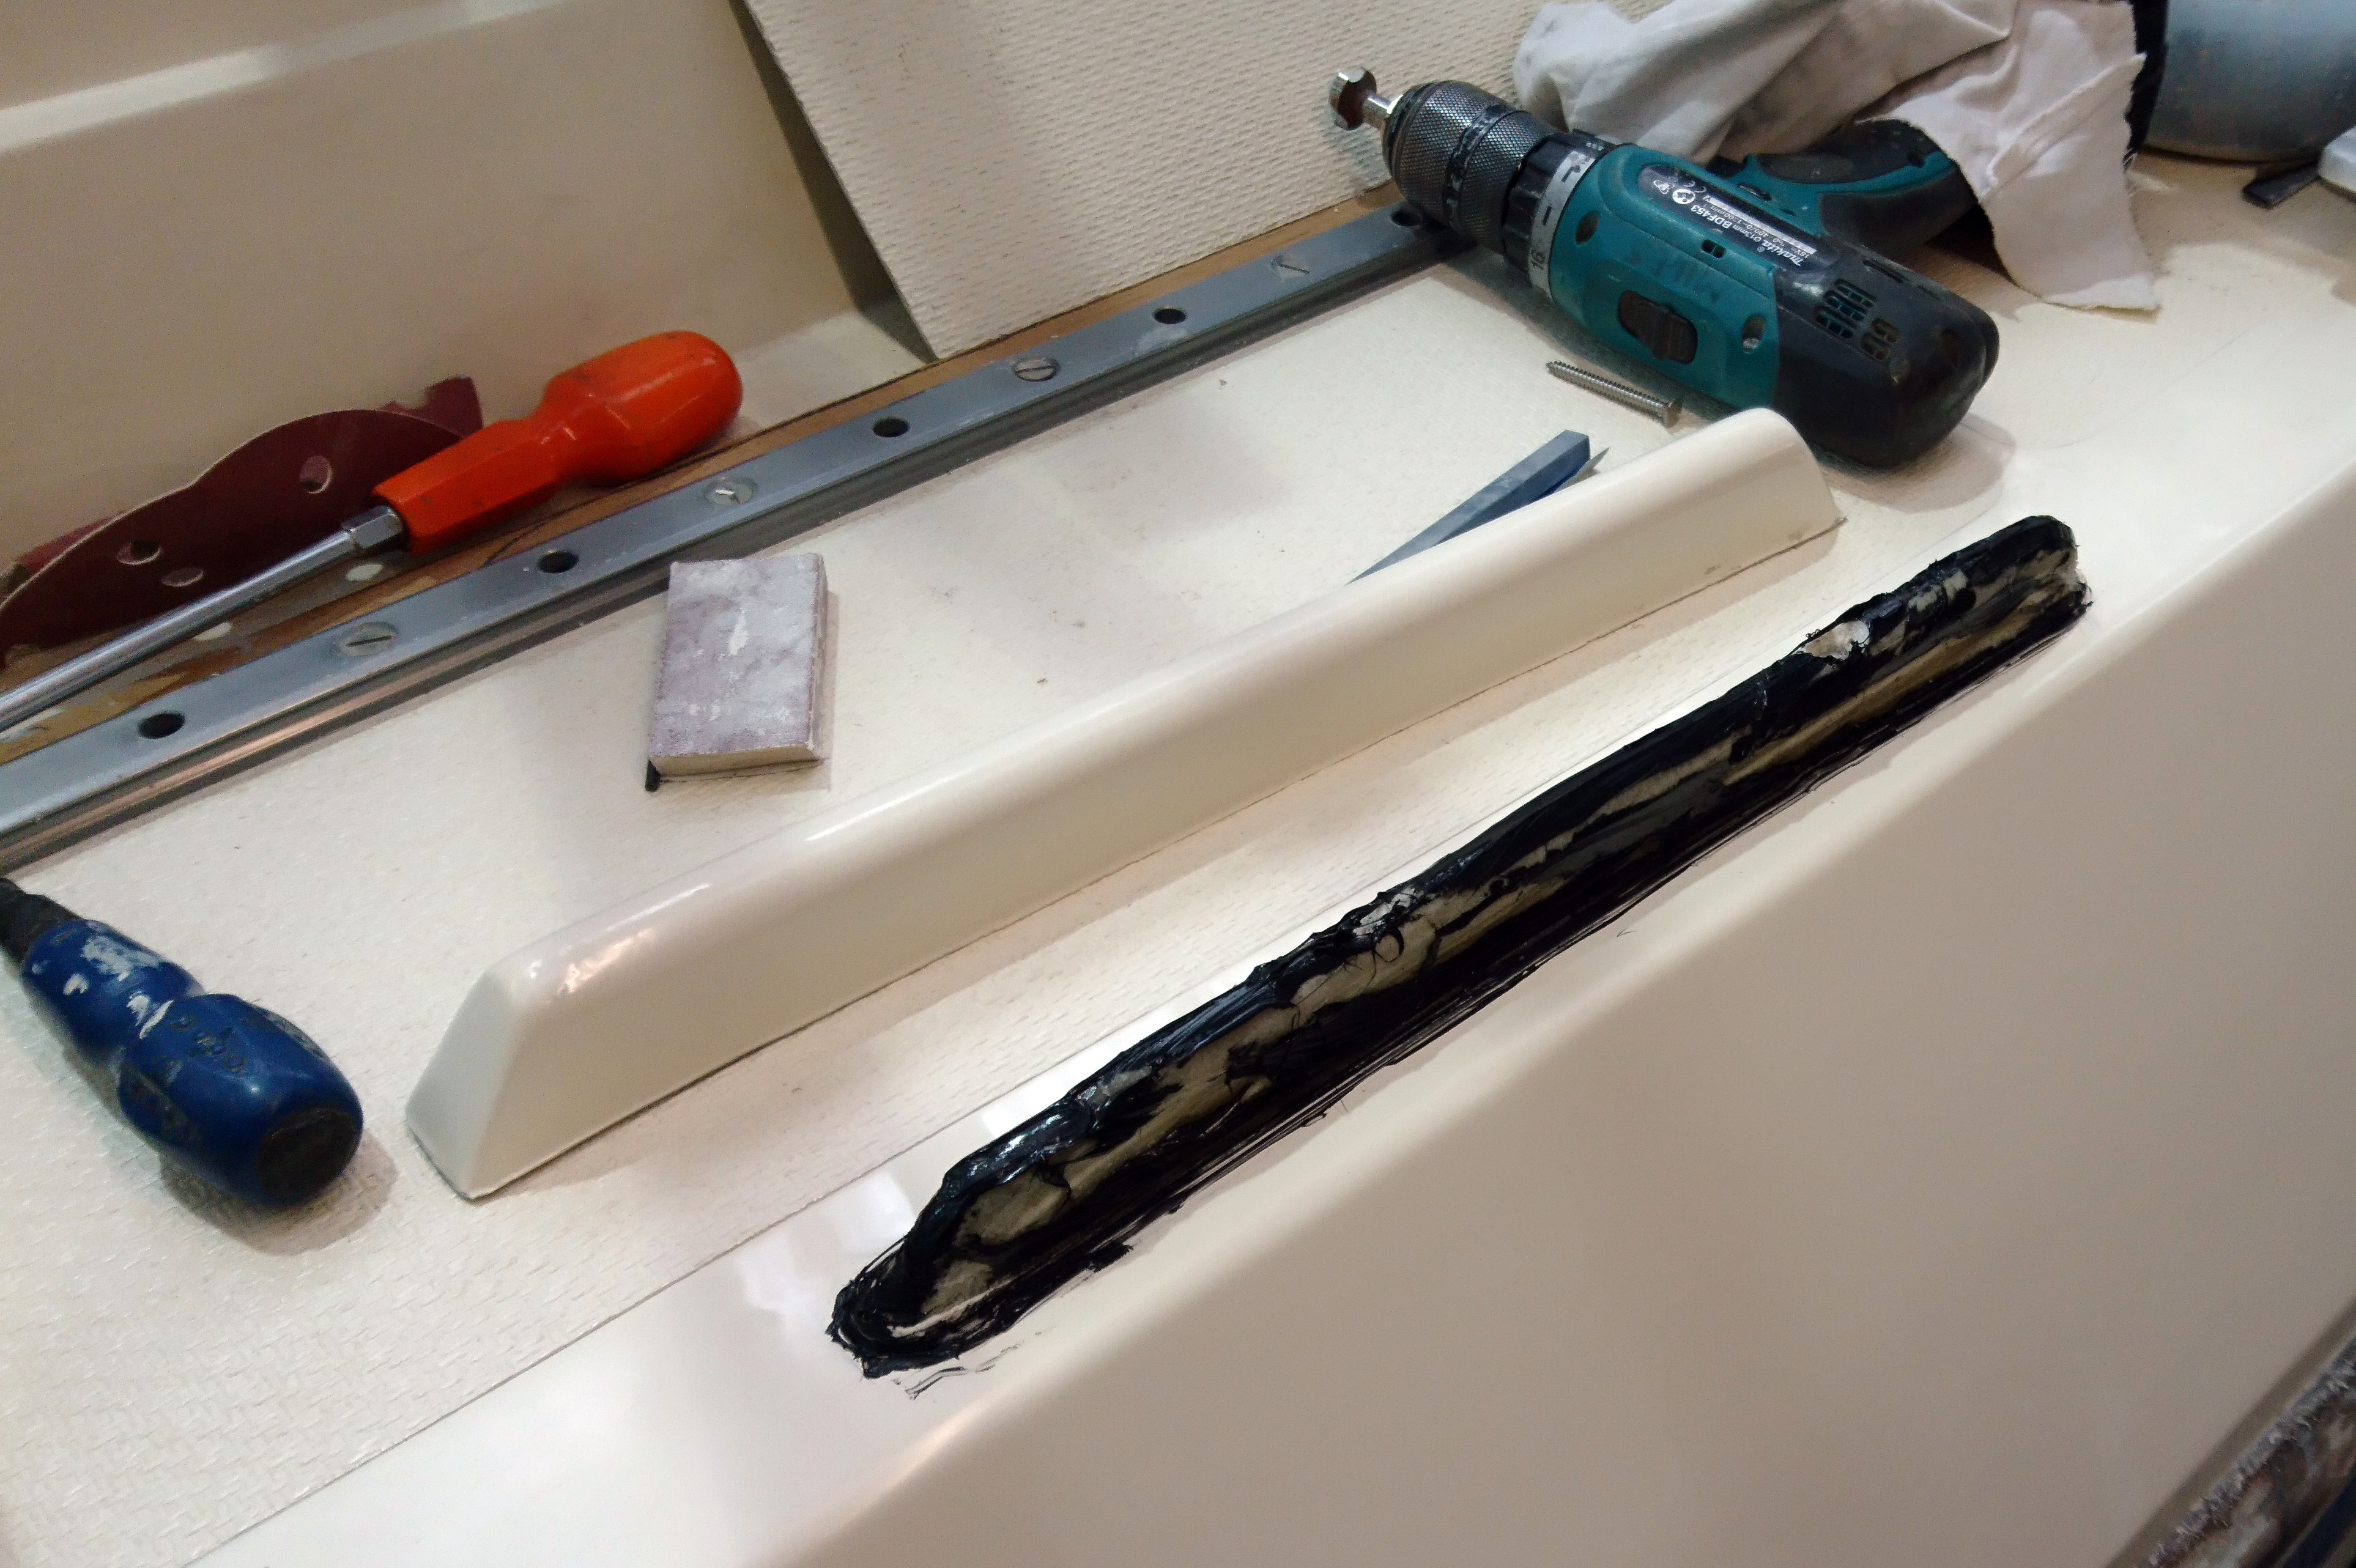
Internal toe rail lug glued and bolted to the deck ready to receive new toe rail.
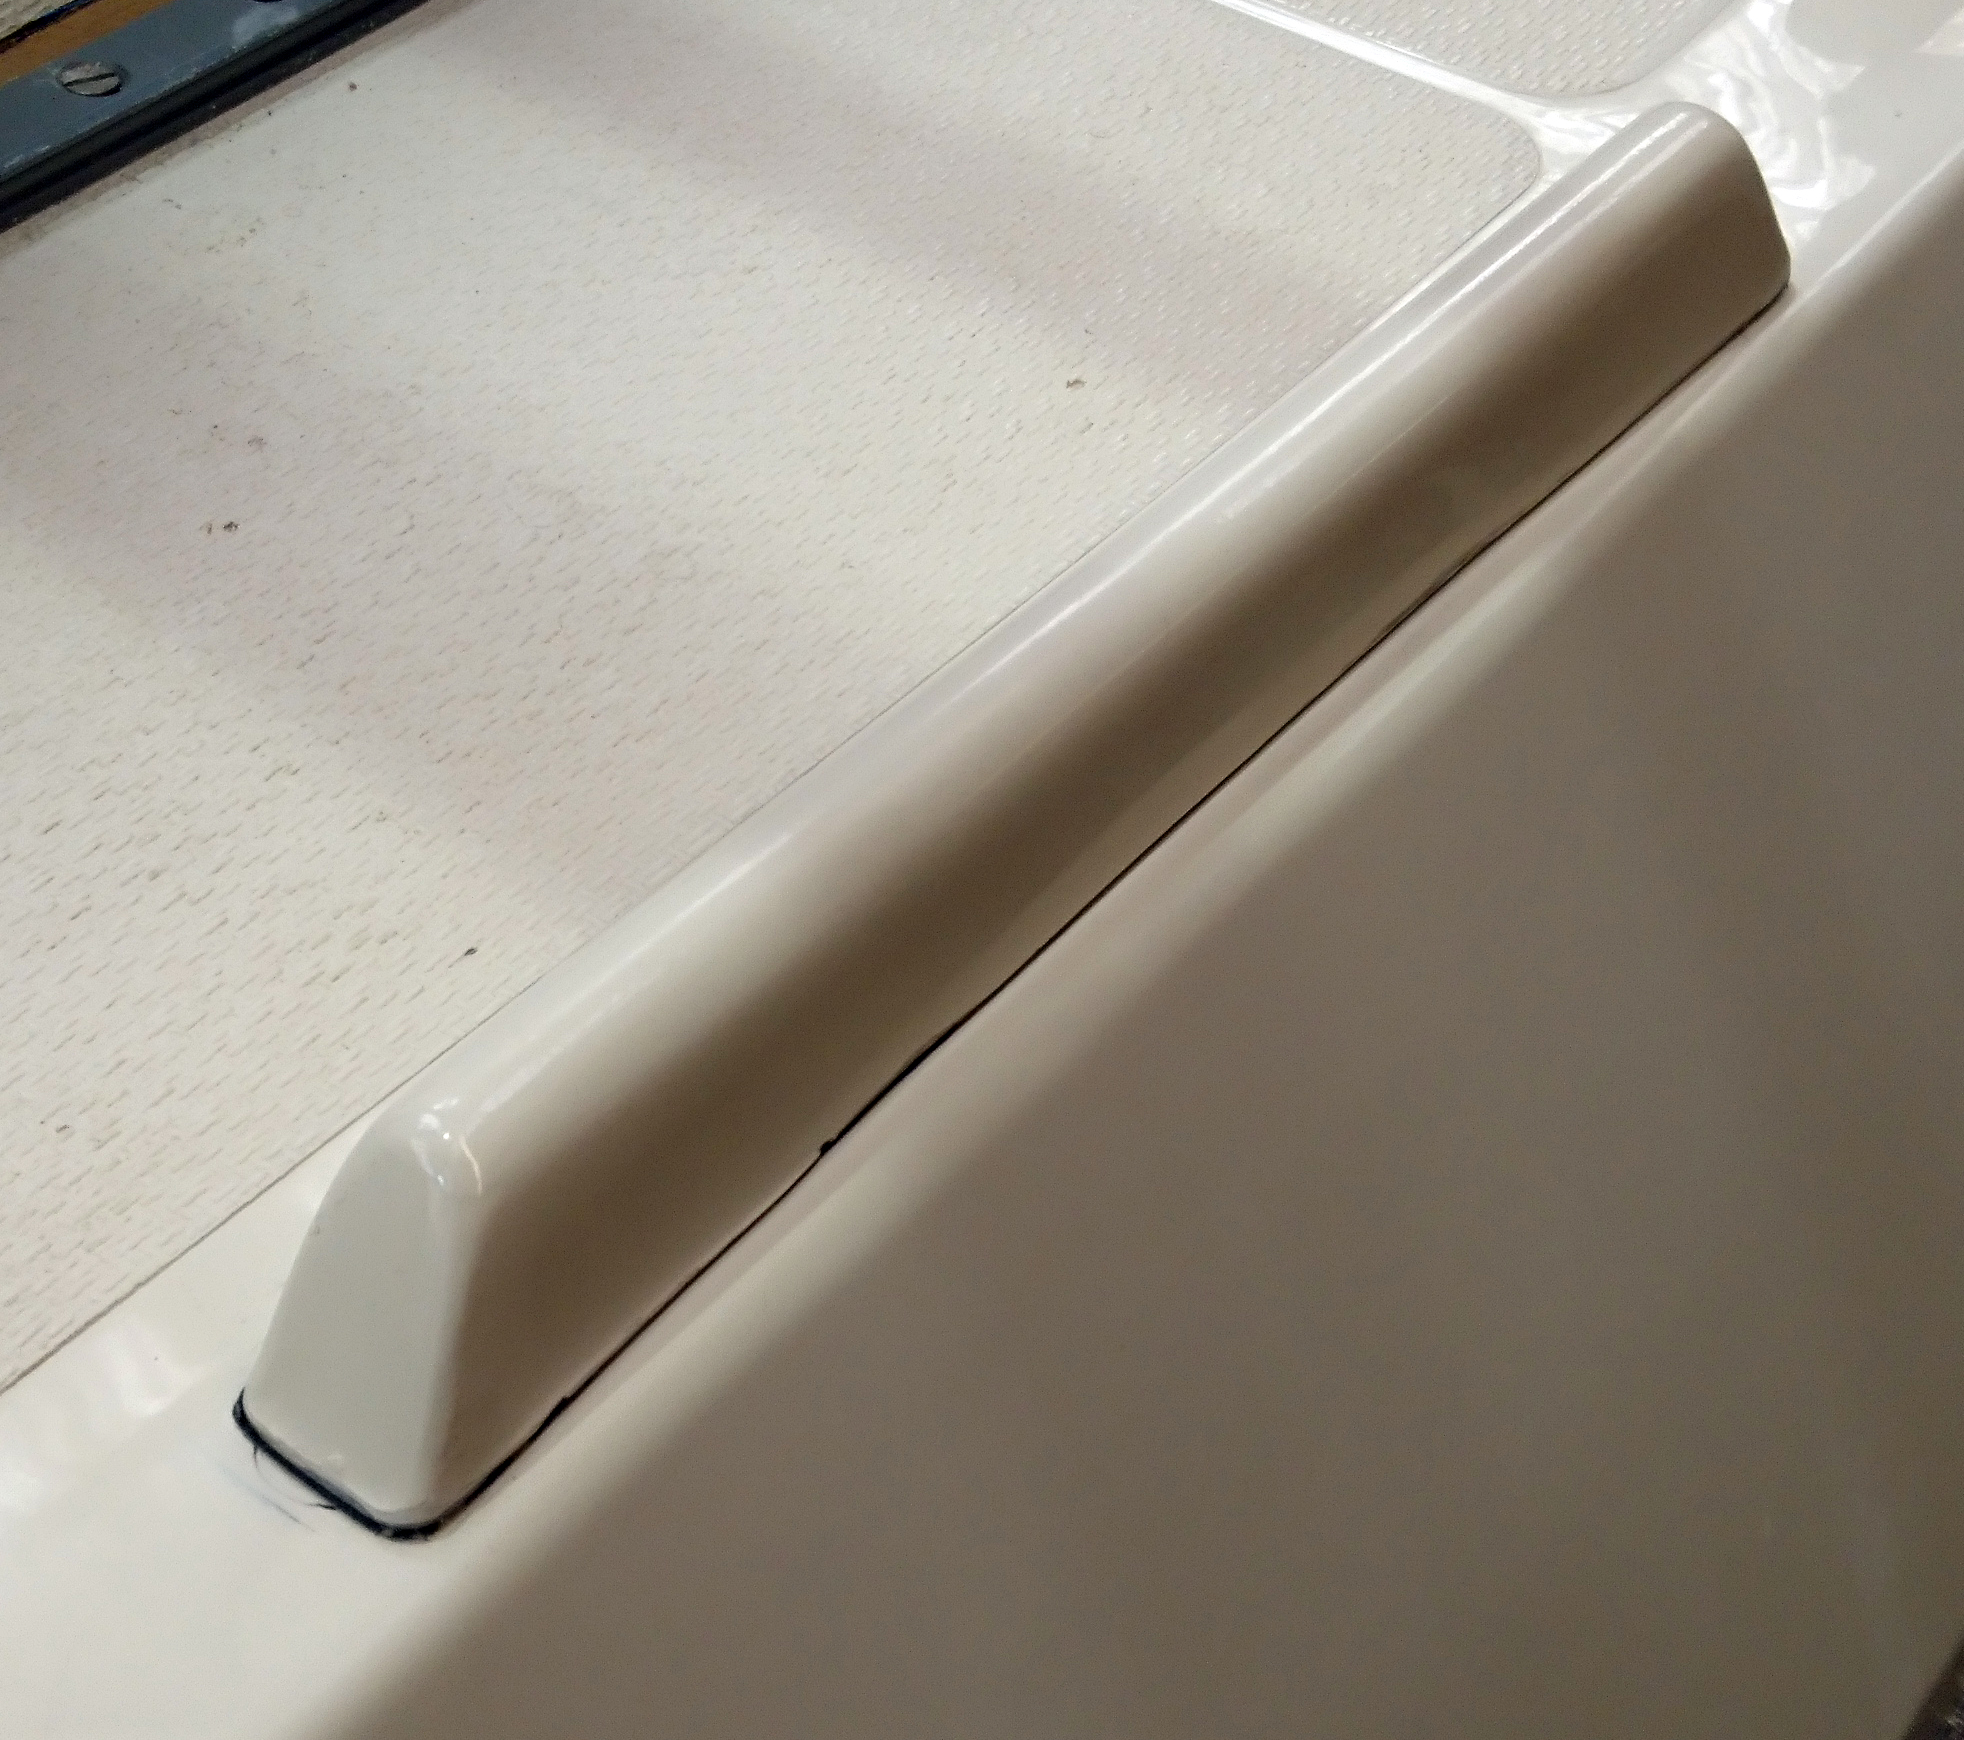
Toe rail glued using Sabatack and clamped down over night.
A fillet of gelcoat was added around the join and once set can be sanded and polished.
Various shots of the finished repair…….