Compression post repair on a Seamaster 925 – Job Finished –
Whilst doing a little research before starting a new project on a Seamaster 925, I found a quote;
“Holman and Pye design, Seamaster build quality, what more could you ask for?”
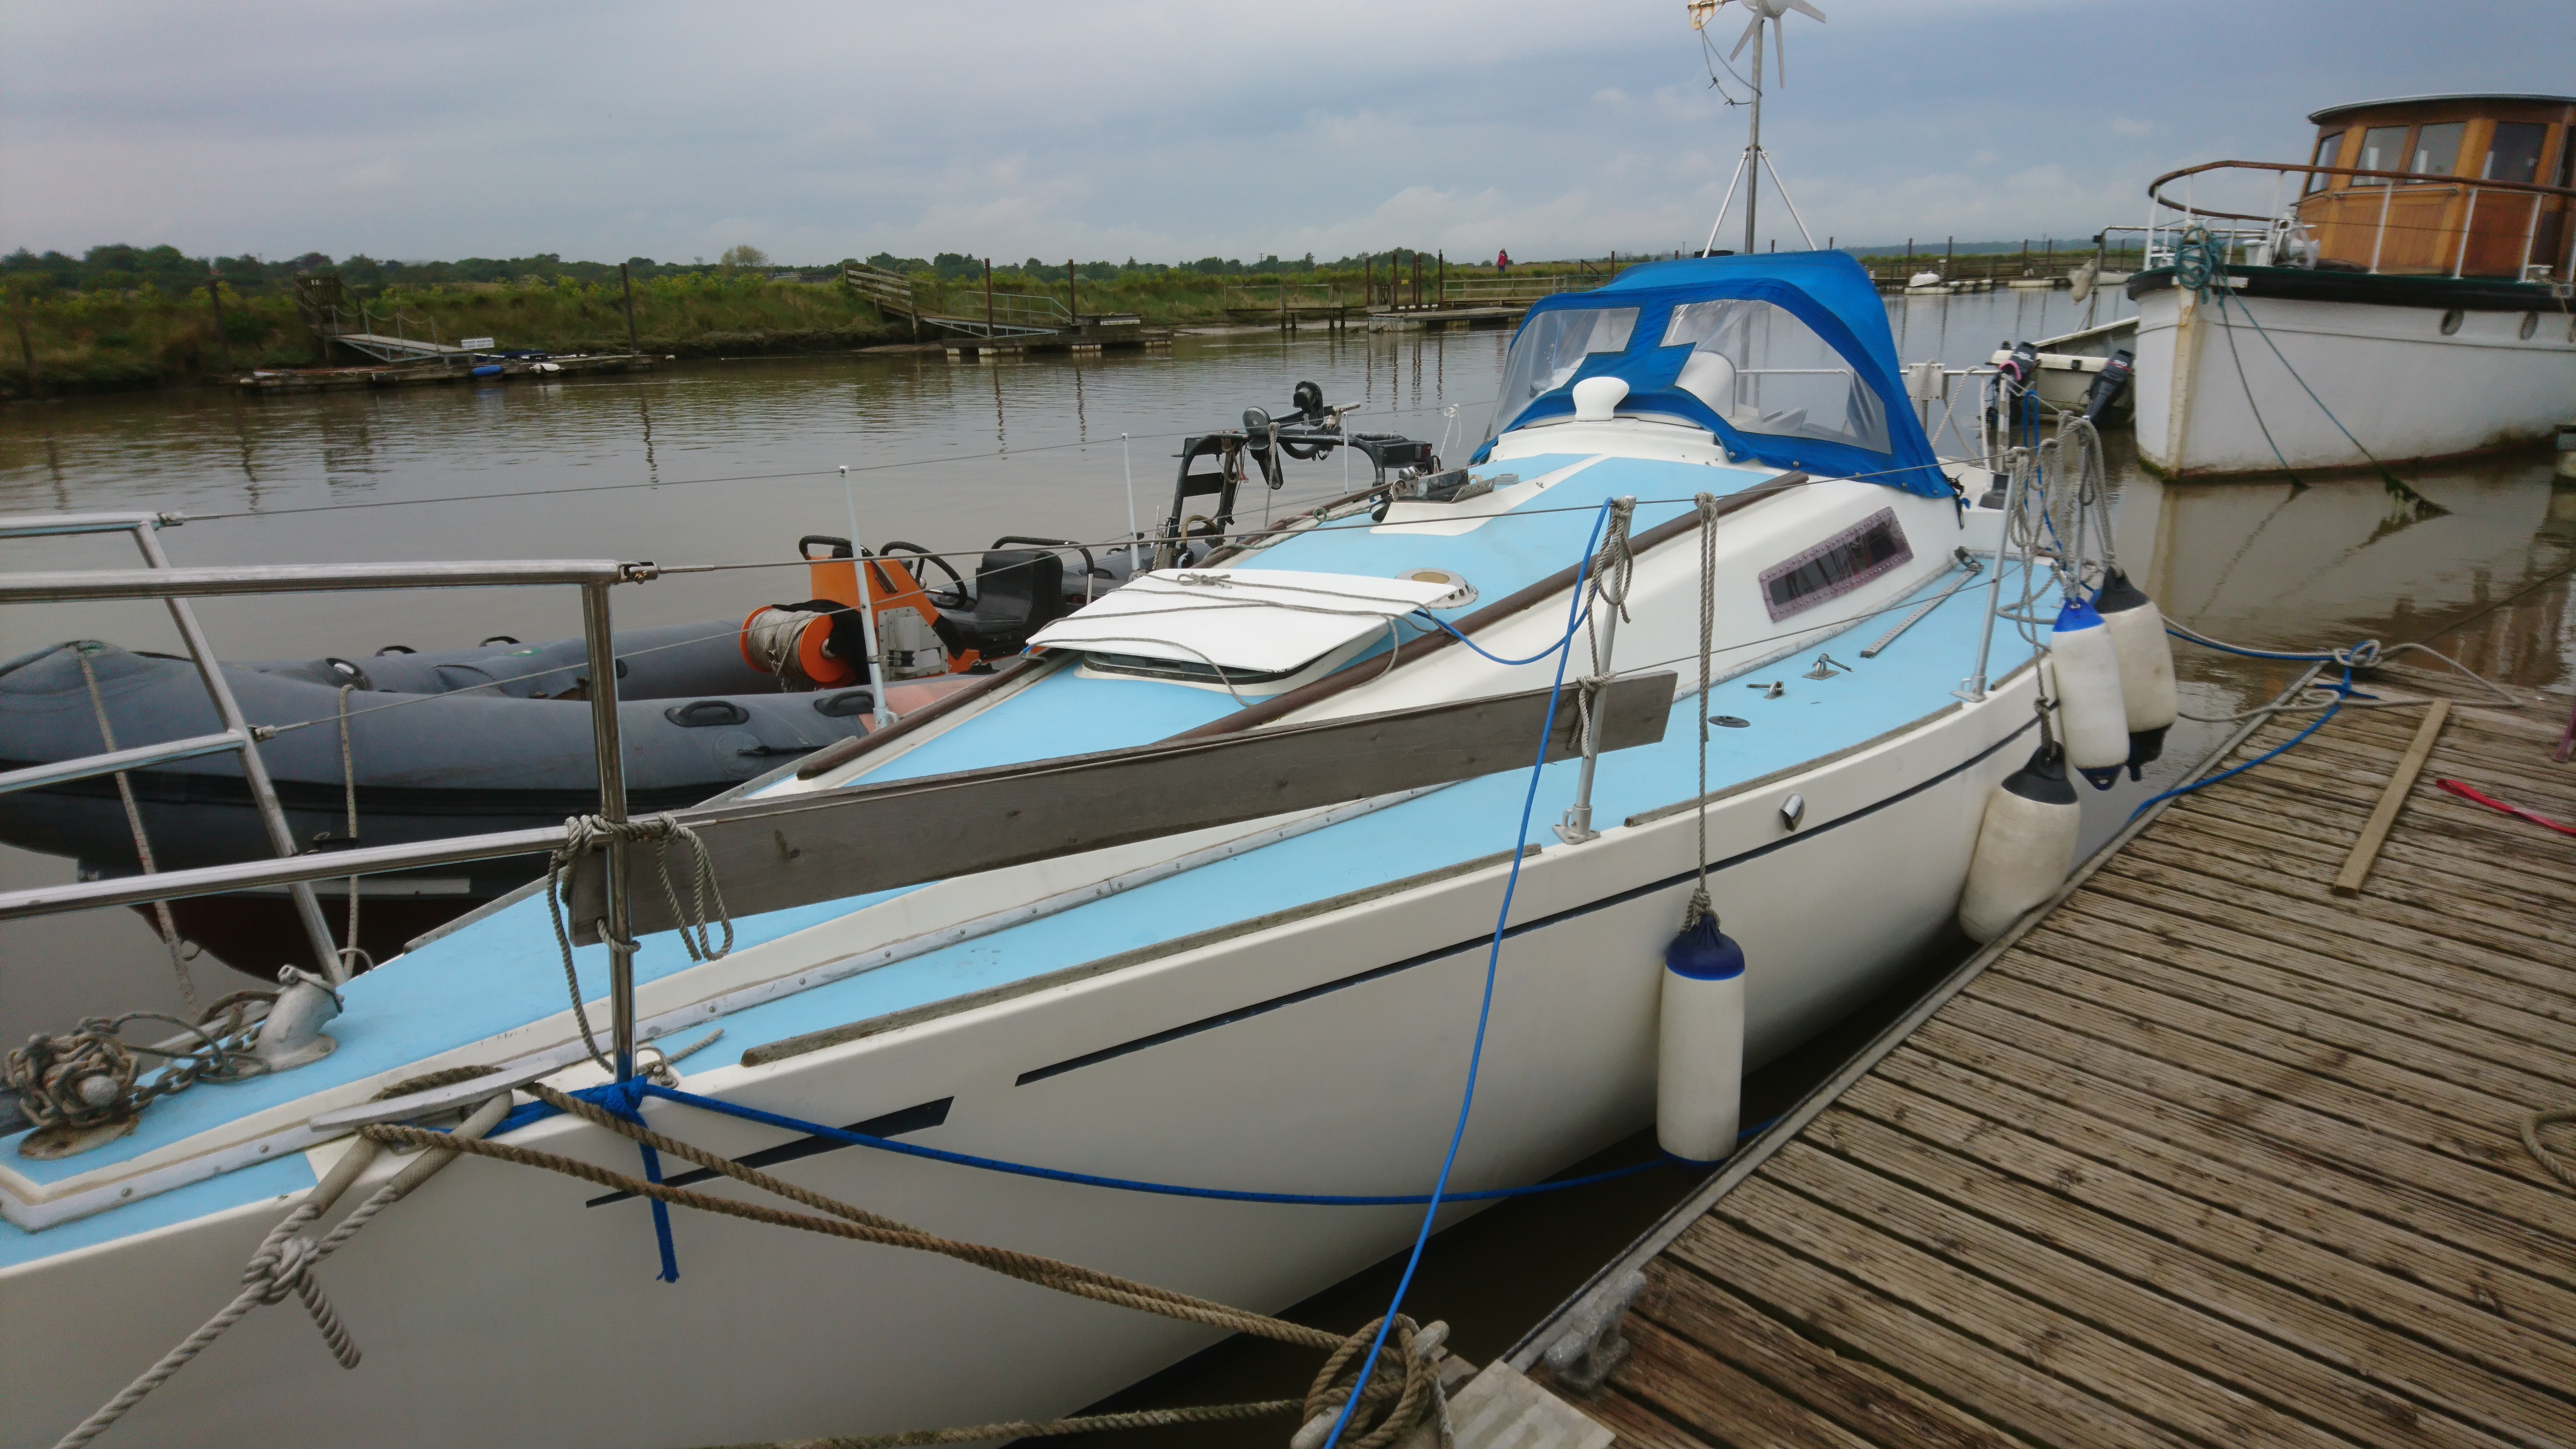
The Seamaster 925 that arrived at the yard looked very pretty with classic late 70’s lines and in allround very good condition.
However whoever designed and fitted the compression post was not having a good day or just wasn’t overly concerned about what would happen a few decades into the future.
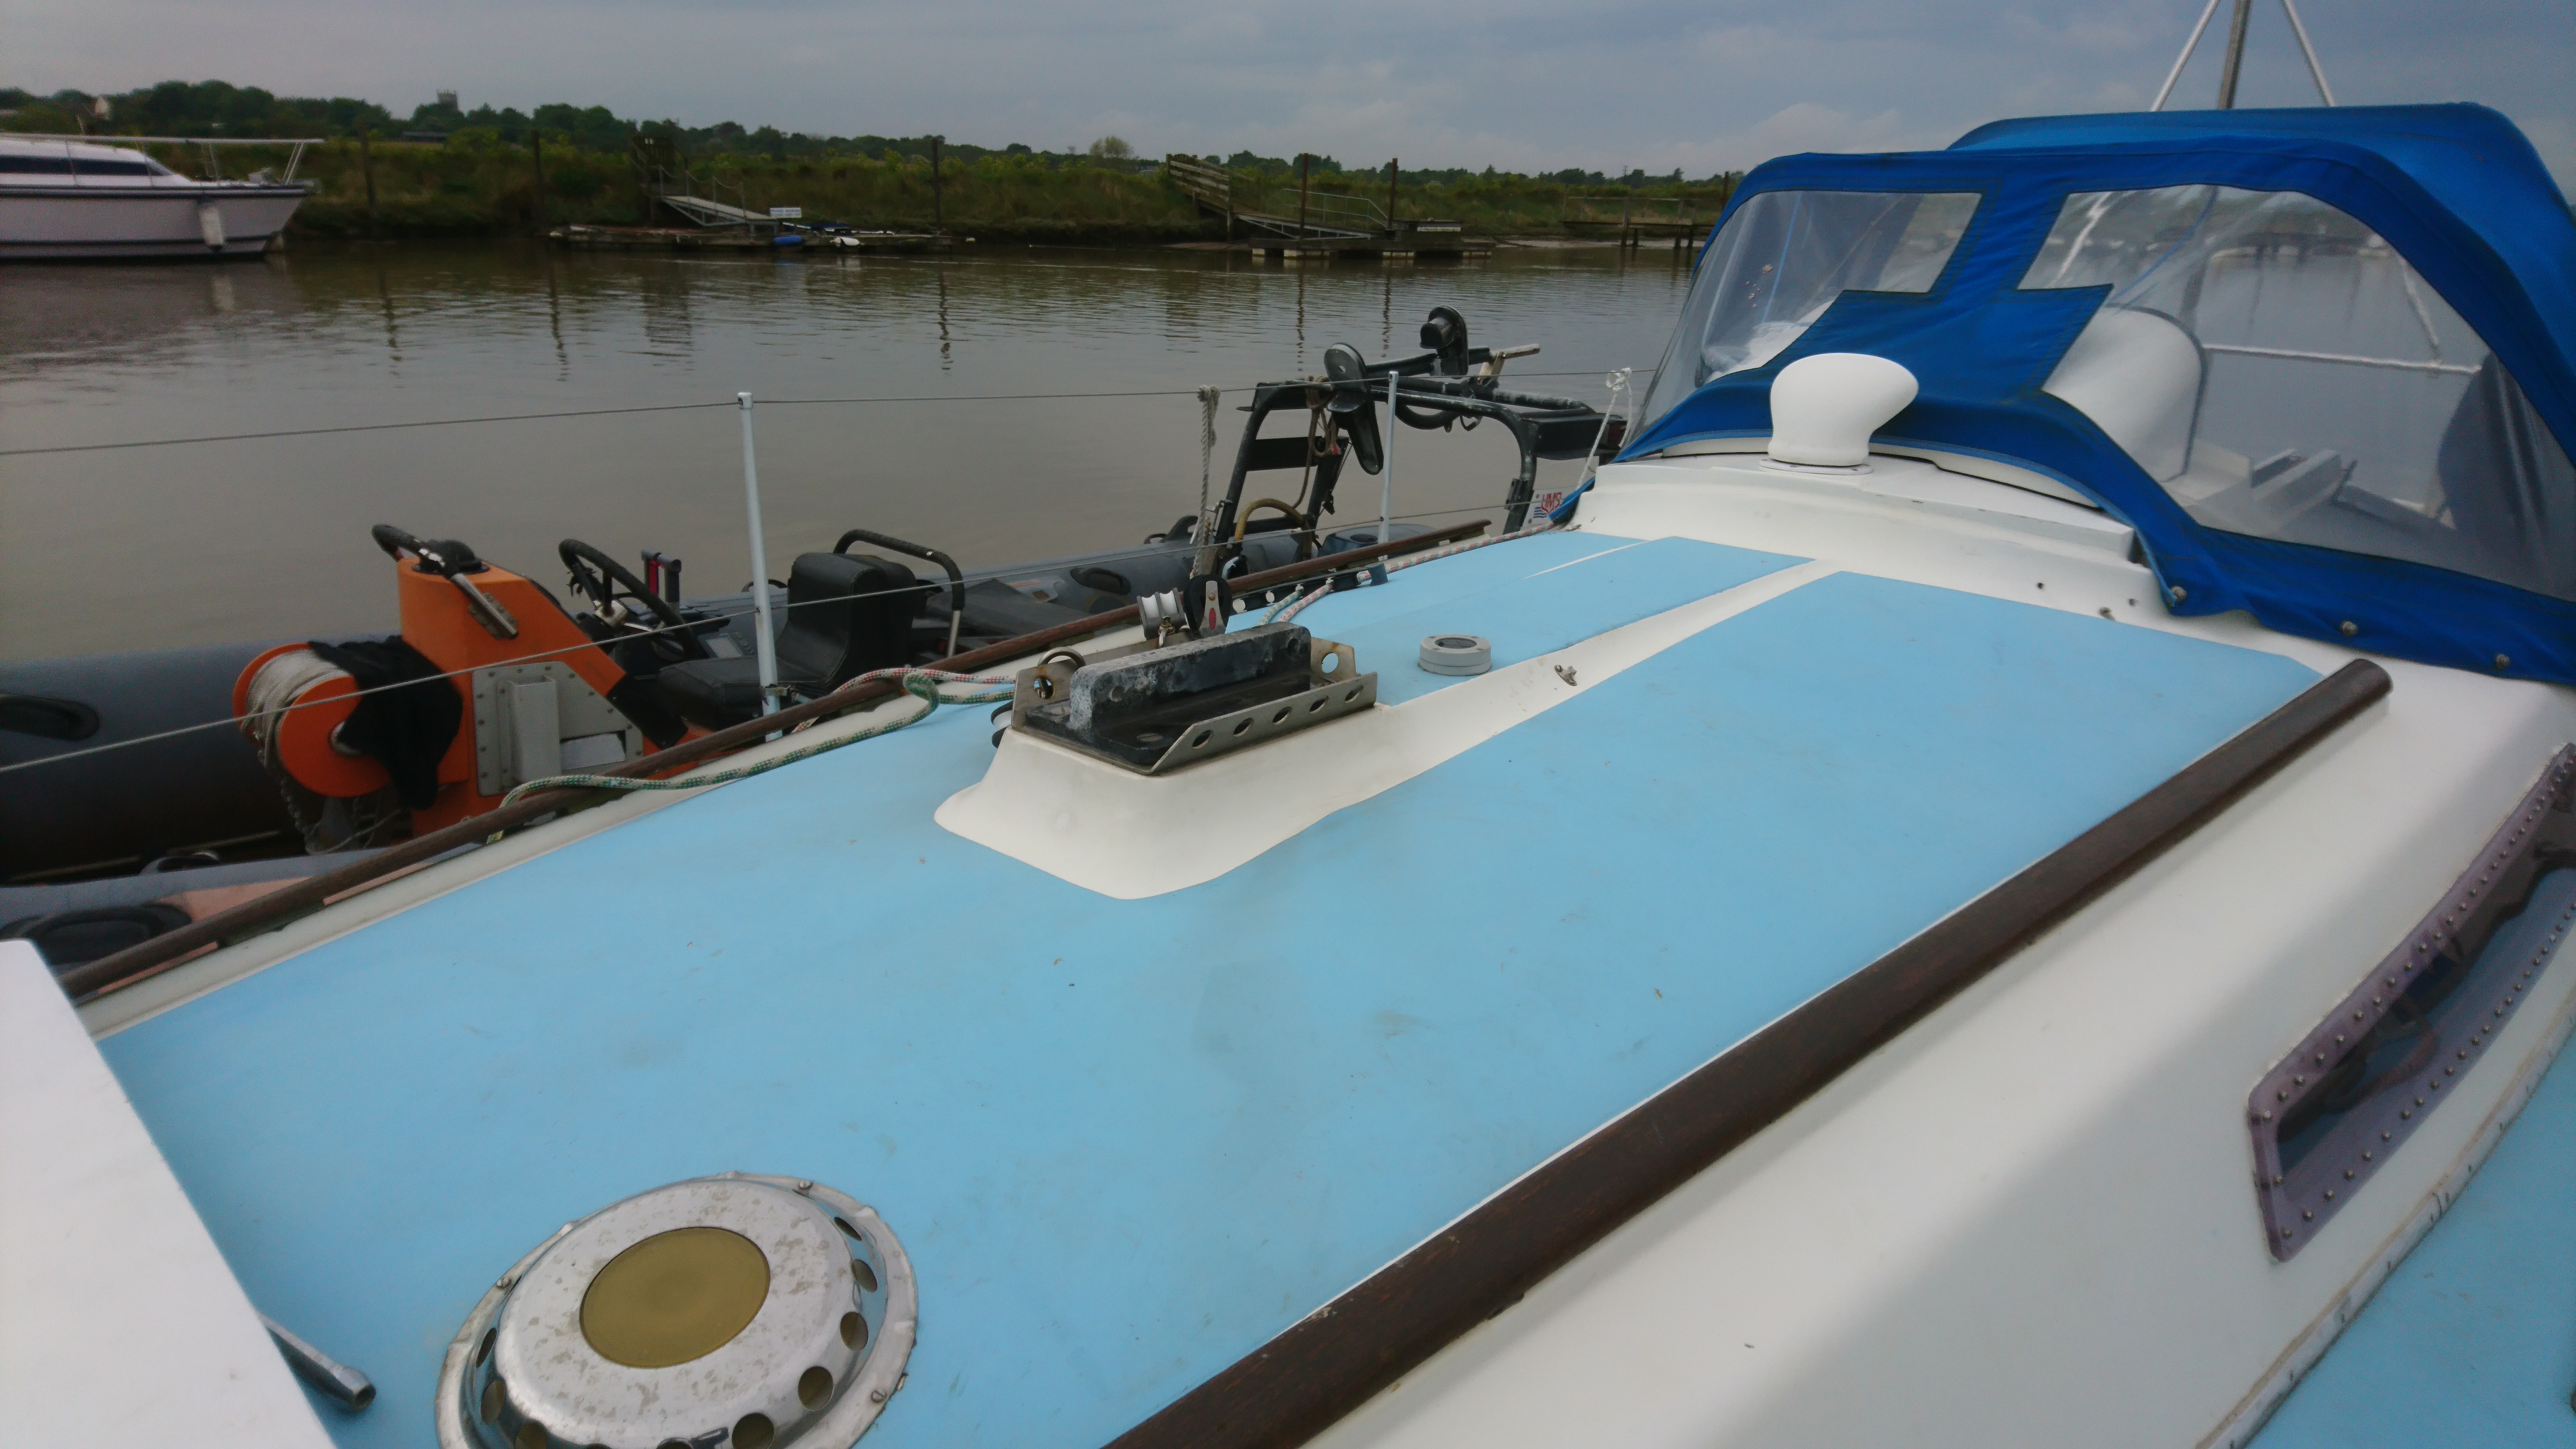
It was obvious something was wrong from outside, as there was a pronounced bump in the deck, next to the mast foot.
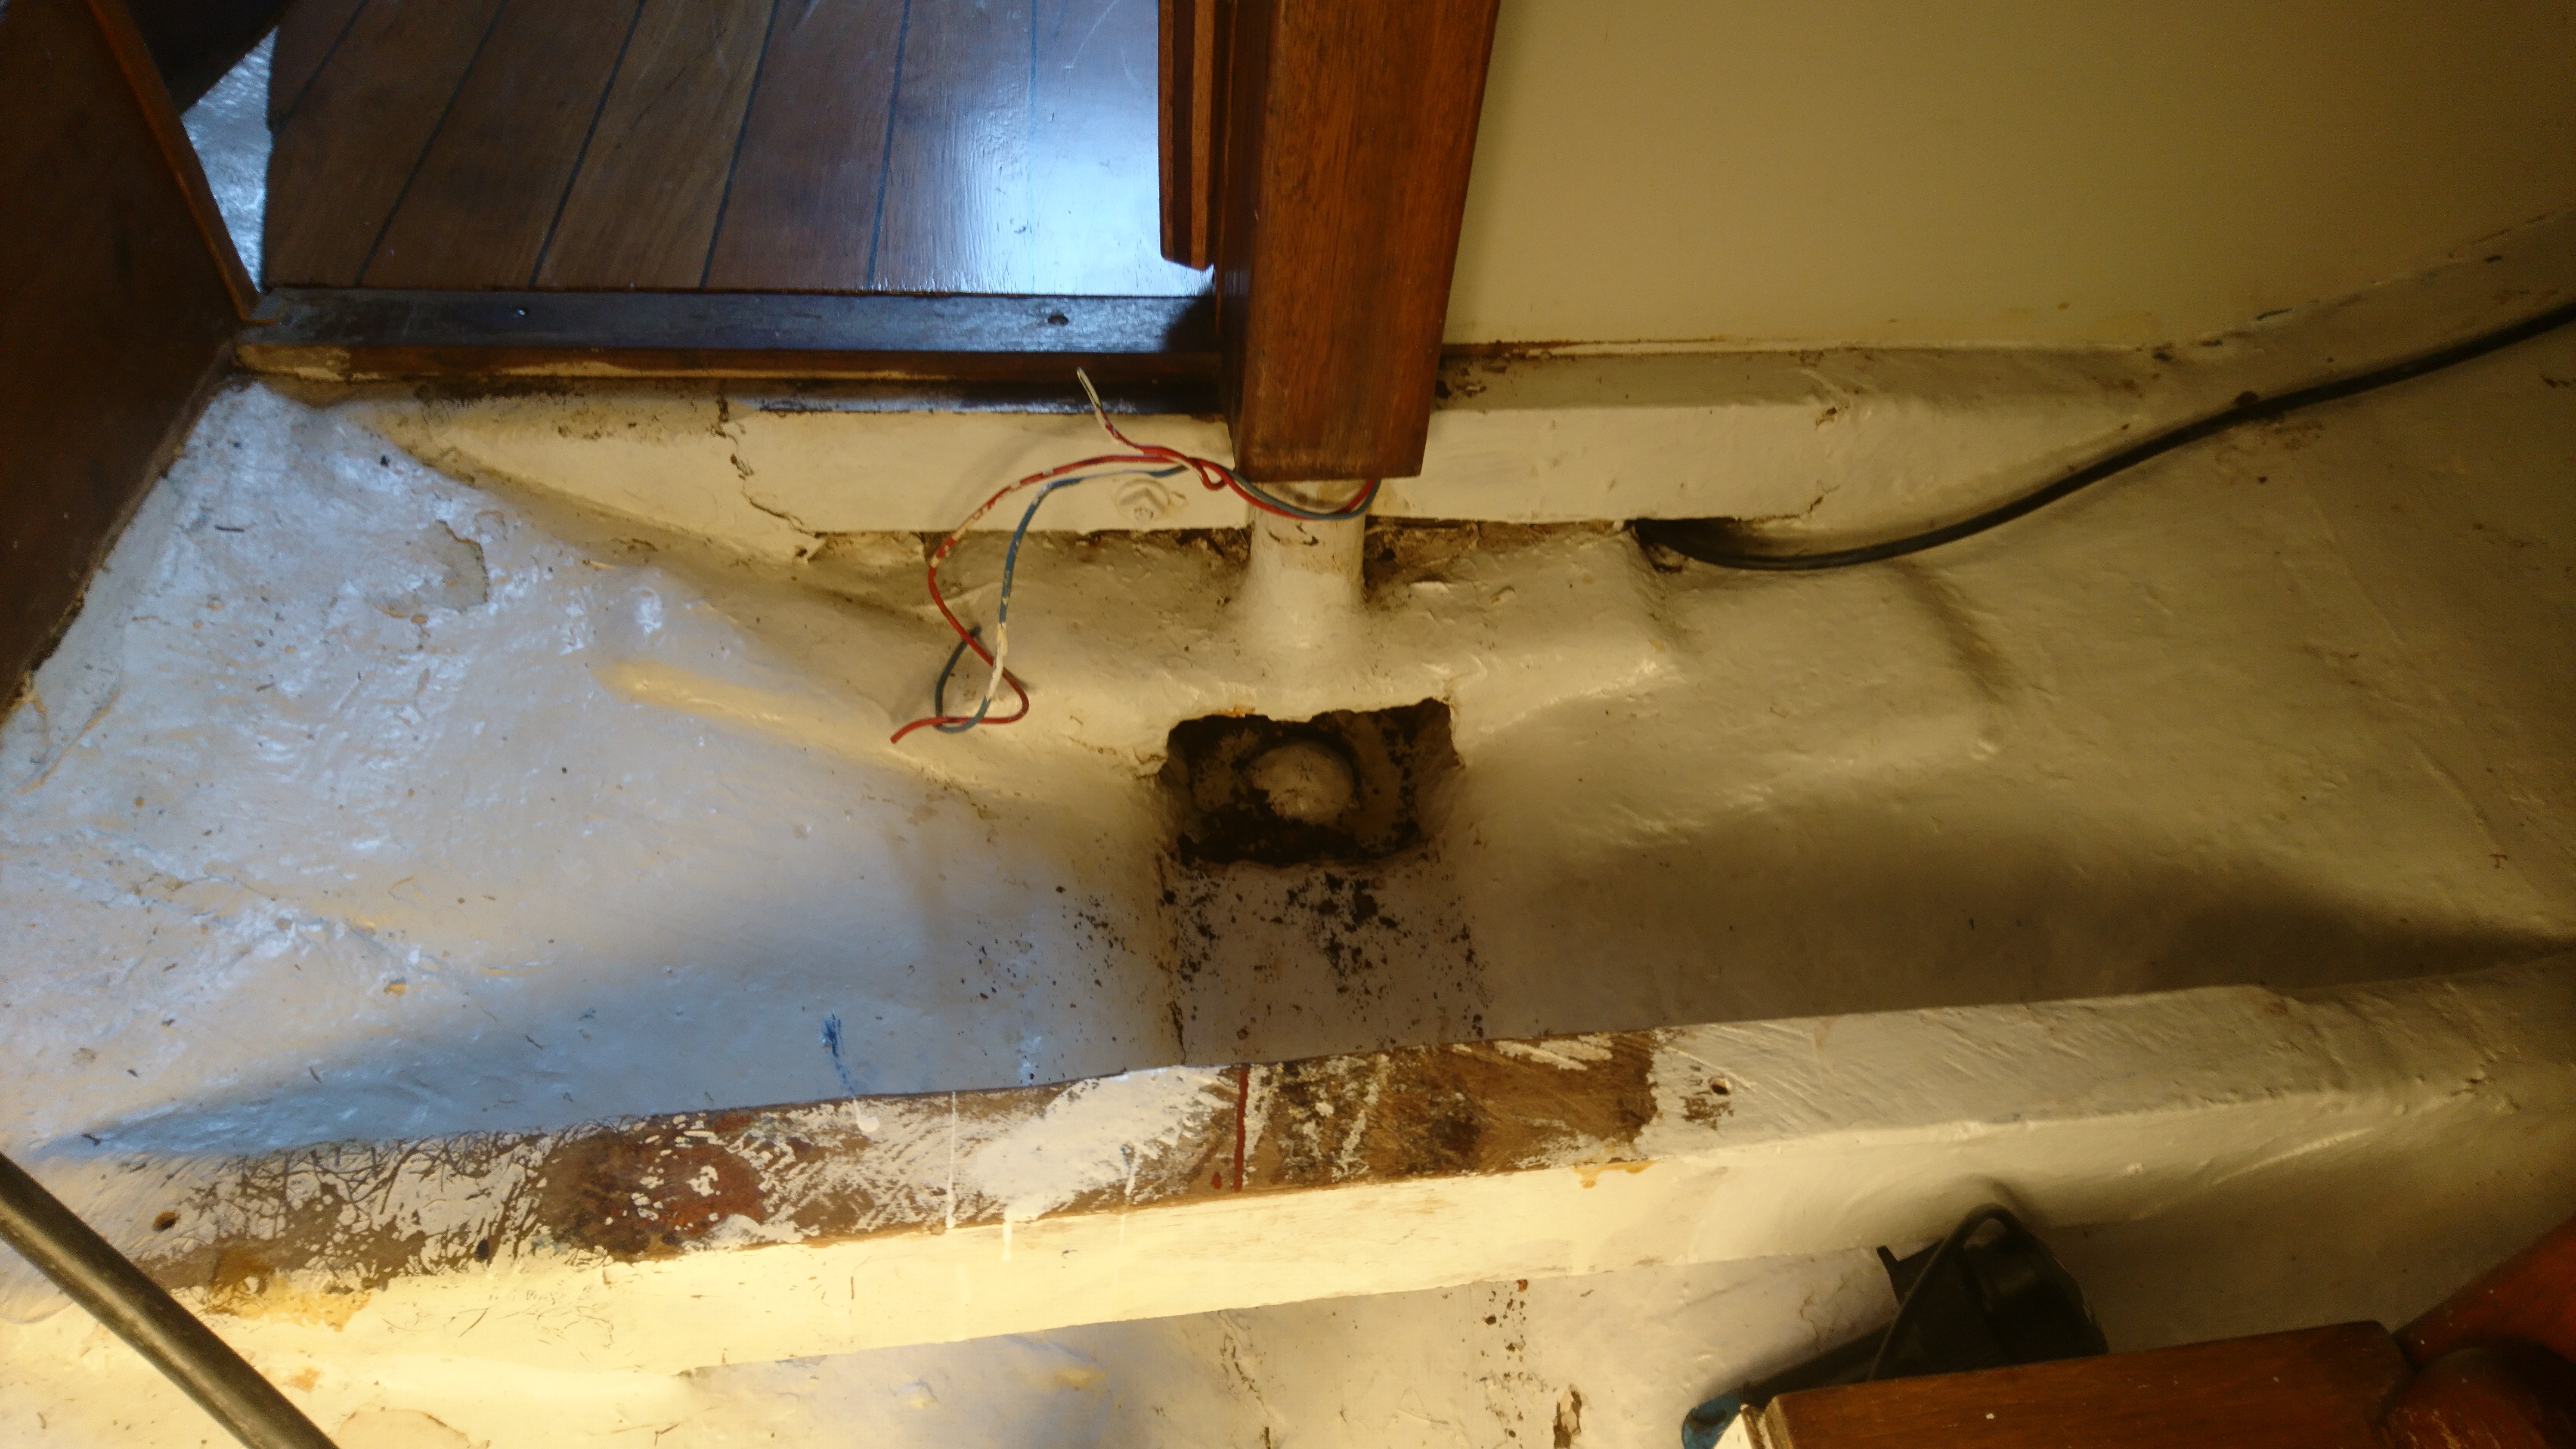
Investigating down below it became obvious what had happened.
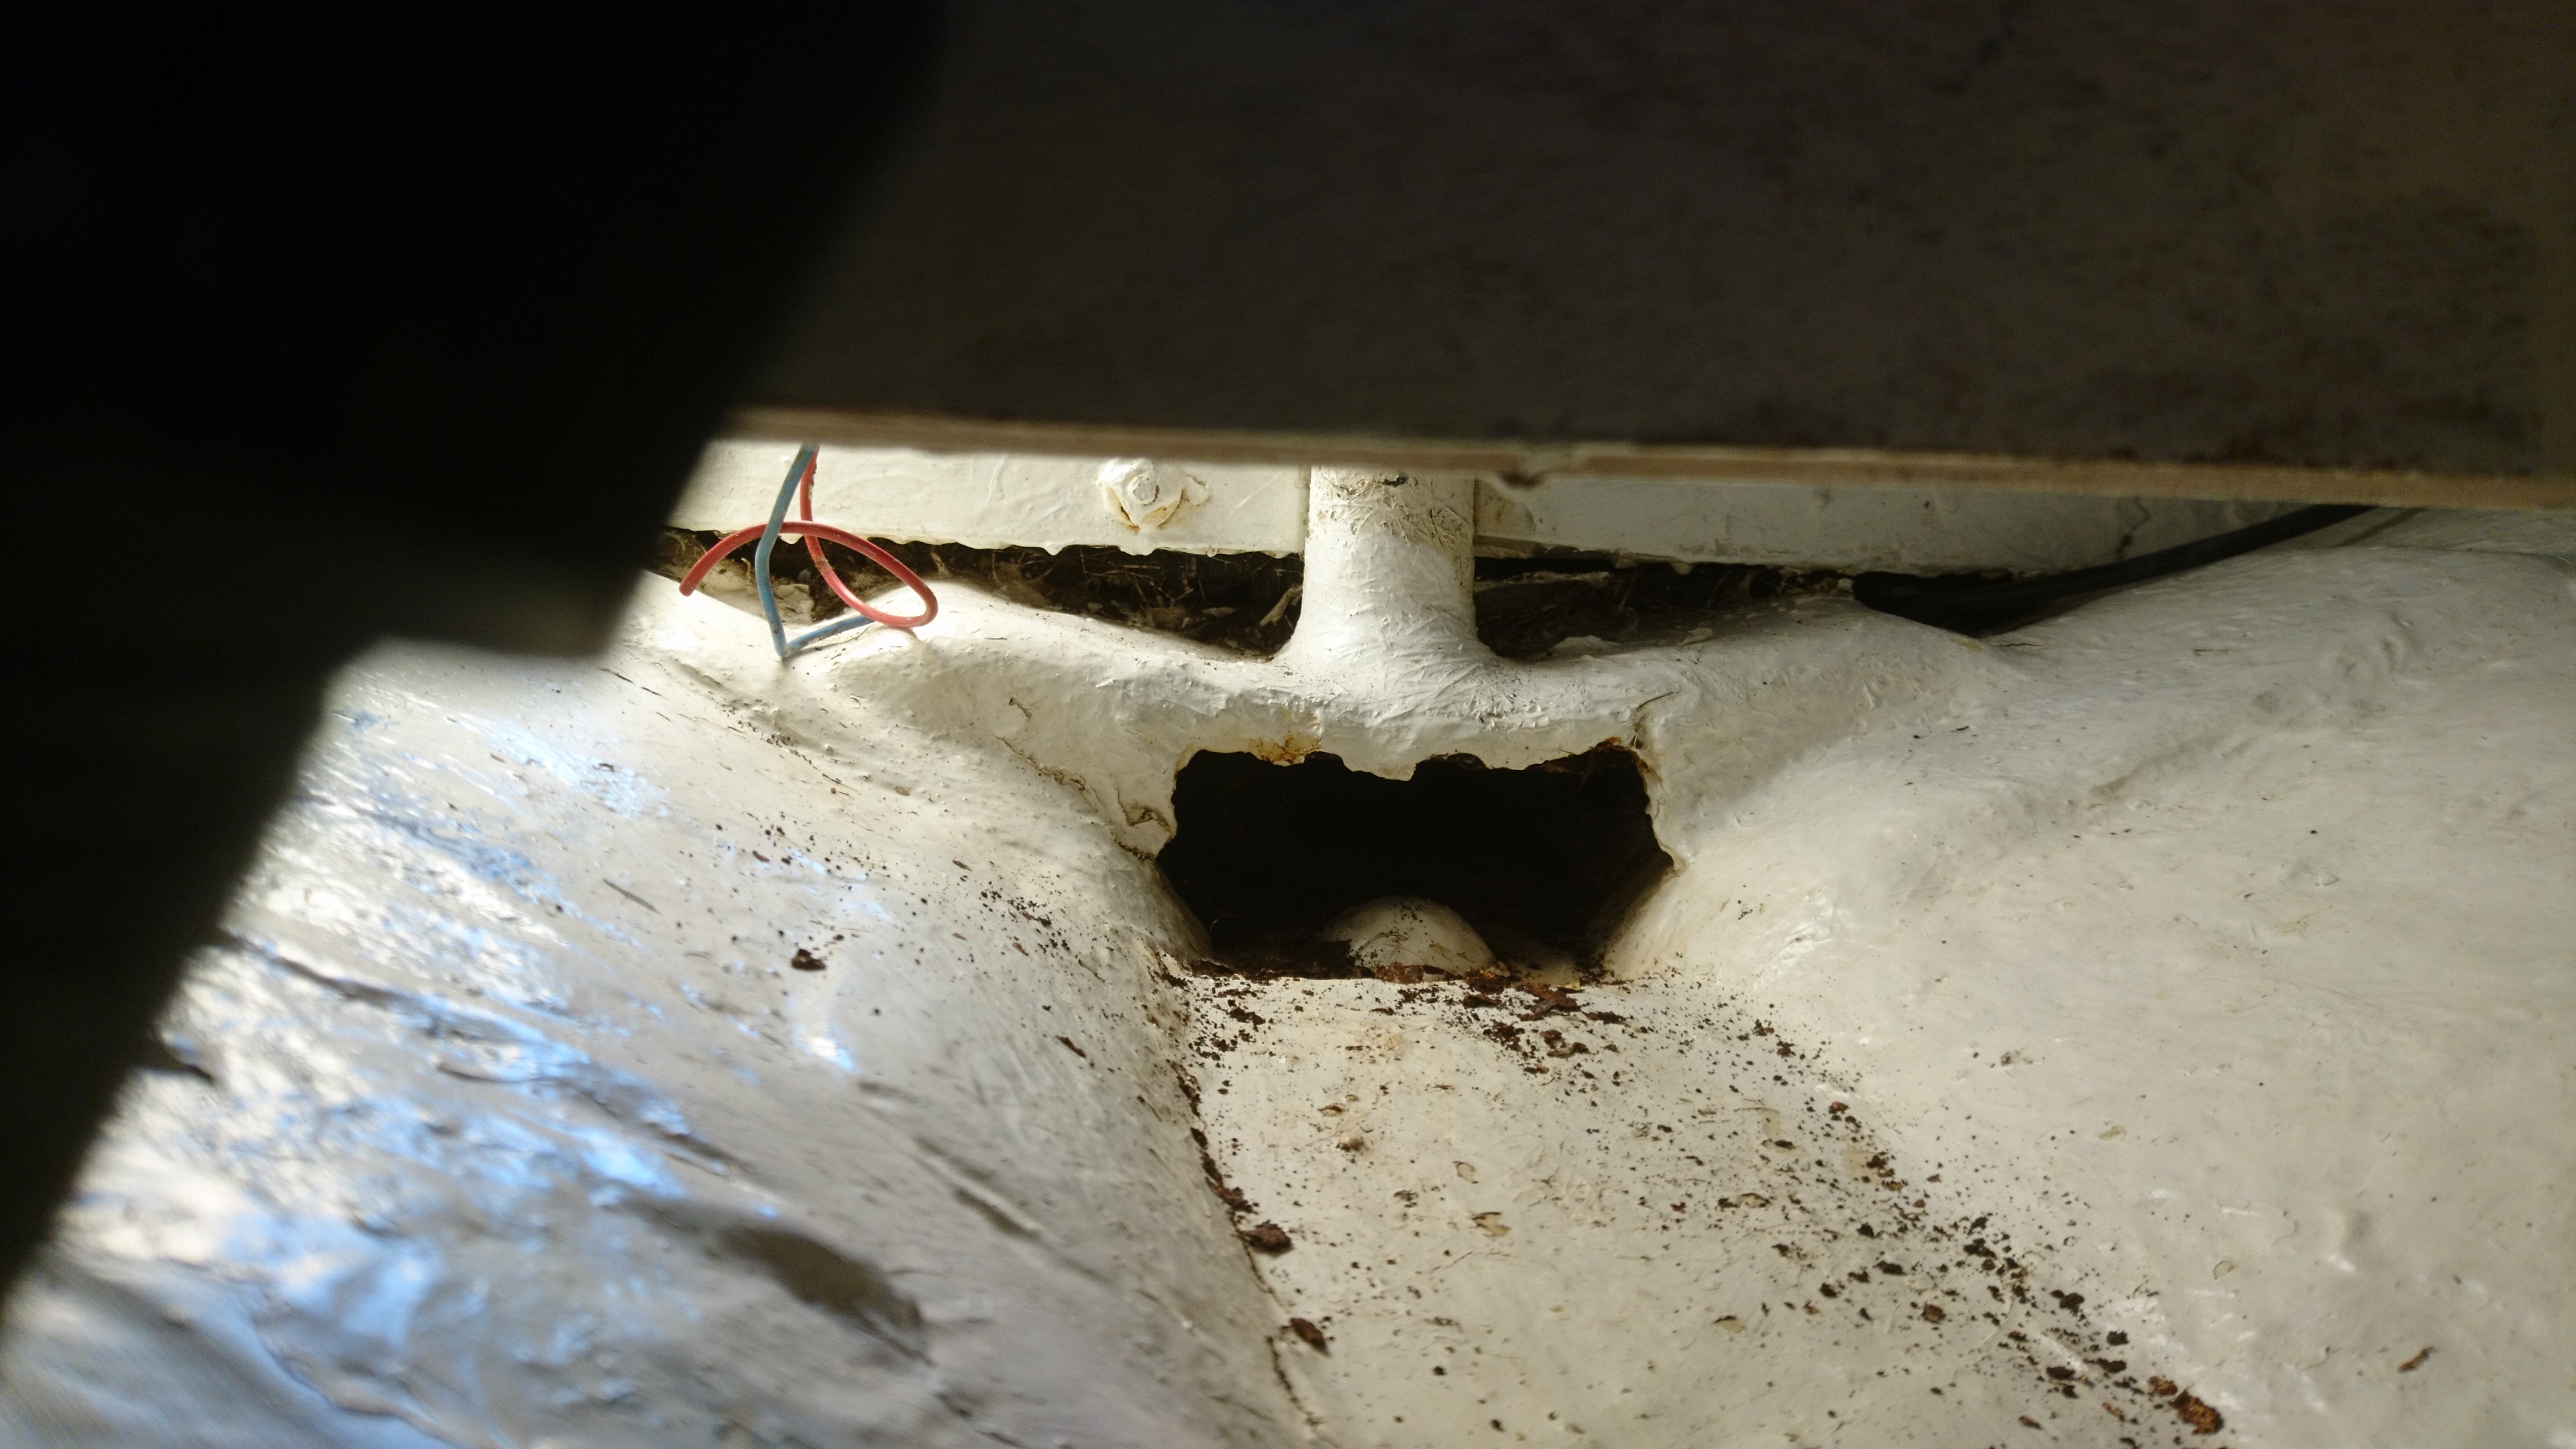
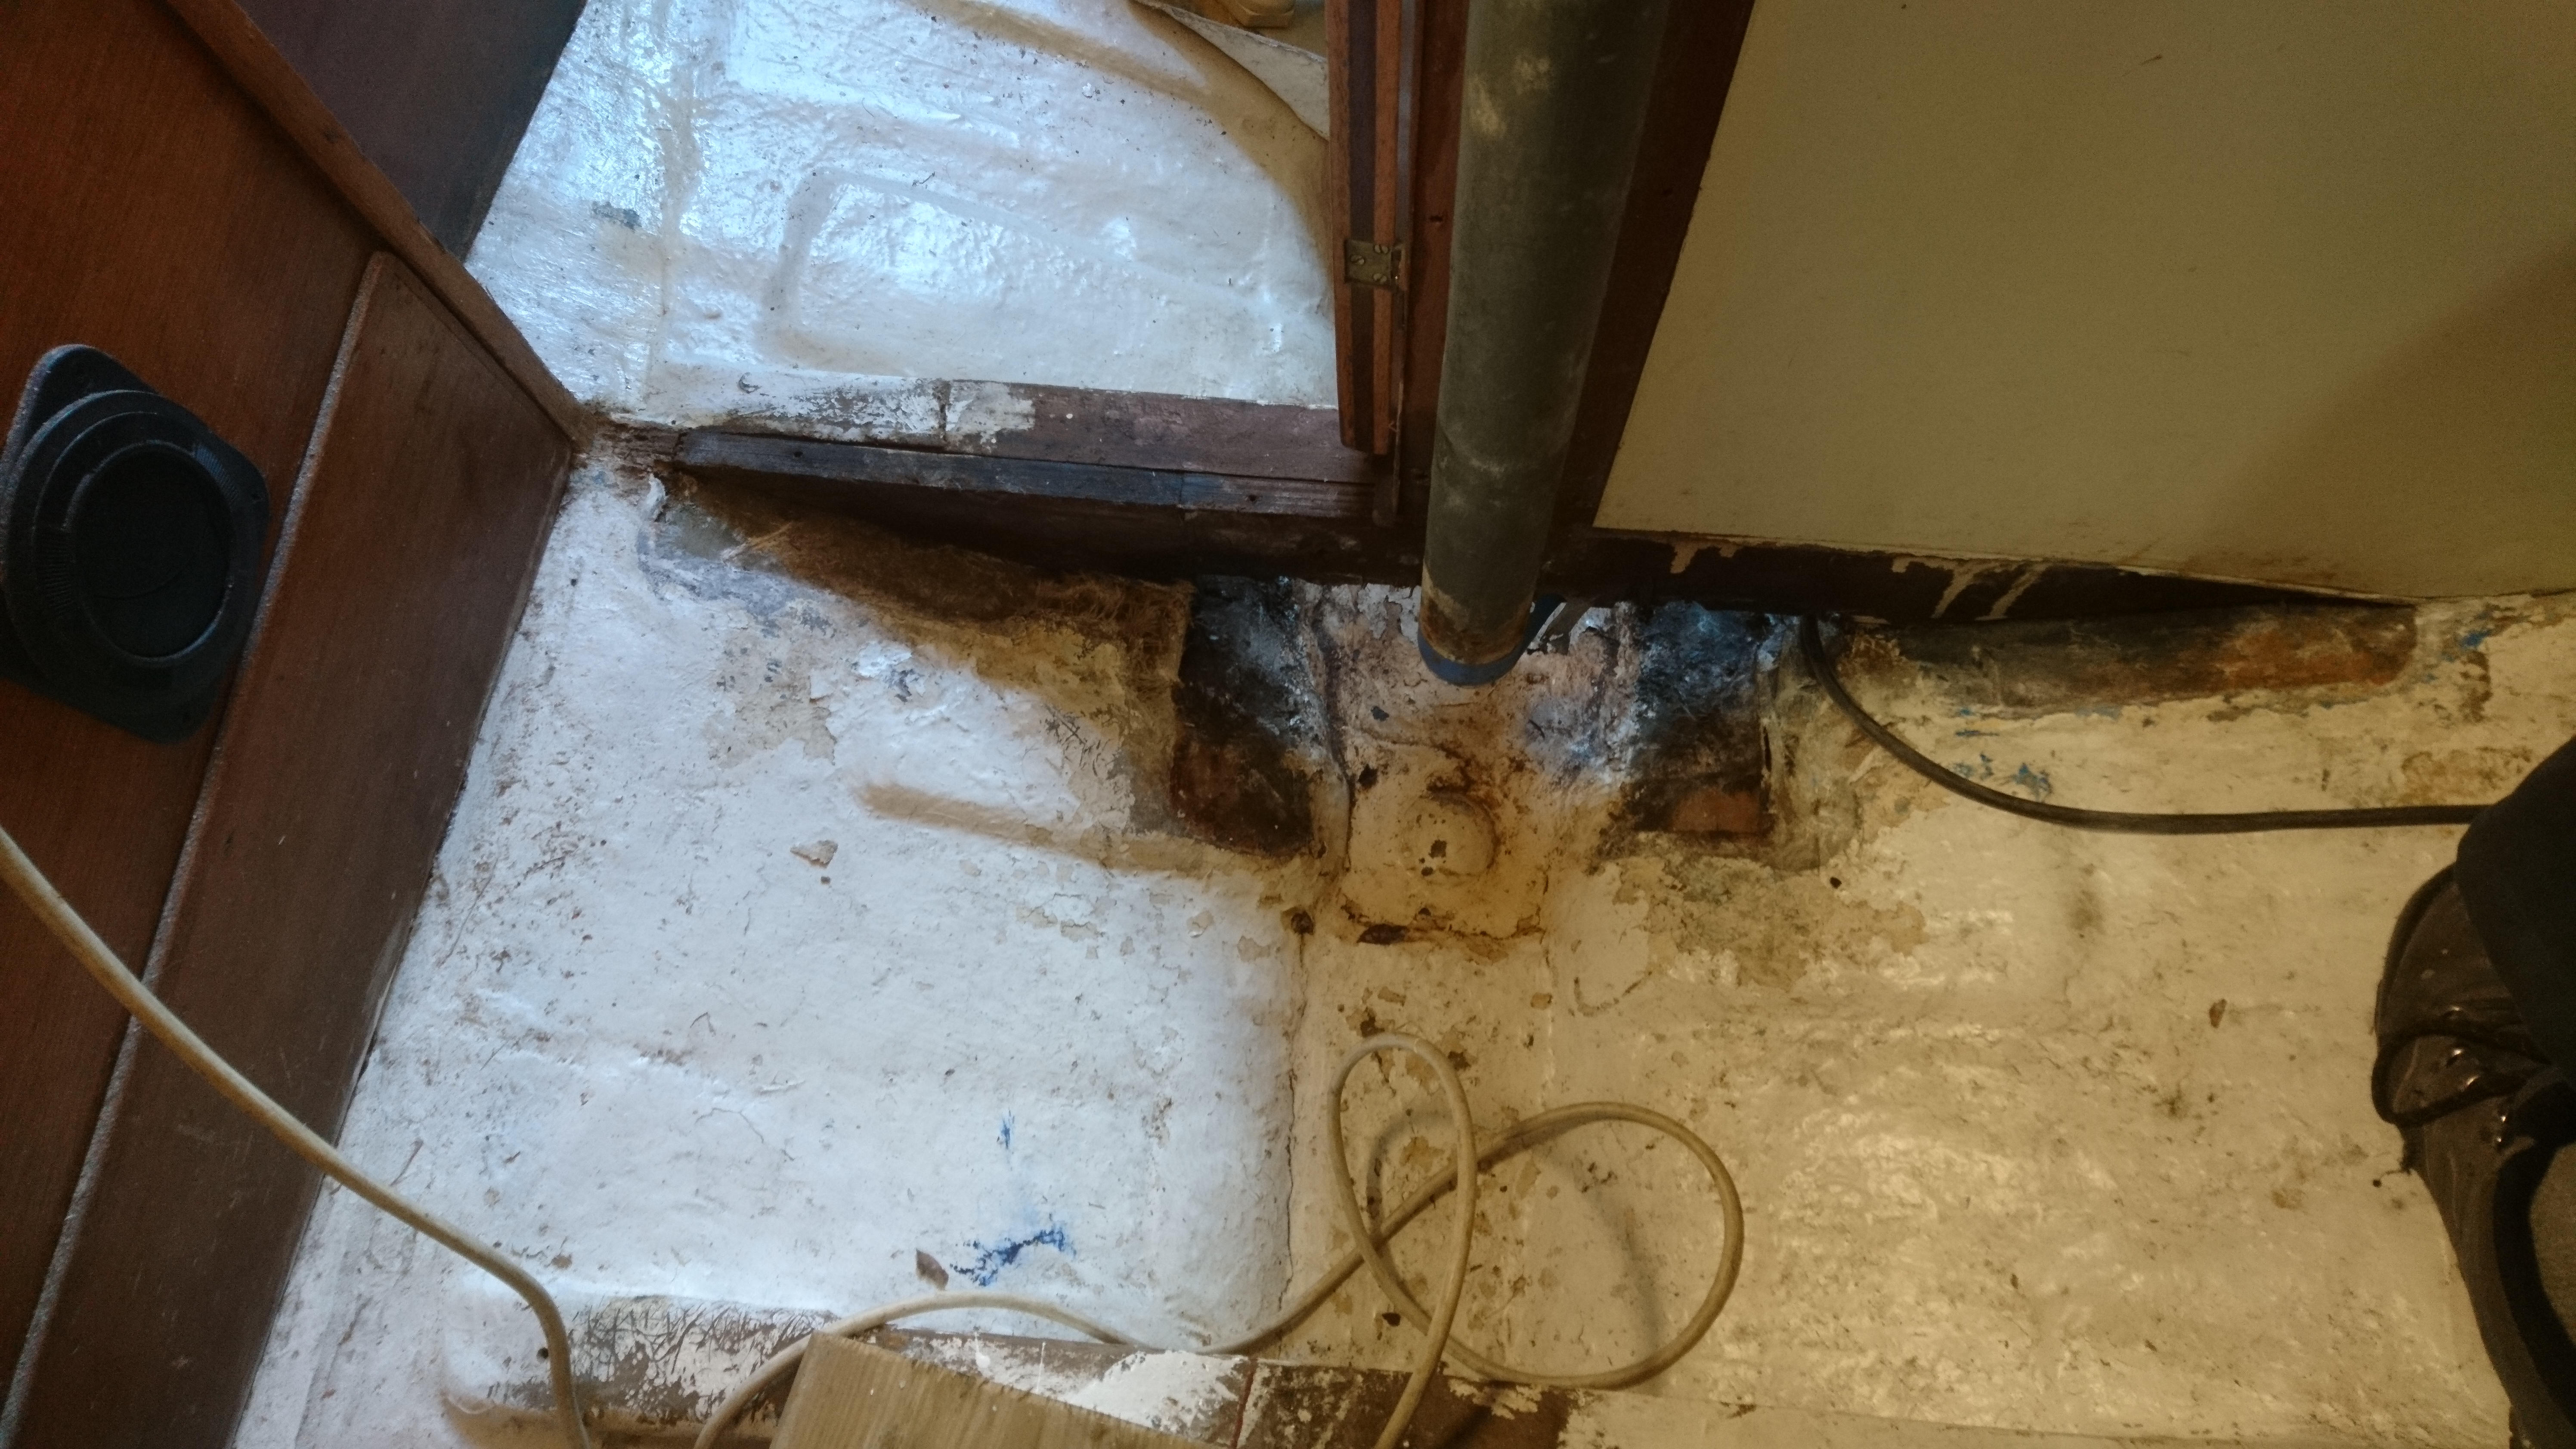
For some inexplicable reason the builder had positioned a keel bolt almost directly under the mast compression post.
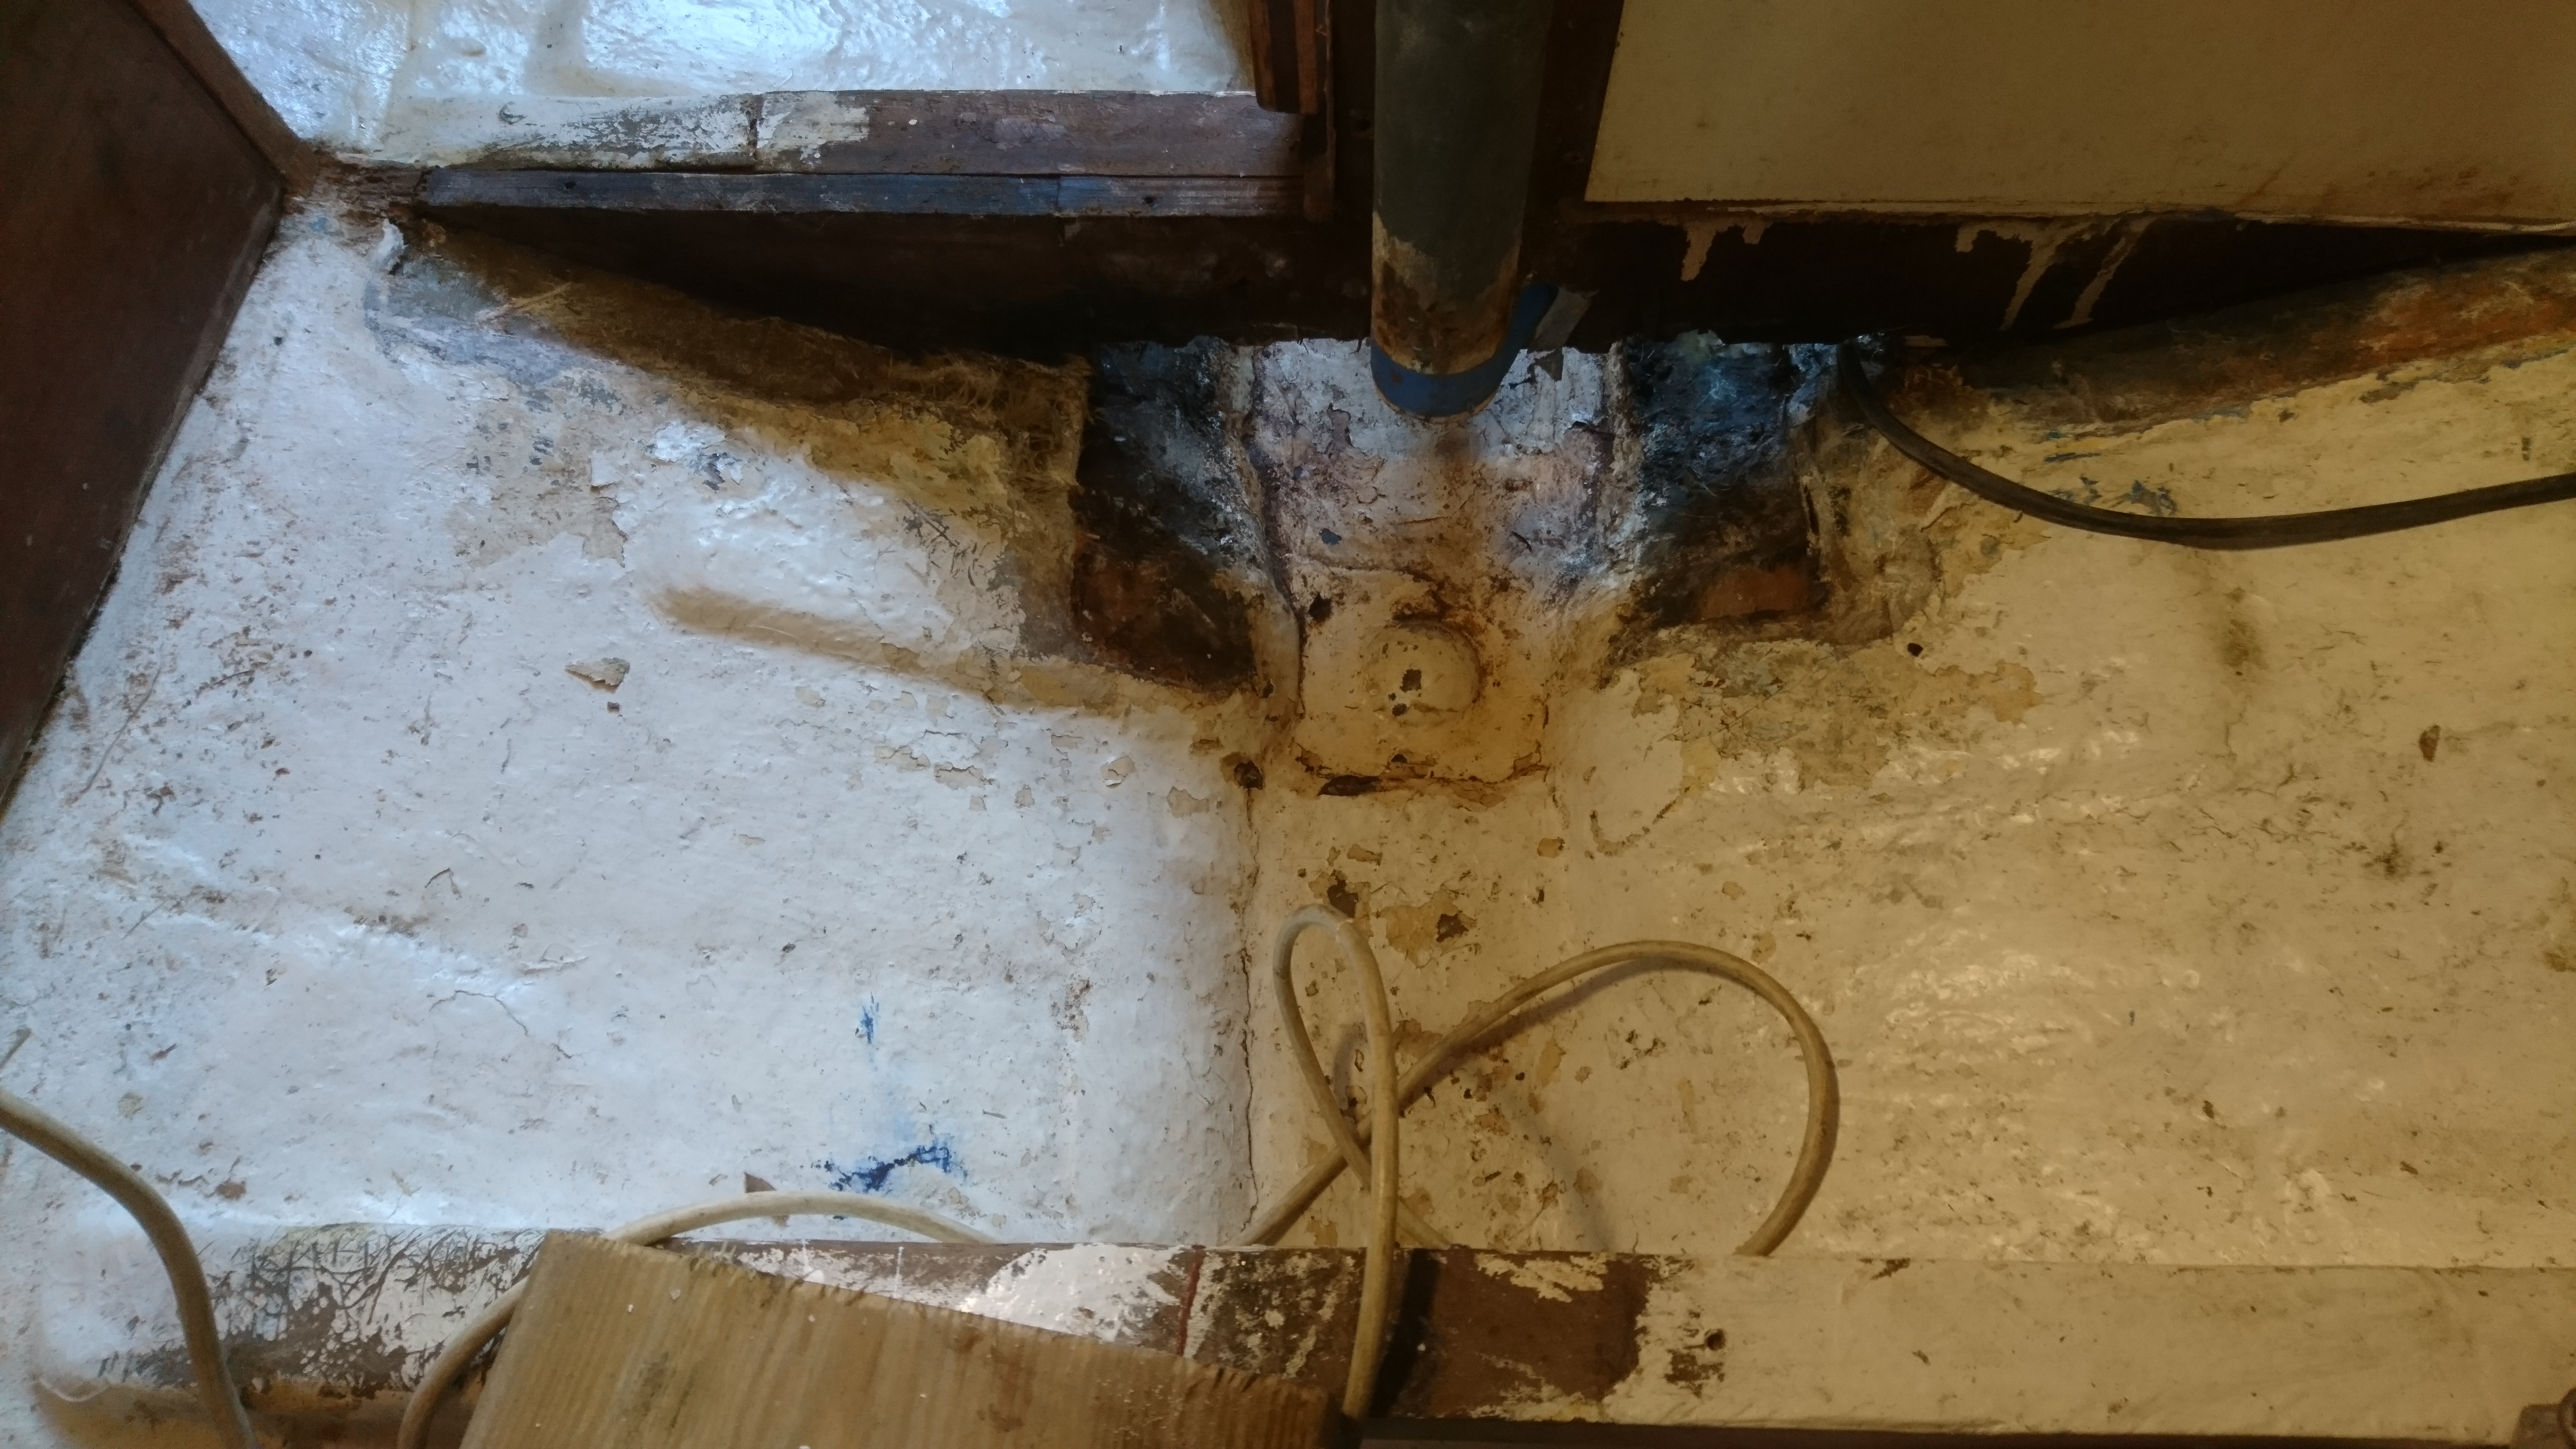
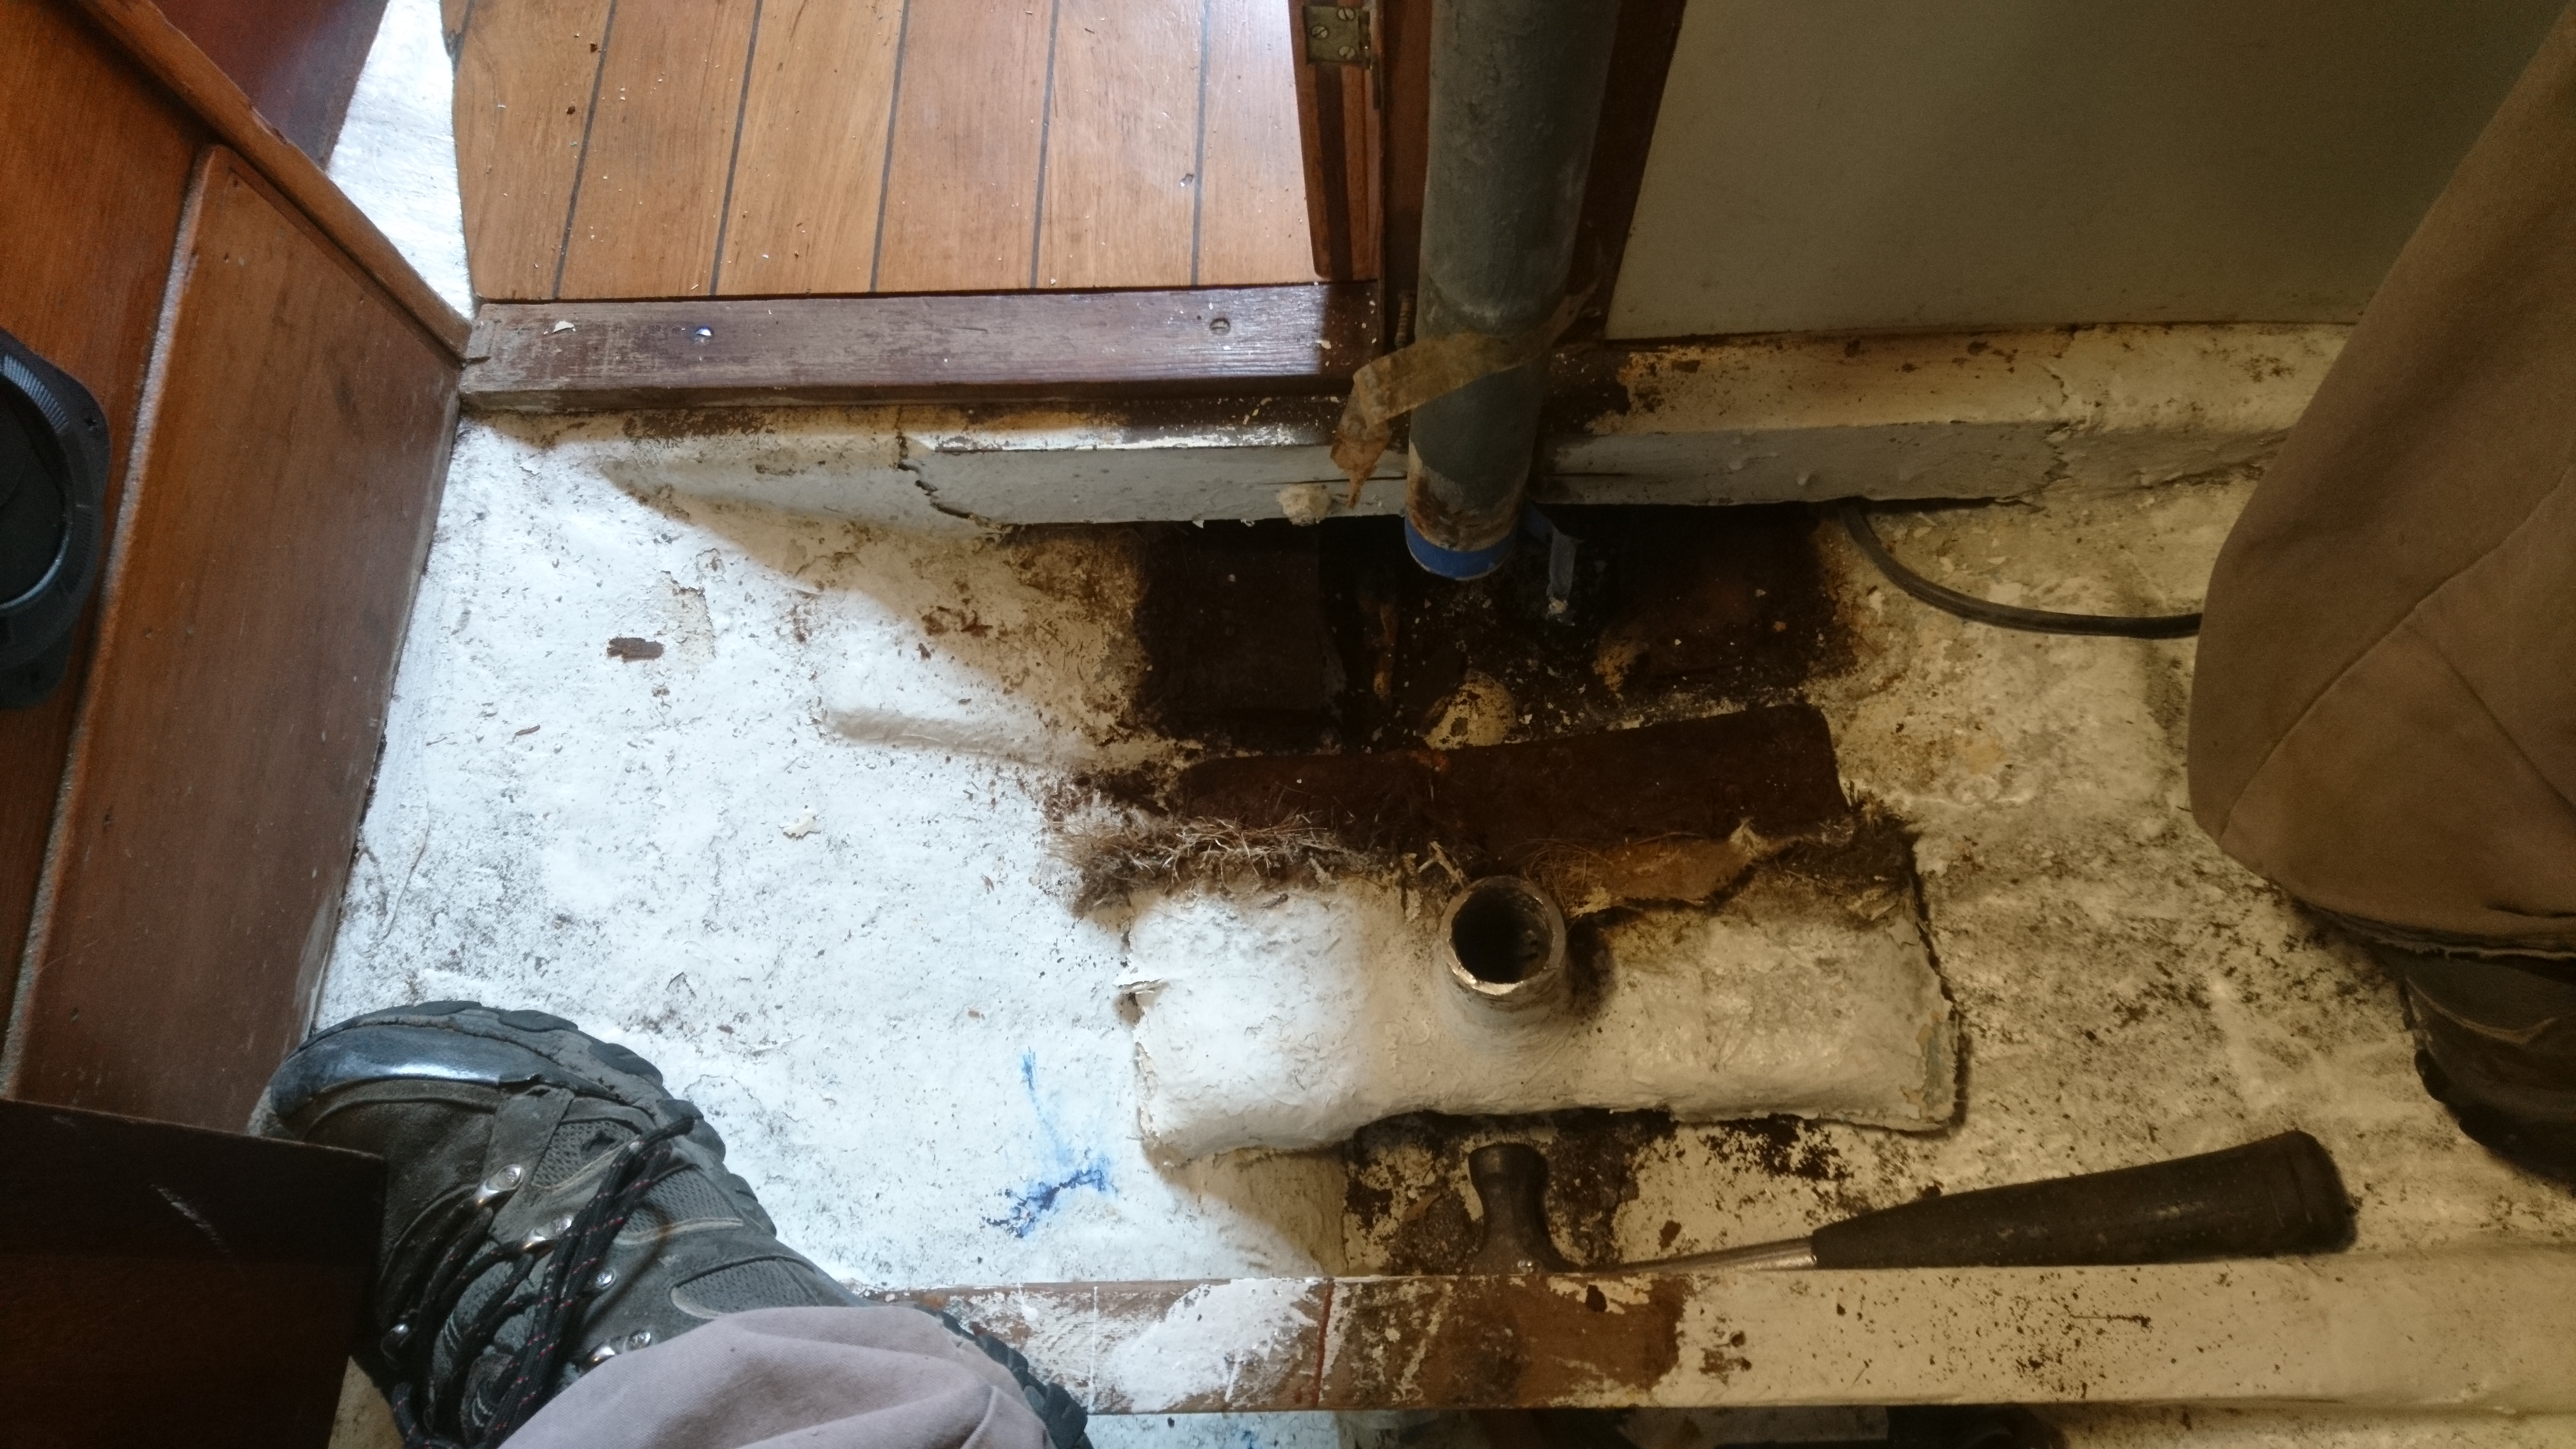
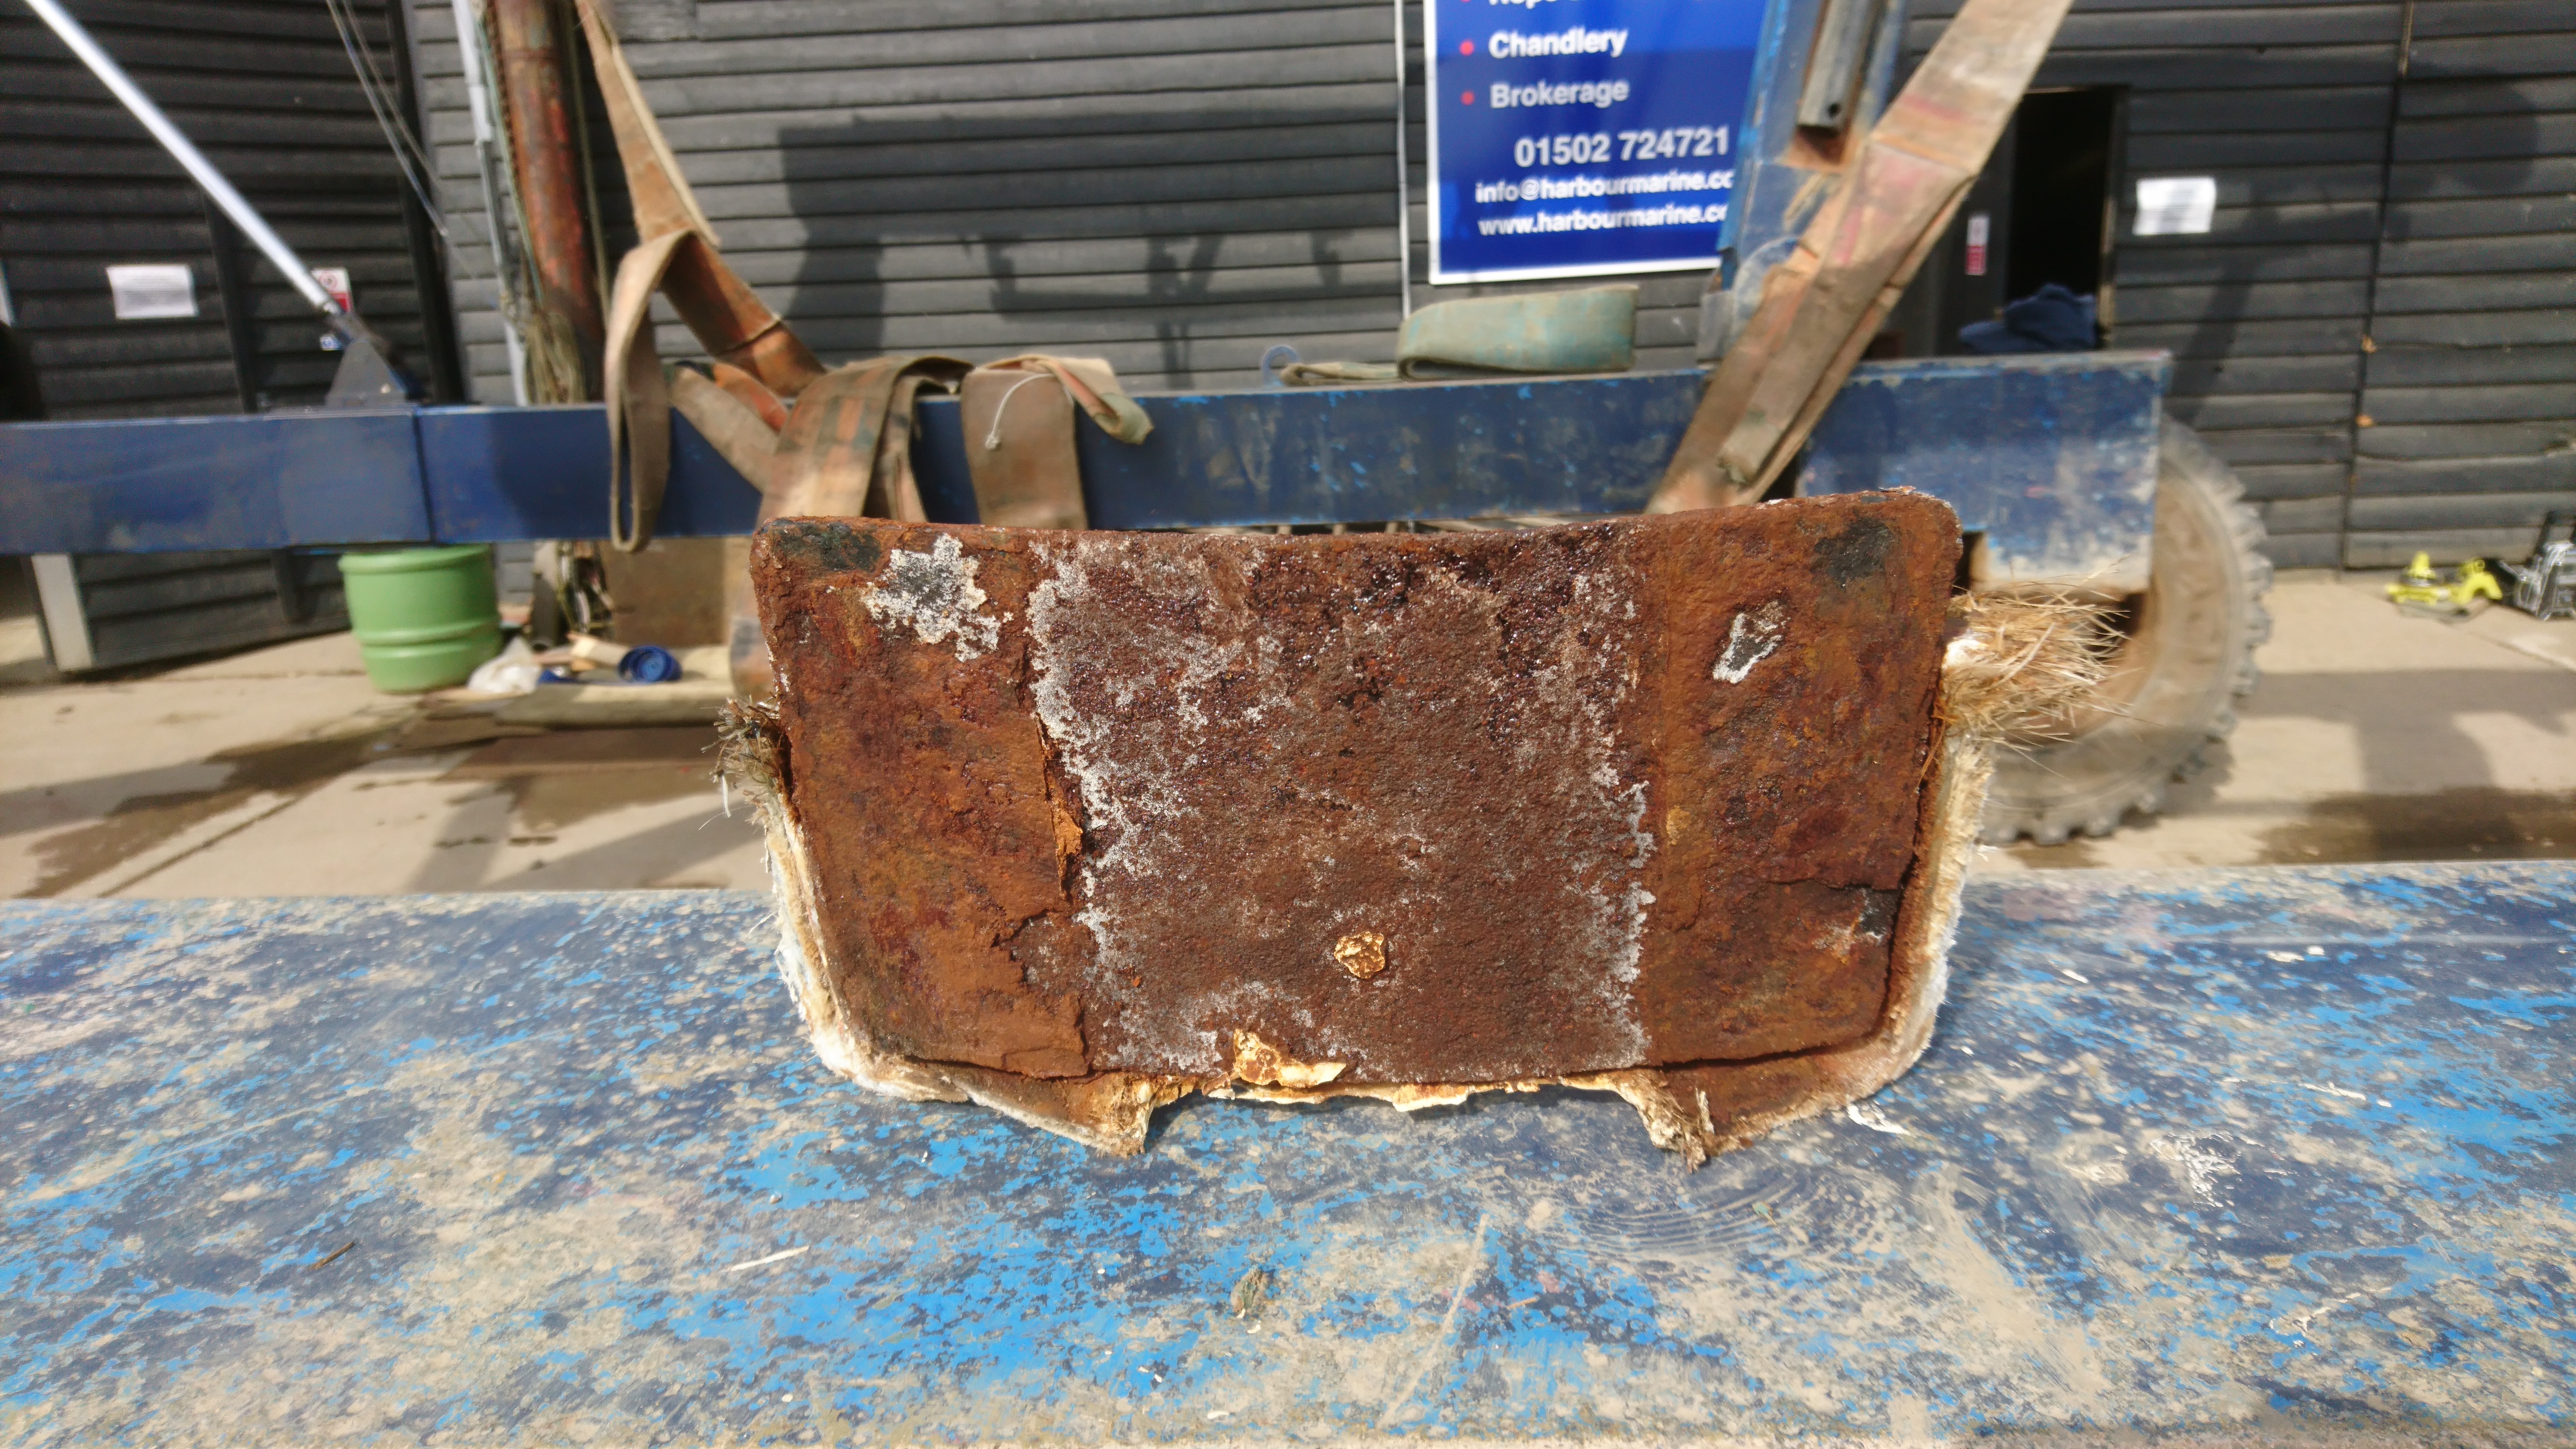
To enable access to this bolt they built a bridge across the bilge using 6mm steel plate.
Over time the plate corroded and the bridge collapsed due to the rig loads and the deck was pressed down onto the saloon bulkhead, just aft of the post.
Over a little more time the inner skin of the deck gave way crushing the balsa core and created an external bump in the glass outer skin.
Obviously if this continued the deck would have been pierced with the real possibility of losing the rig over the side.
The answer was simple, make a bigger, stronger, more supportive base for the compression post.
Initially I wanted to try and repair without dropping the rig to save the owner a few bob but even with all the rig tension slackened off there was still too much flex in the deck.
Lucky for us our mobile crane can unstep a mast without us having to haul the boat out and so an hour later the rig was sitting on trestles on the pontoon.
The task of getting the old post out, which appeared to have been fitted before the main saloon bulkhead was not quite so straight forward.
There simply was no way to get the post out in one piece and even then a section at the top of the bulkhead would have to be cut away.
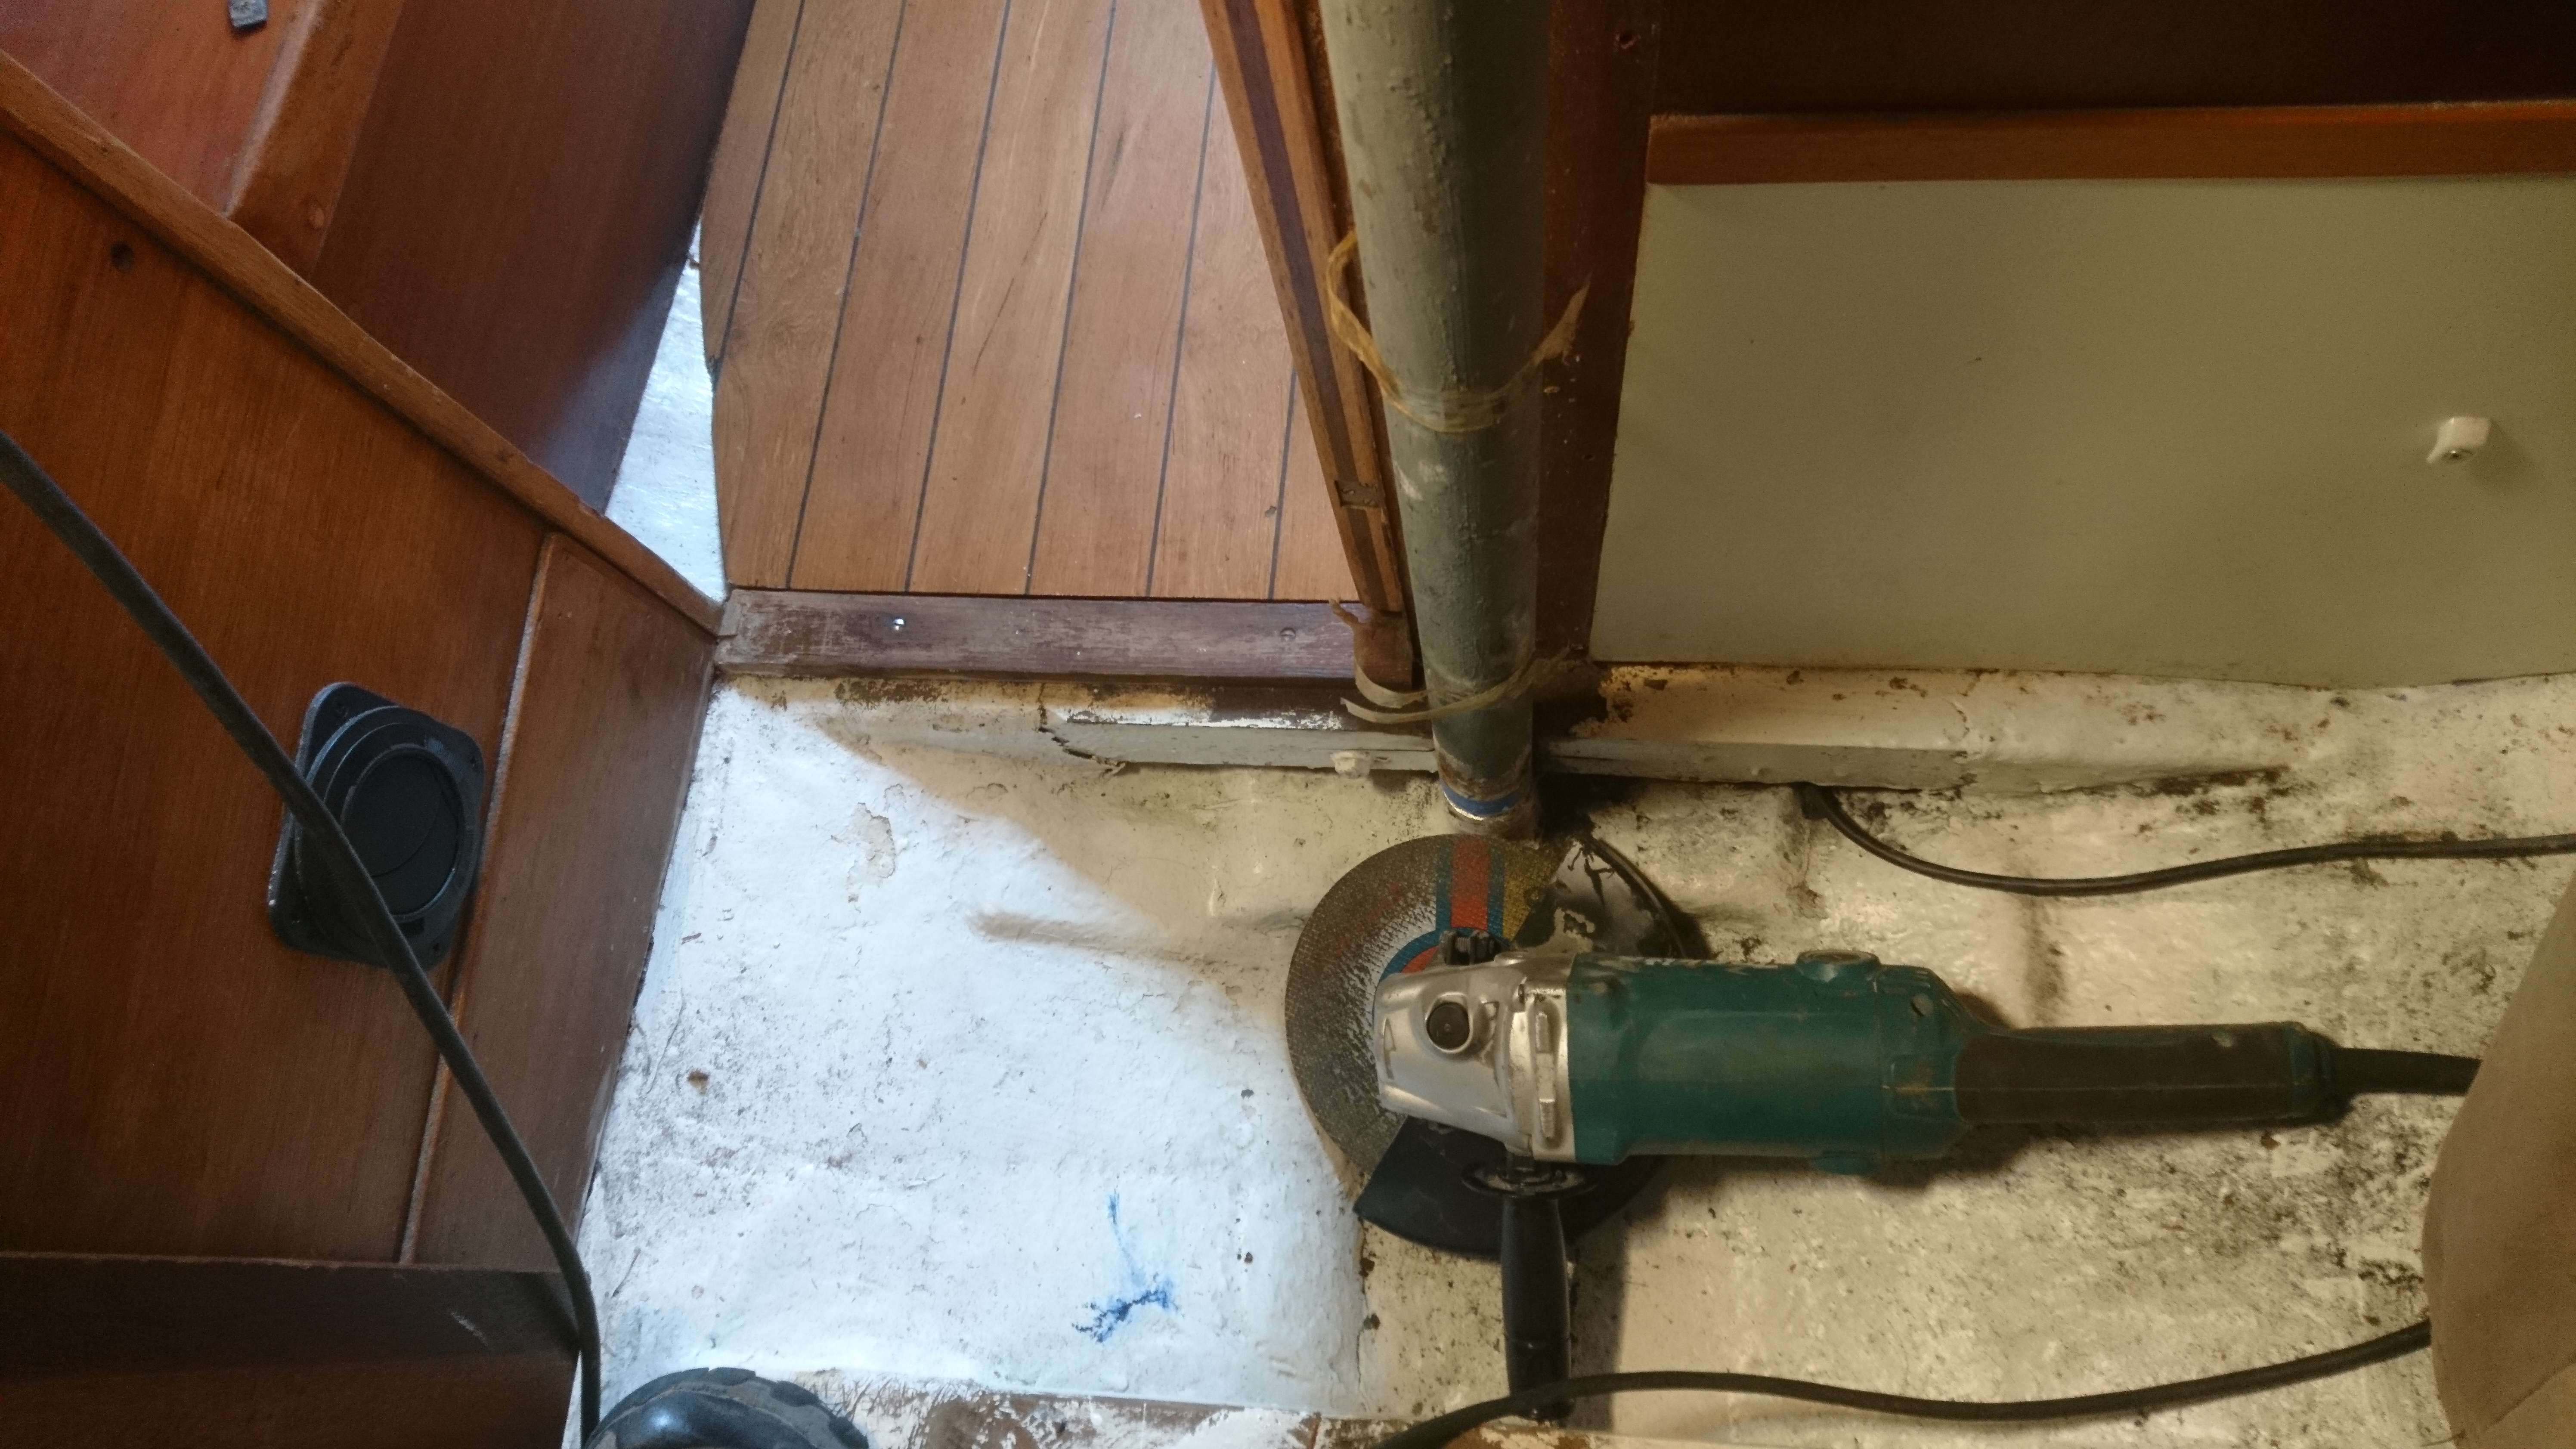
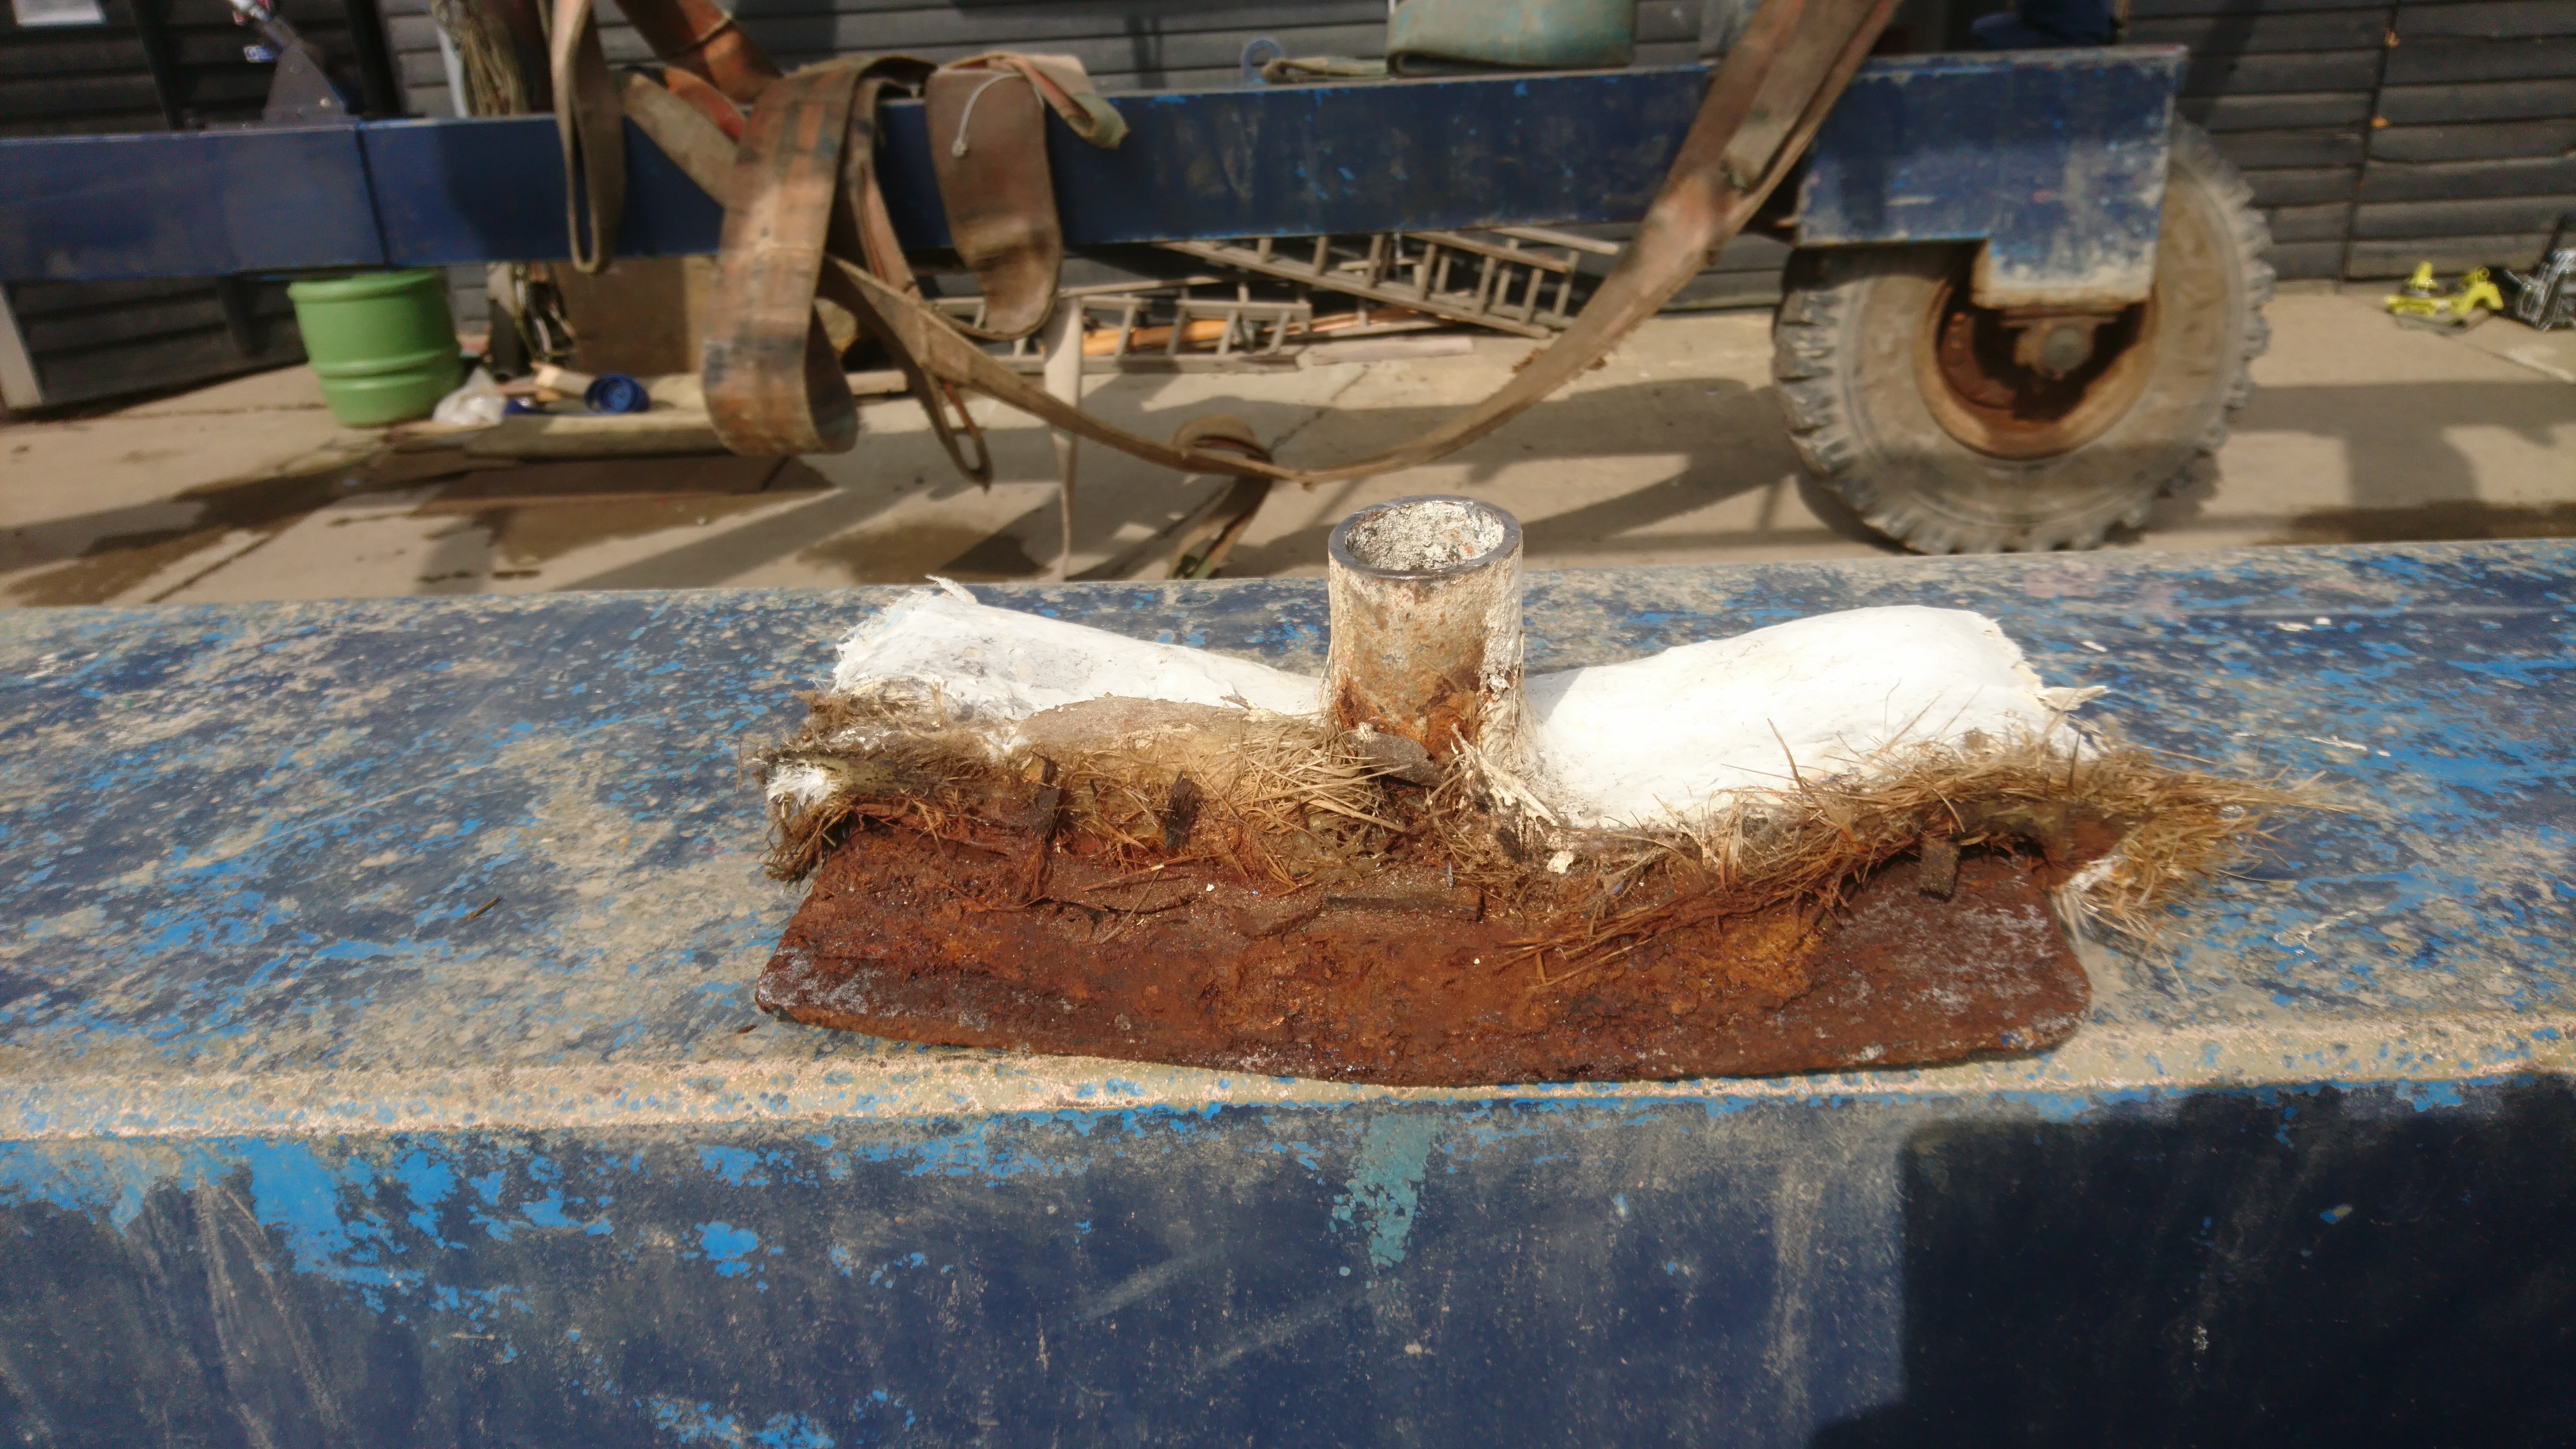
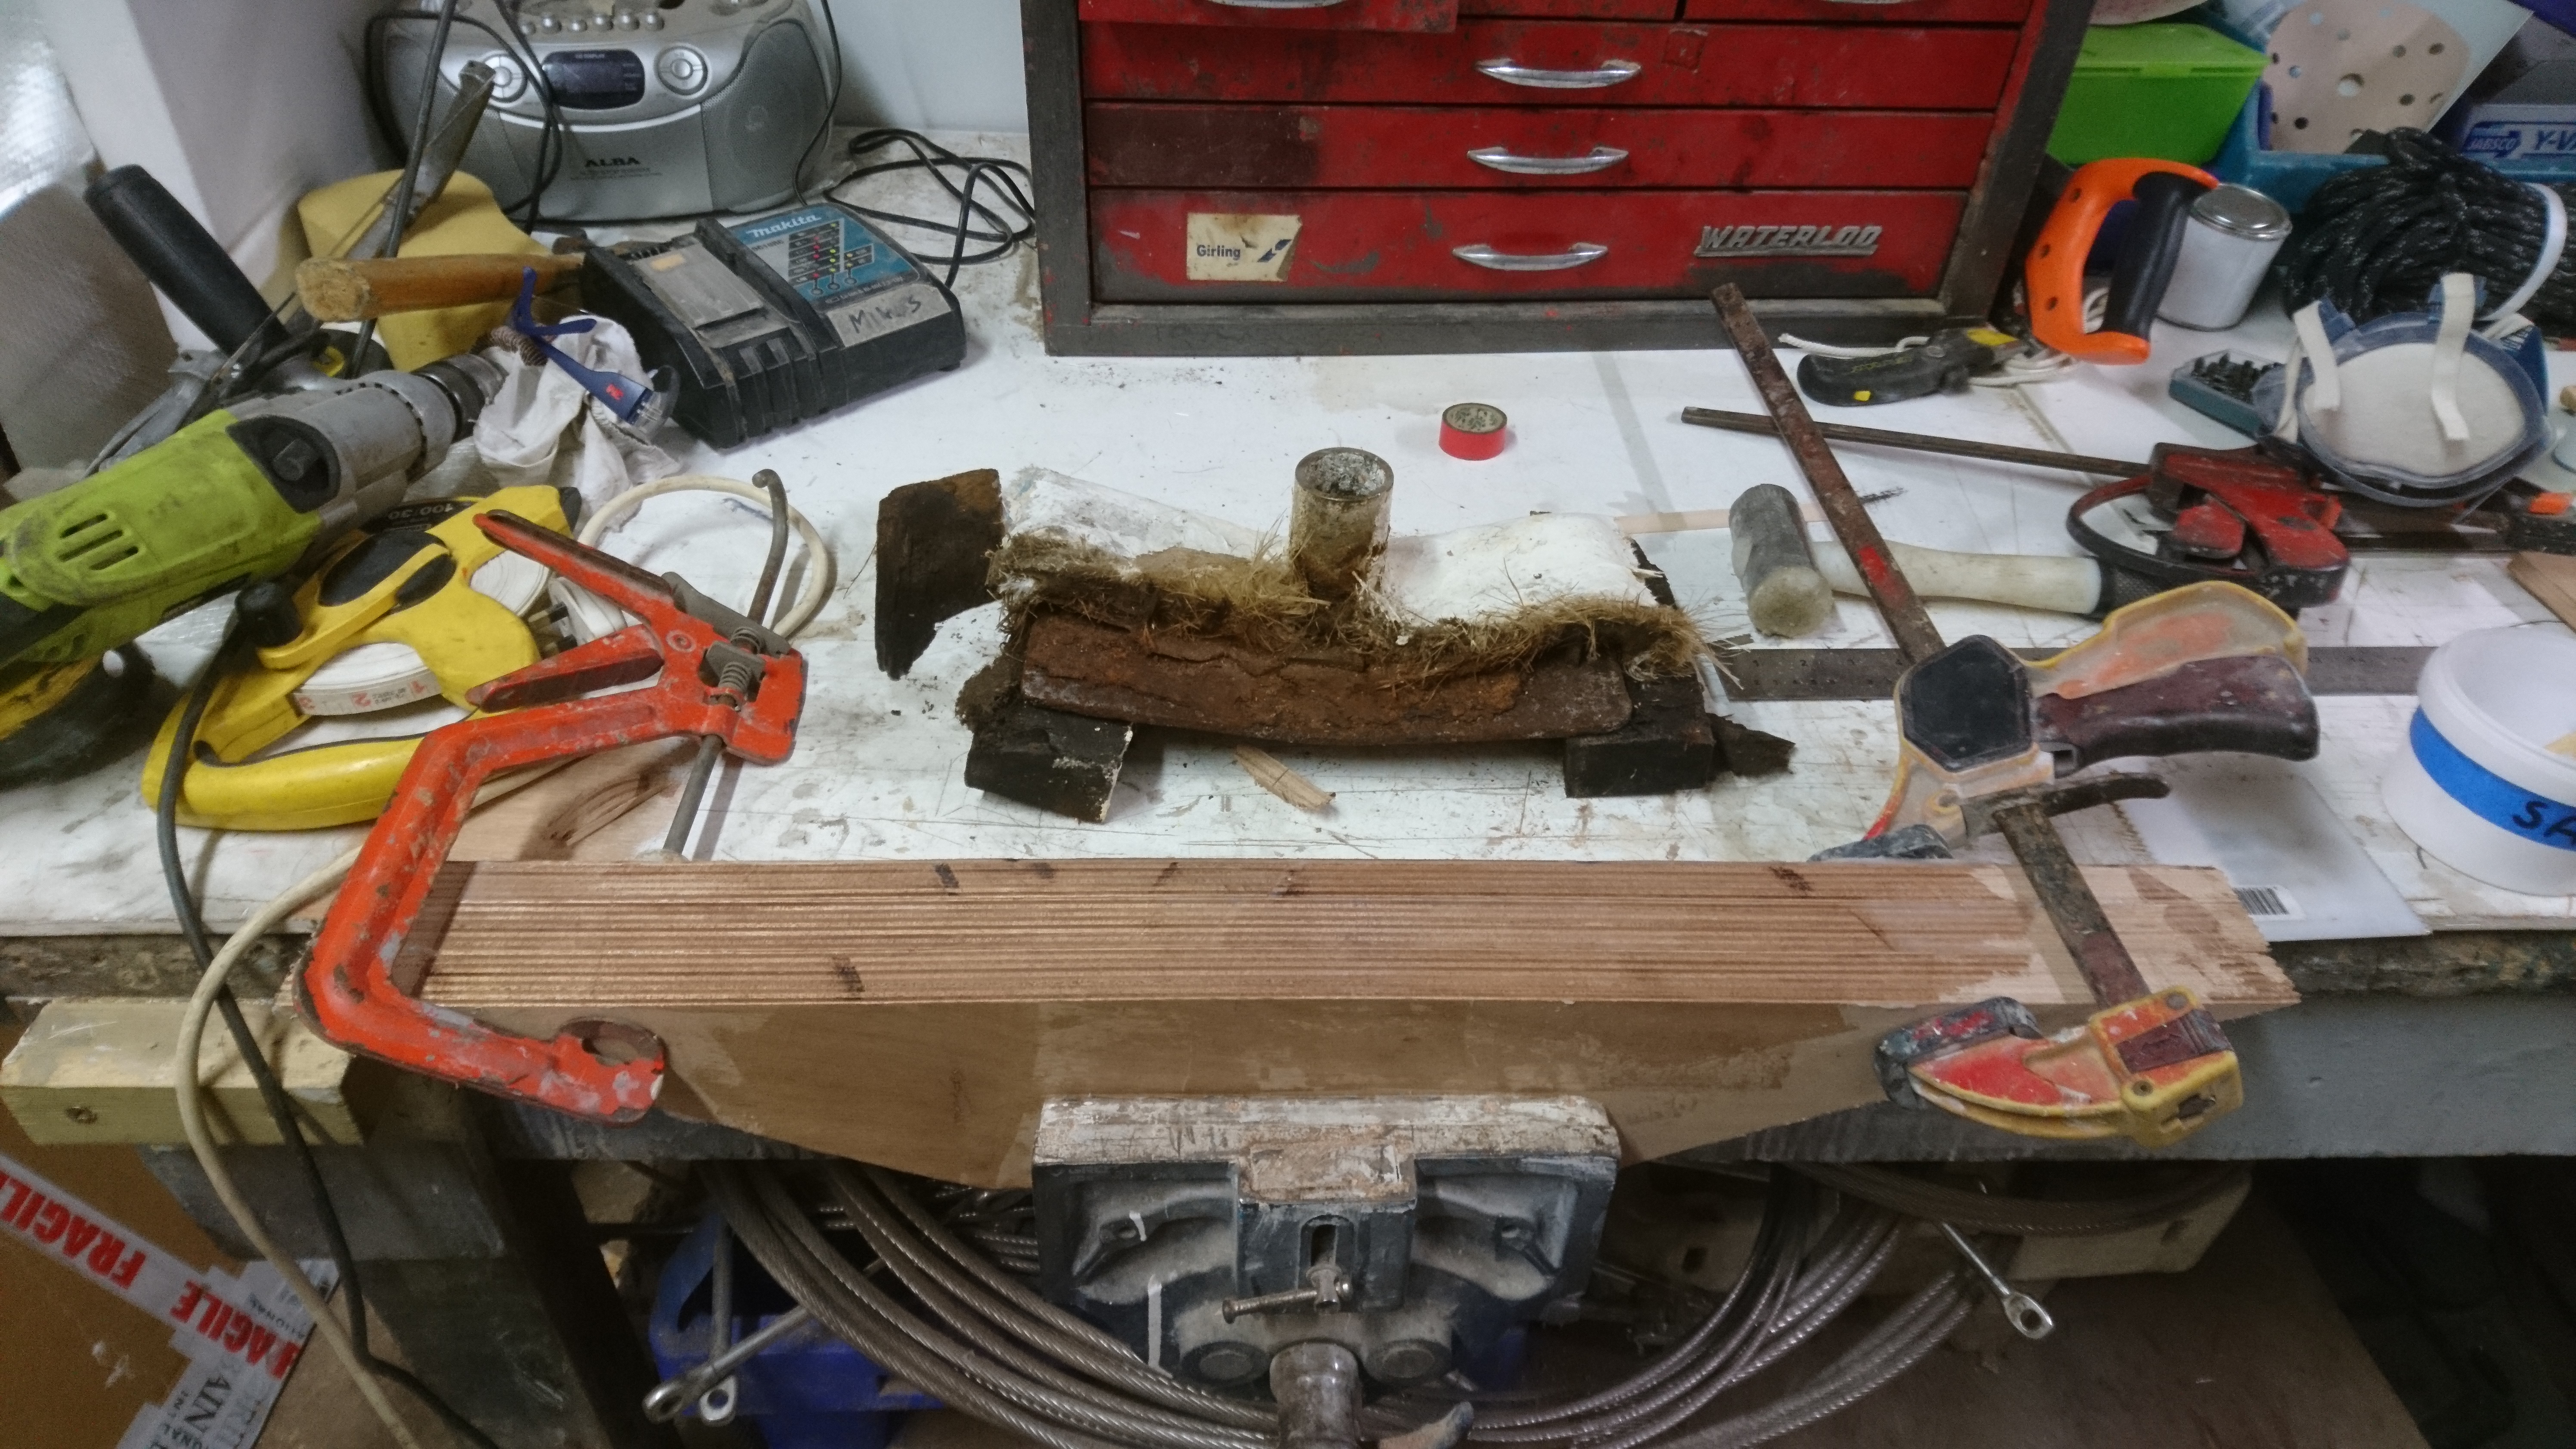
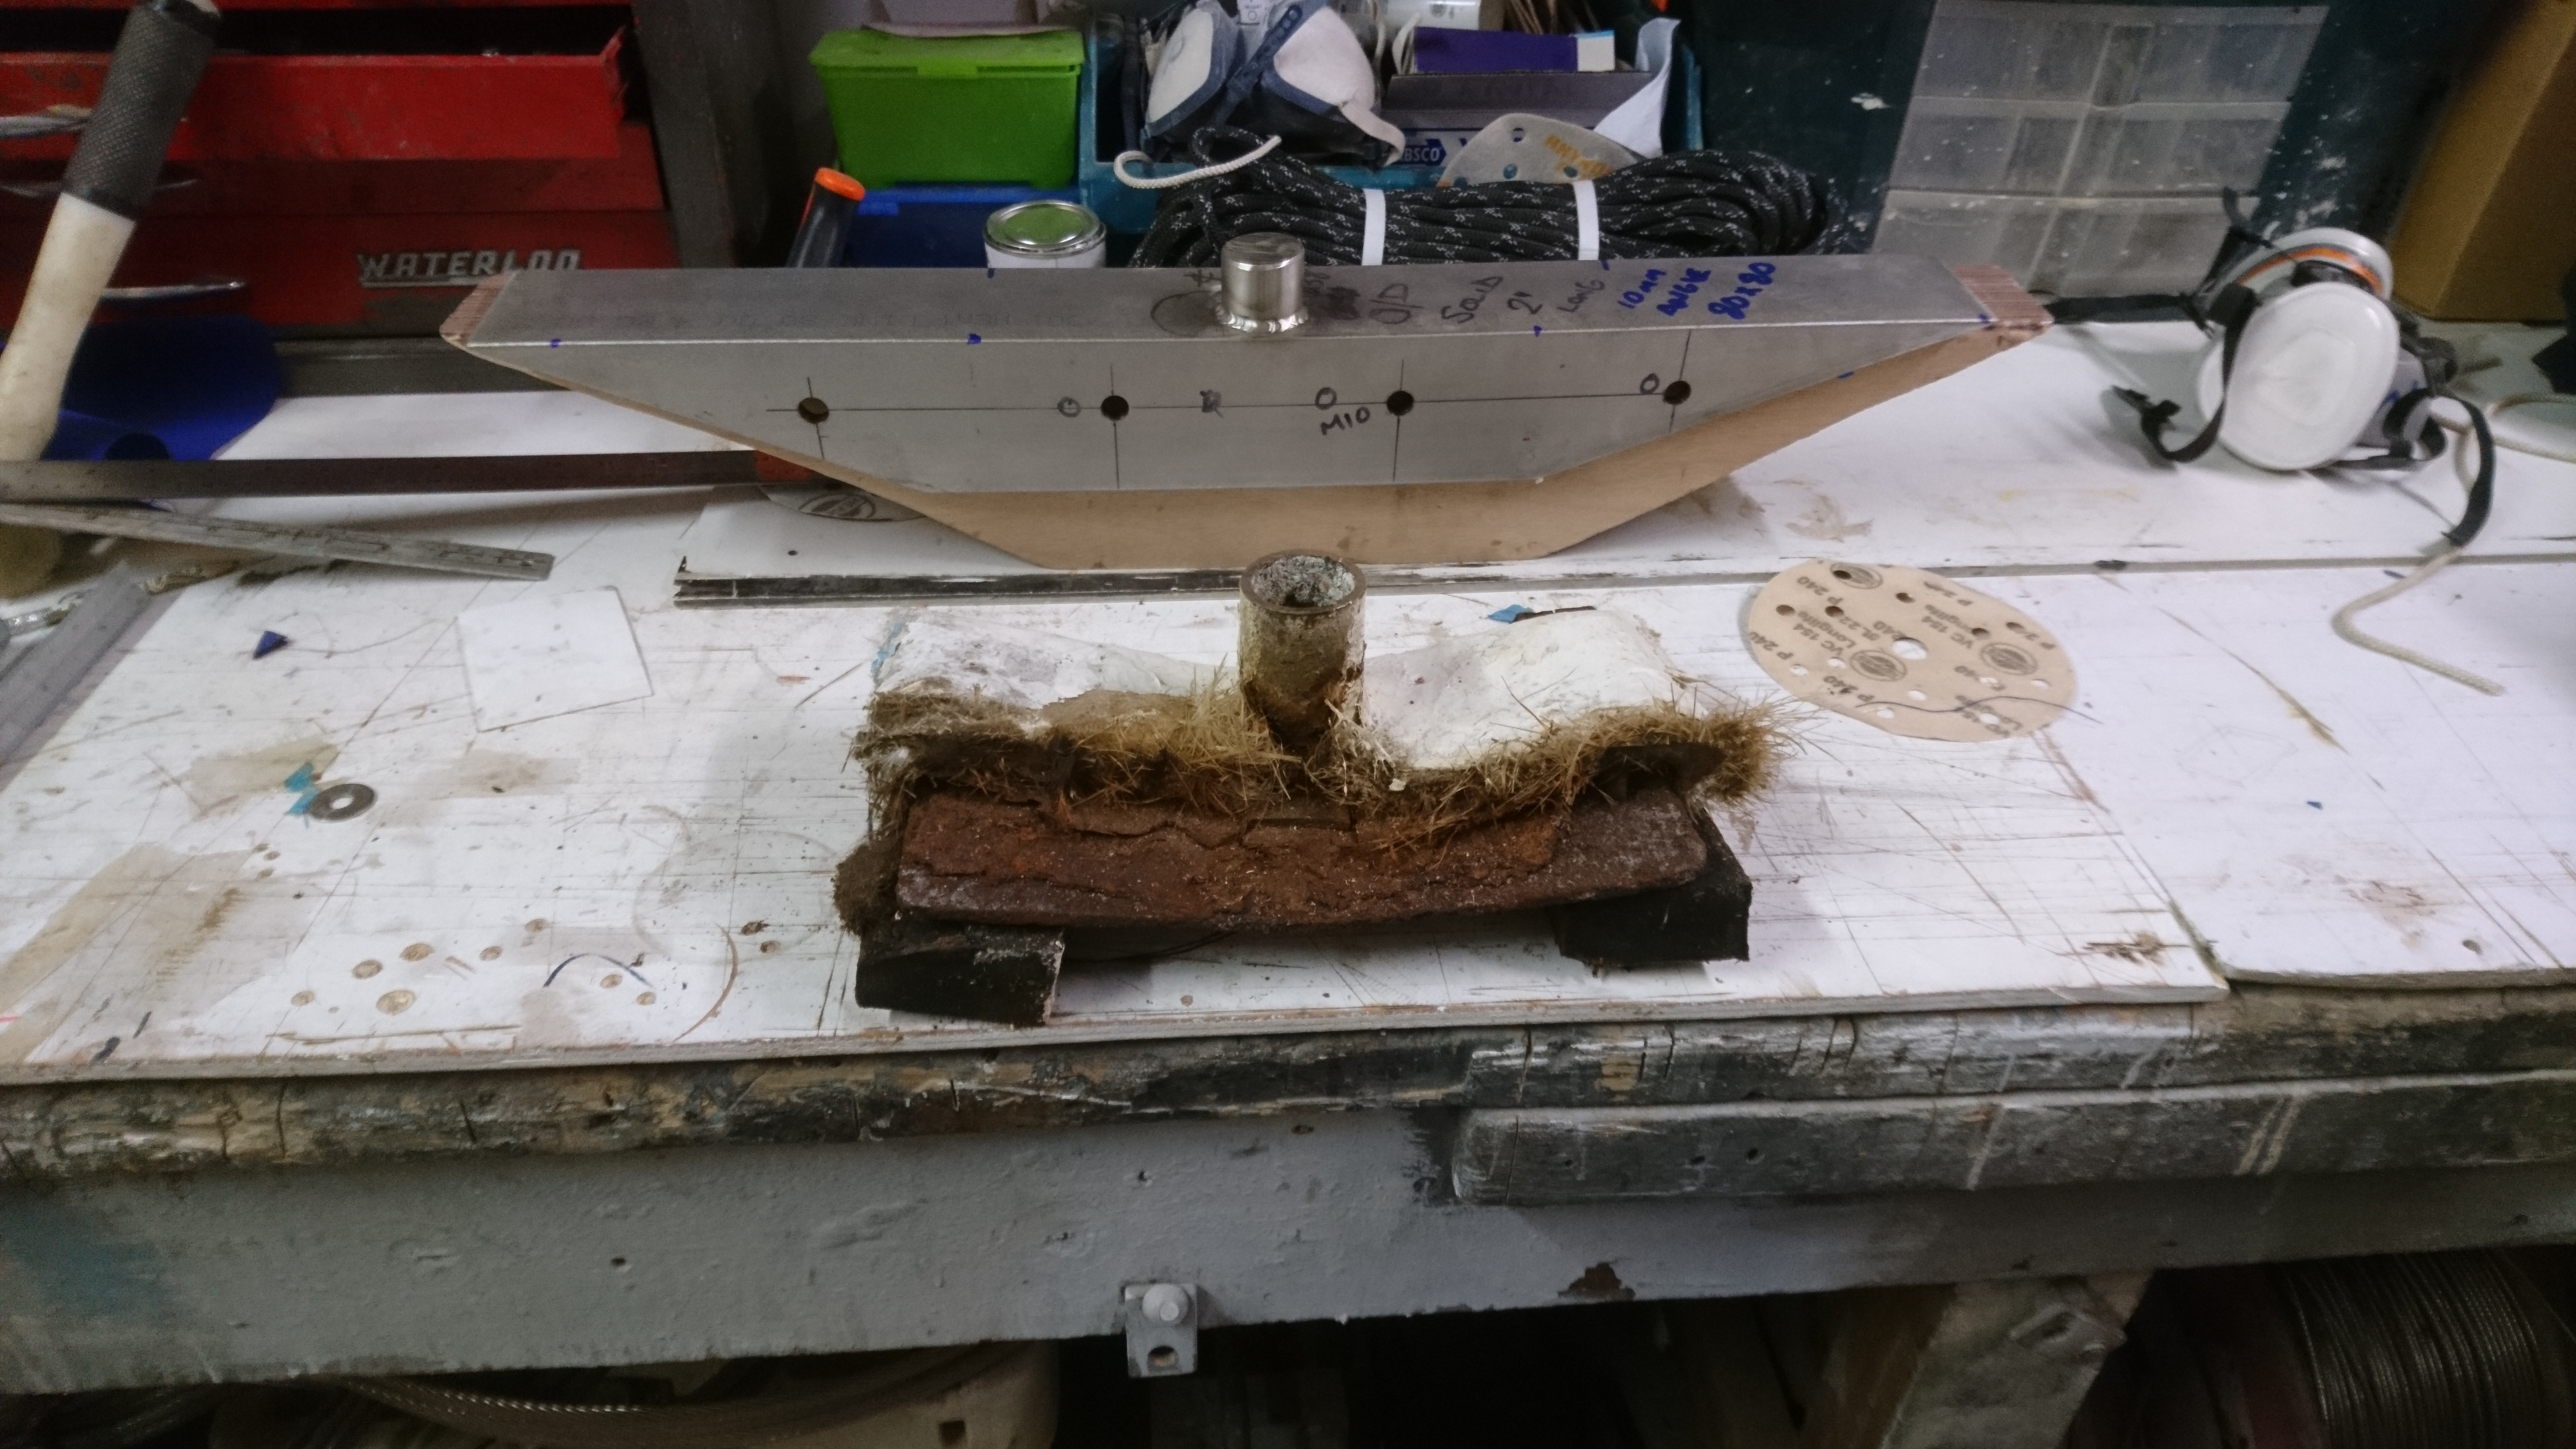
The post was made of 2″ galvanized steel tube with a 6mm plate welded to each end.
Interestingly there were no fasteners of any kind attaching the lower plate to anything, relying purely on a couple of layers of glass fibre.
Apart from the lower 4″, the compression post was in very good condition.
The 9″ grinder with a slitting disc took care of cutting off the corroded 4″ of tube and base plate.
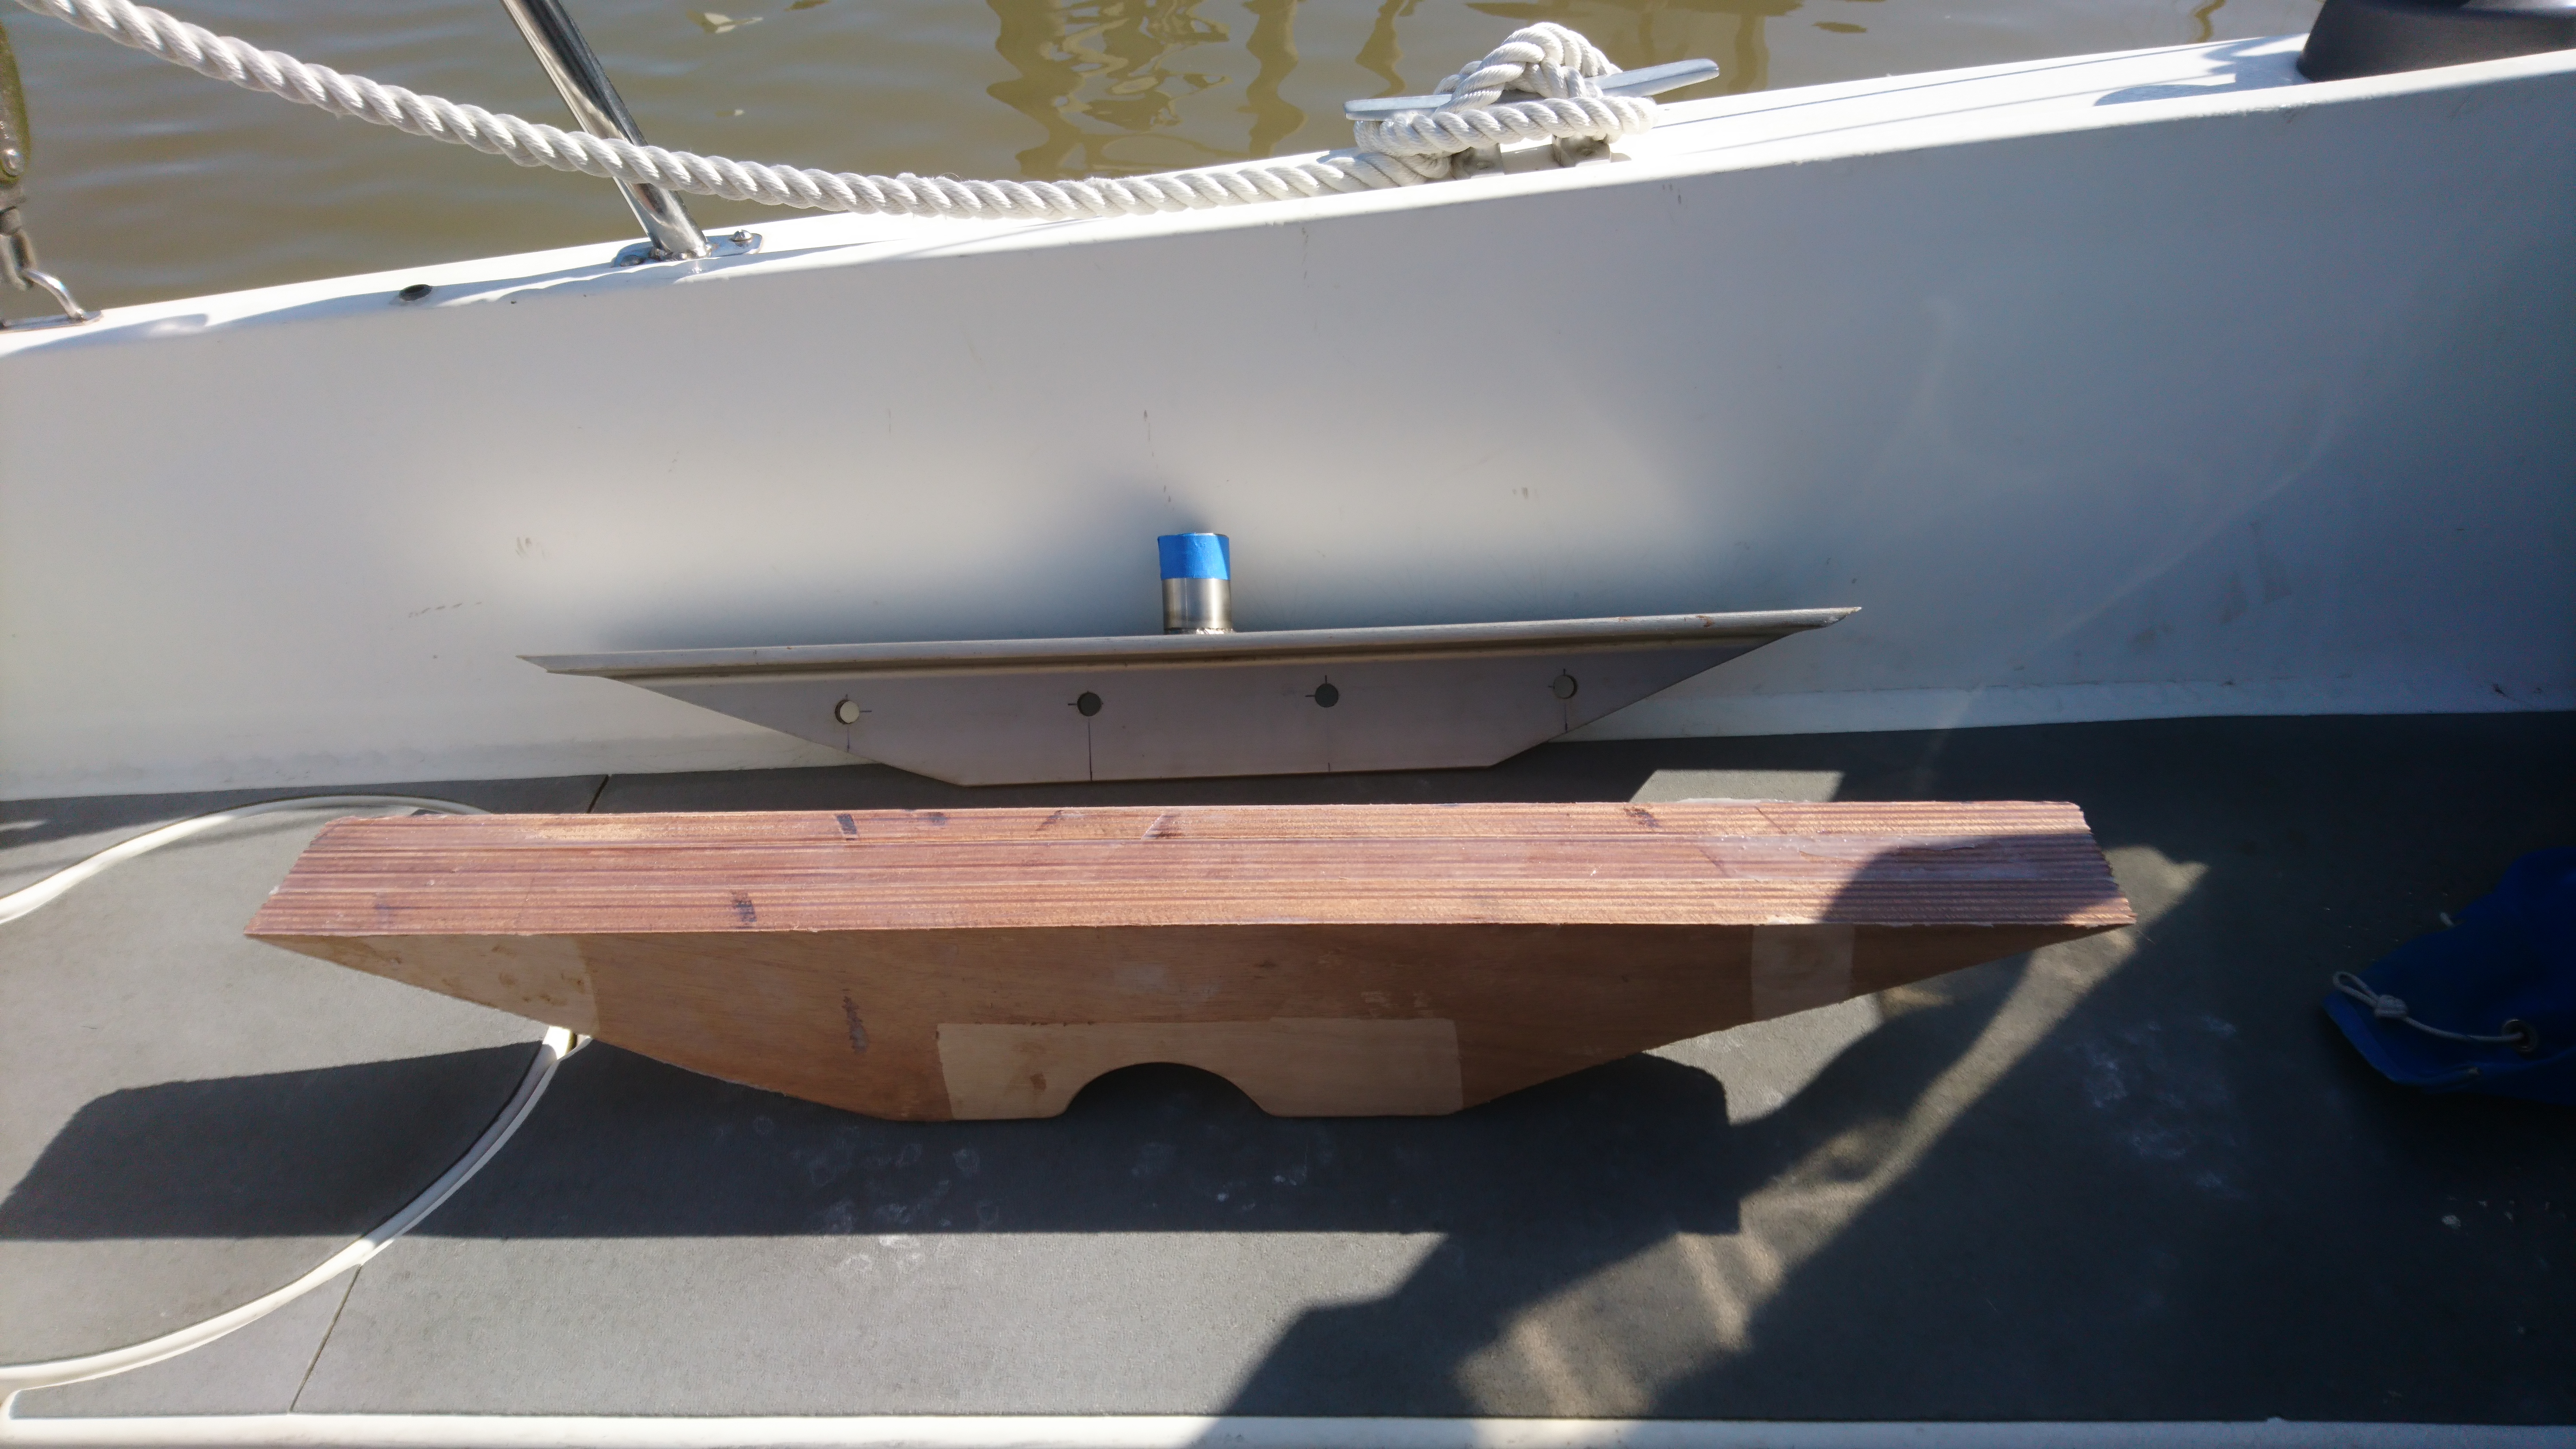
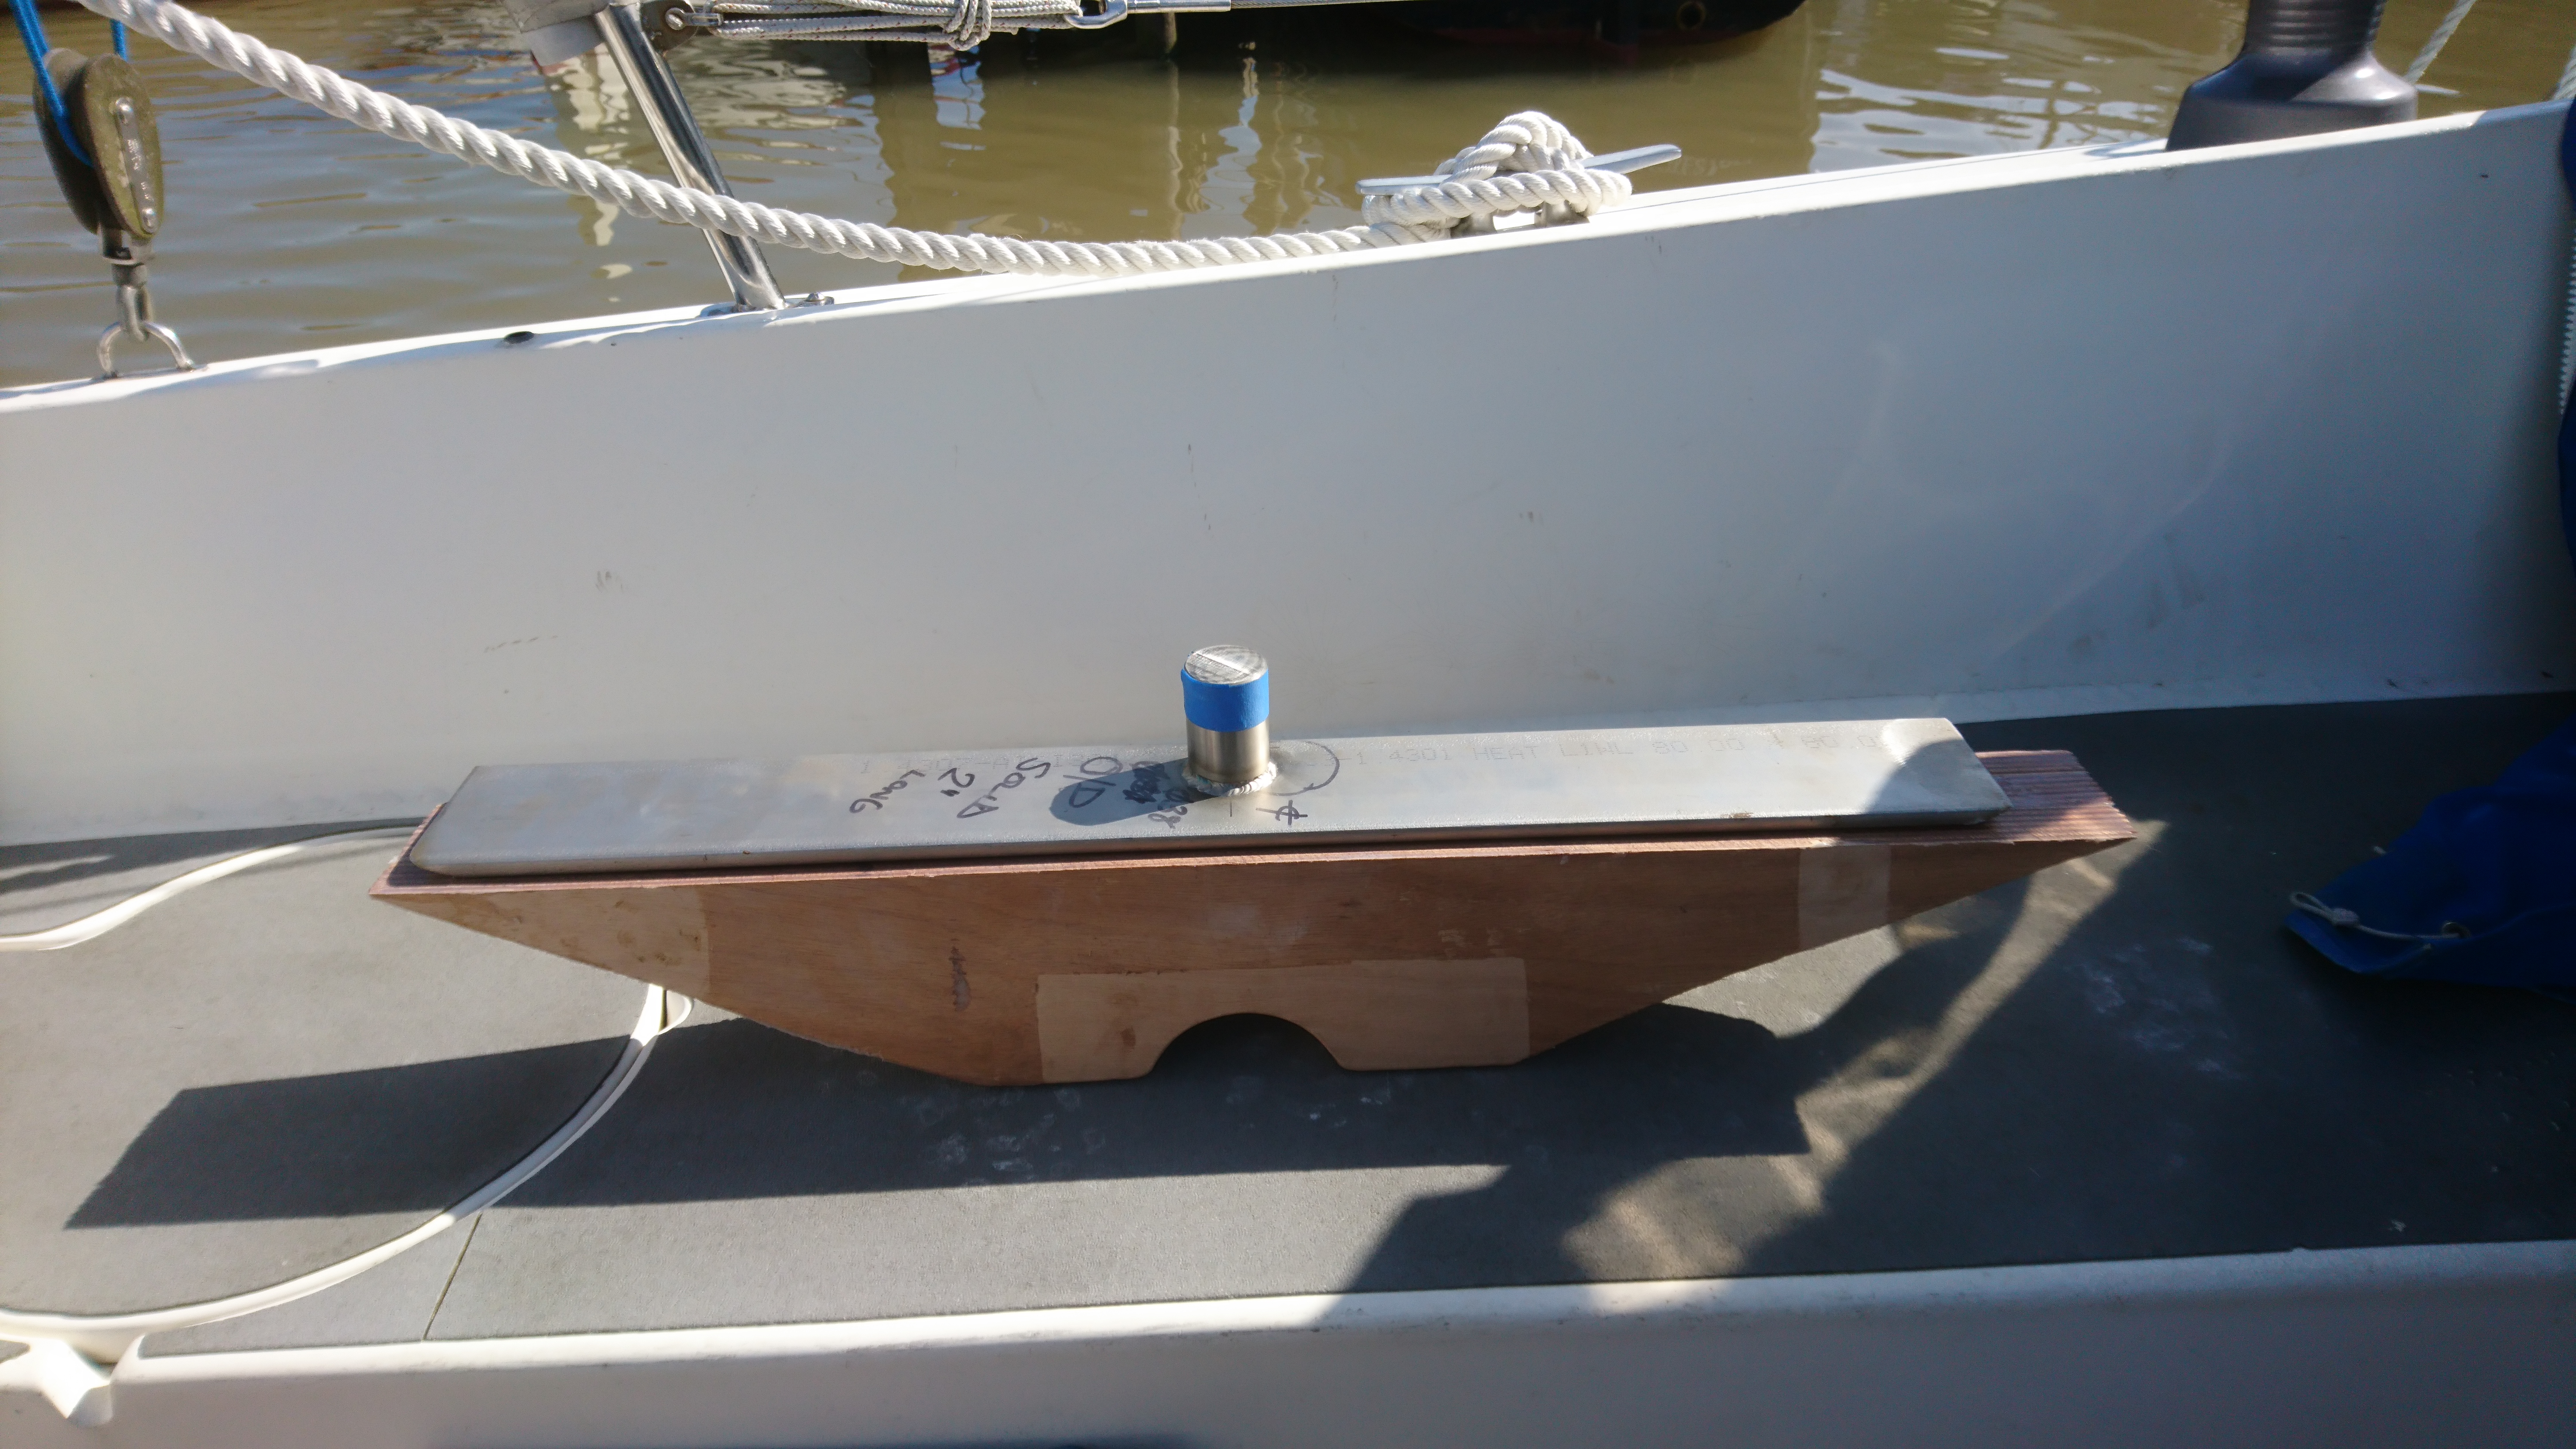
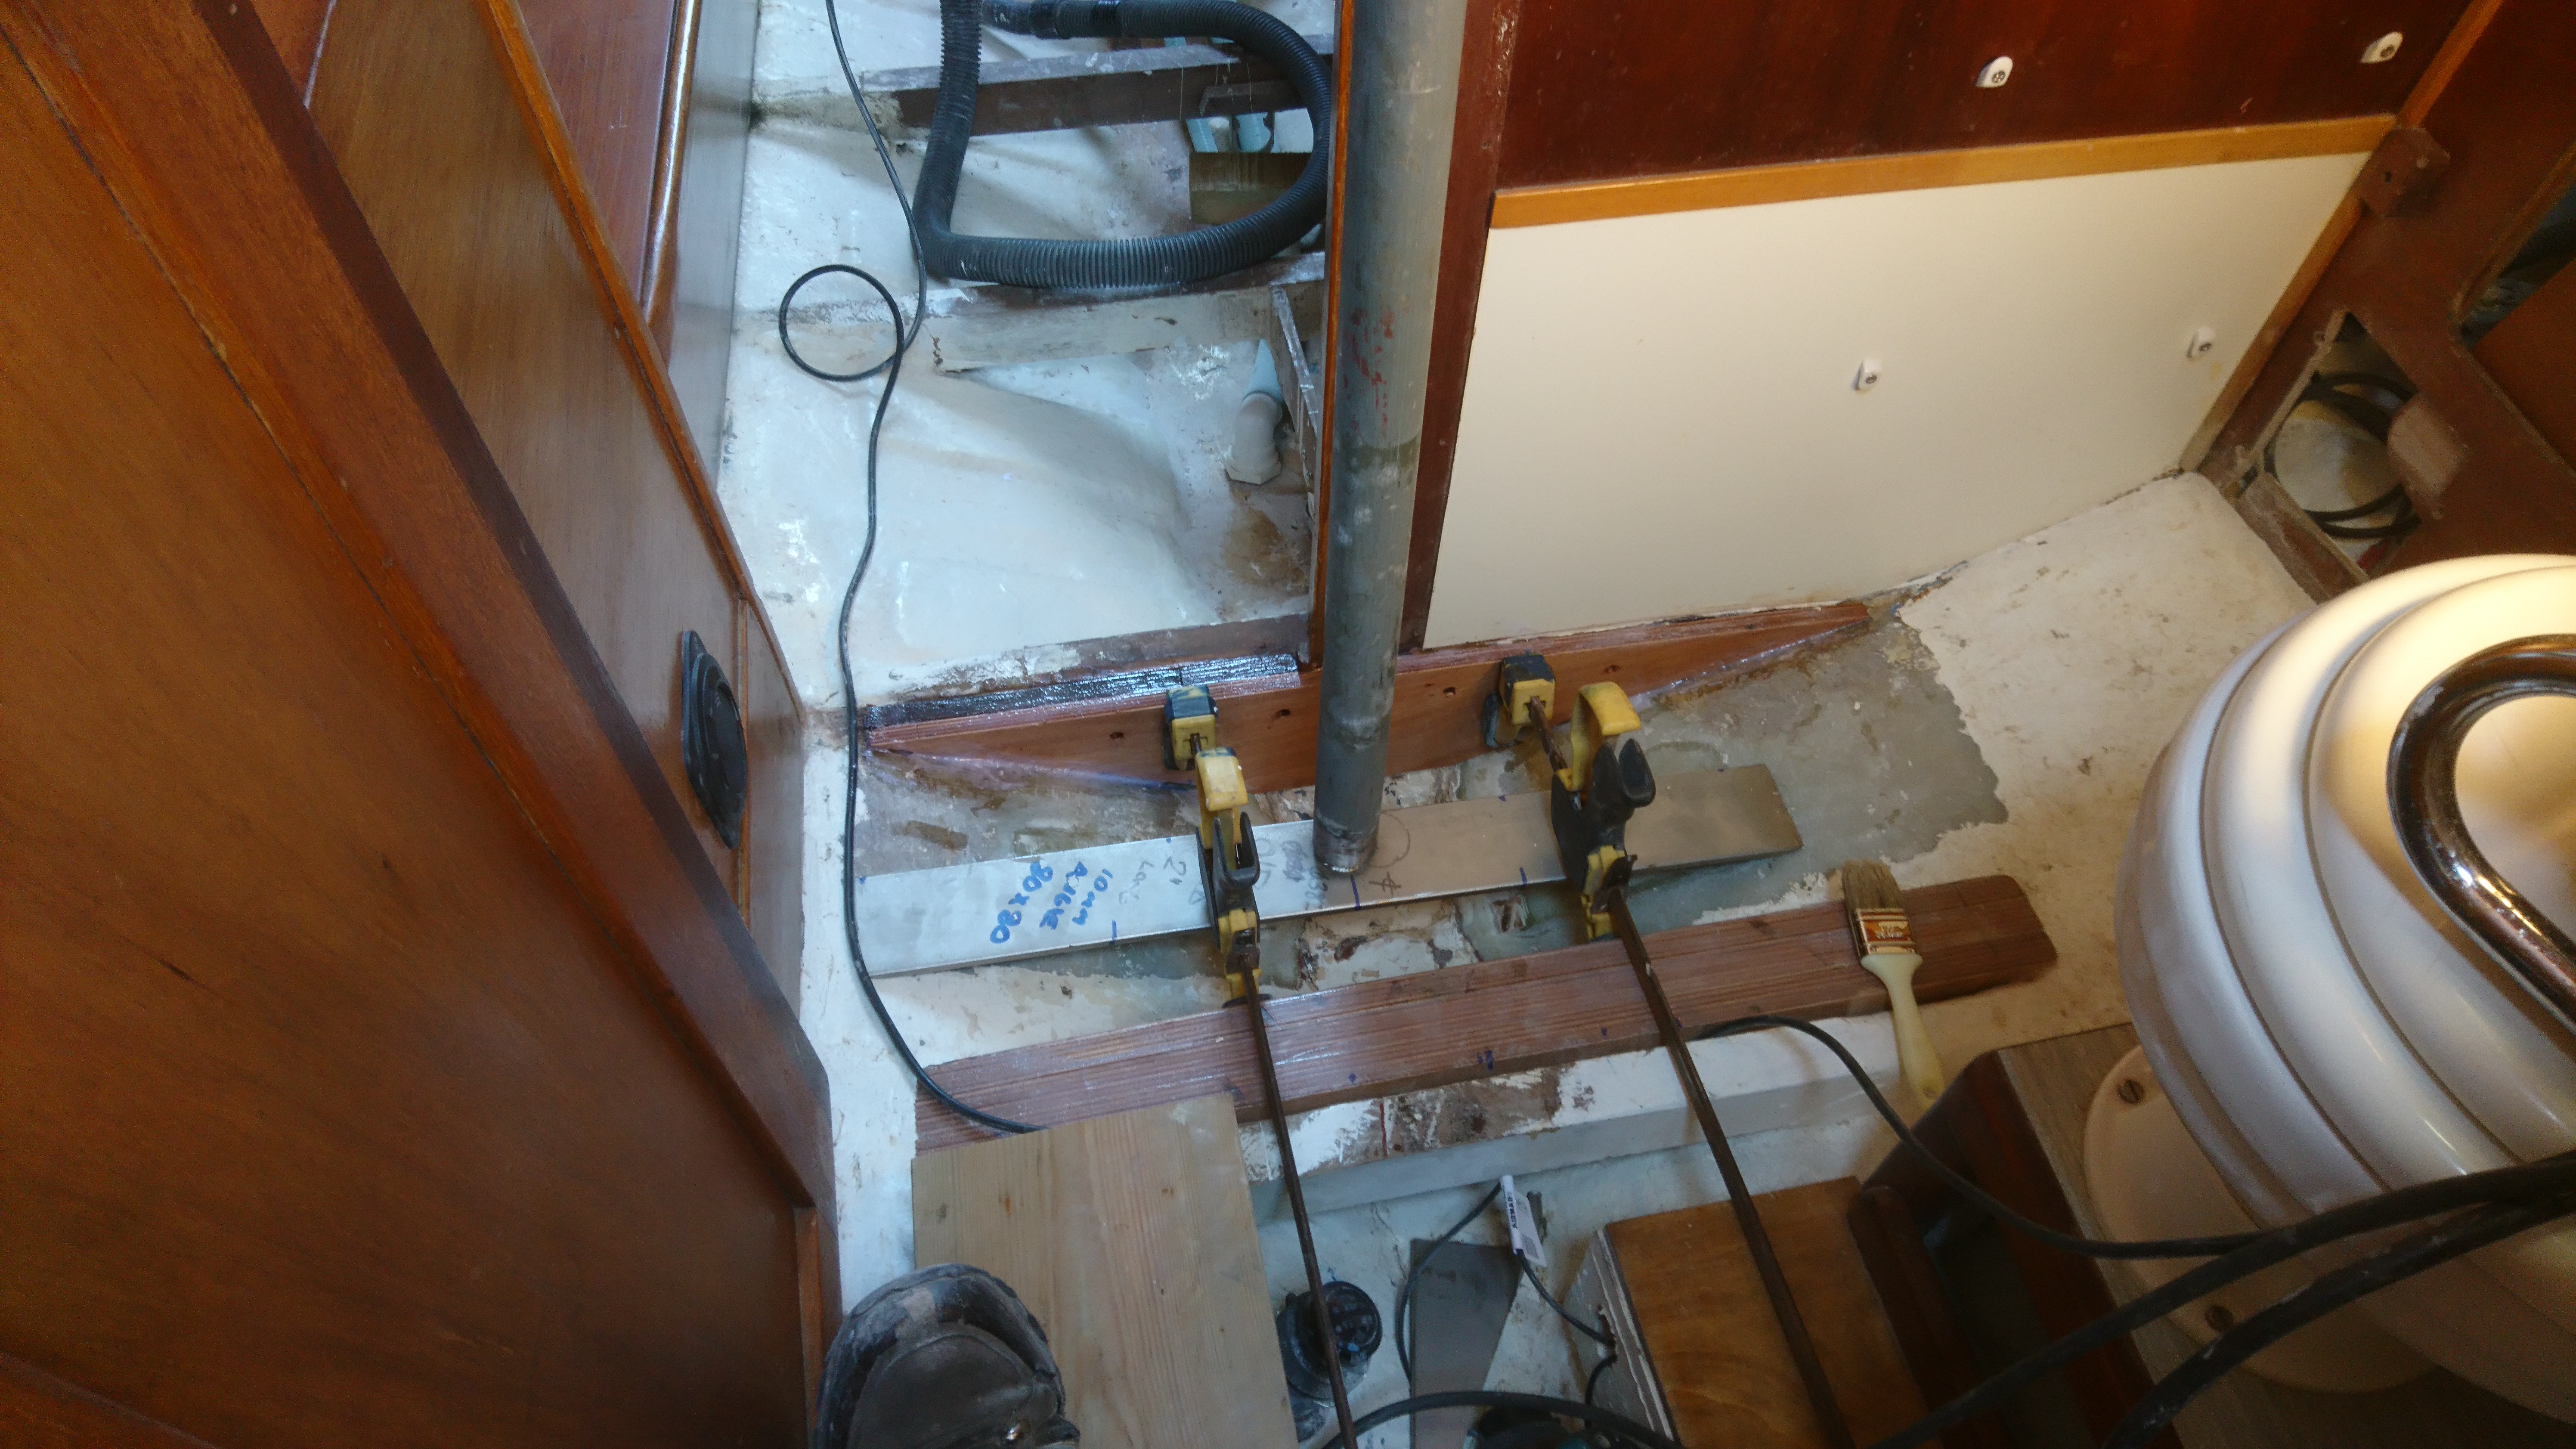
Welding galvanised steel is not a good idea at the best of times and access for welding in the boat was also not good, so I decided to make the new base with a spigot that would slide up the inside of the main tube.
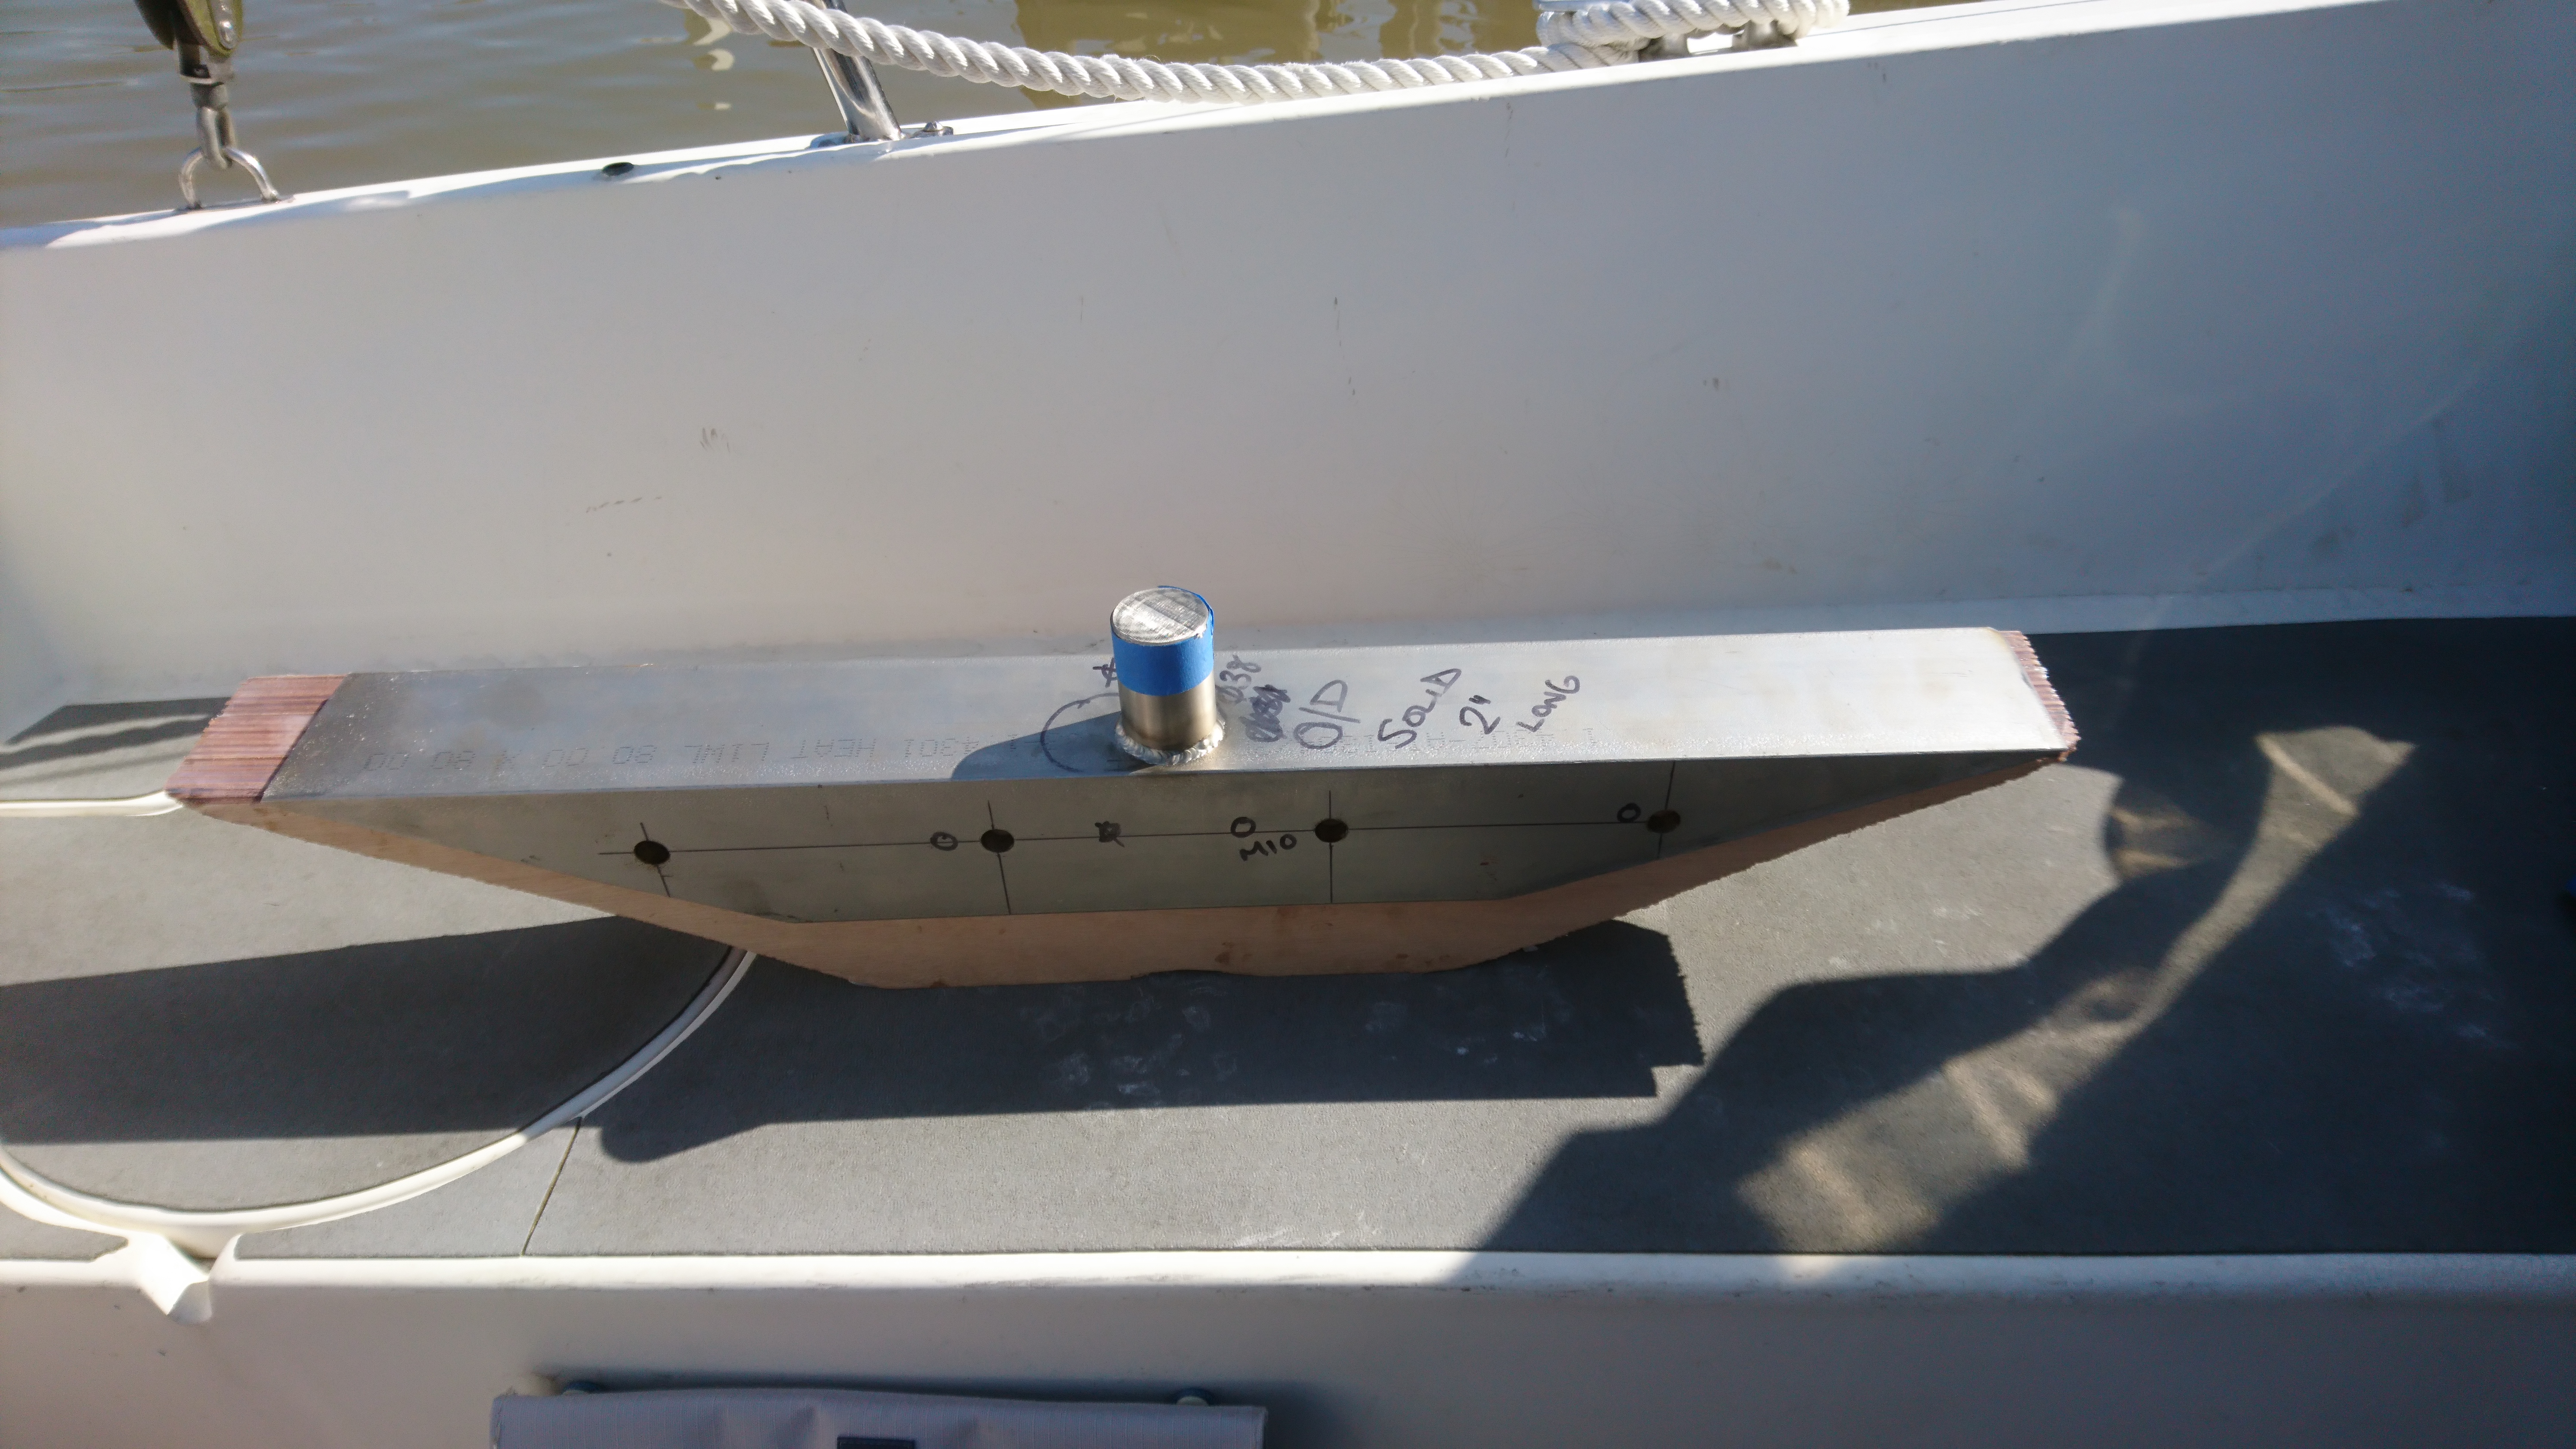
Luck was with me as the engineering dept had been fitting new engine beds to a 46′ classic motor yacht and there was a some 80x80x10 stainless angle left over that was just the right length.
We chopped 3″ off an old 1 3/4″ propshaft and that was welded to the 316 ss angle to give us a spigot that fitted inside the post like a glove.
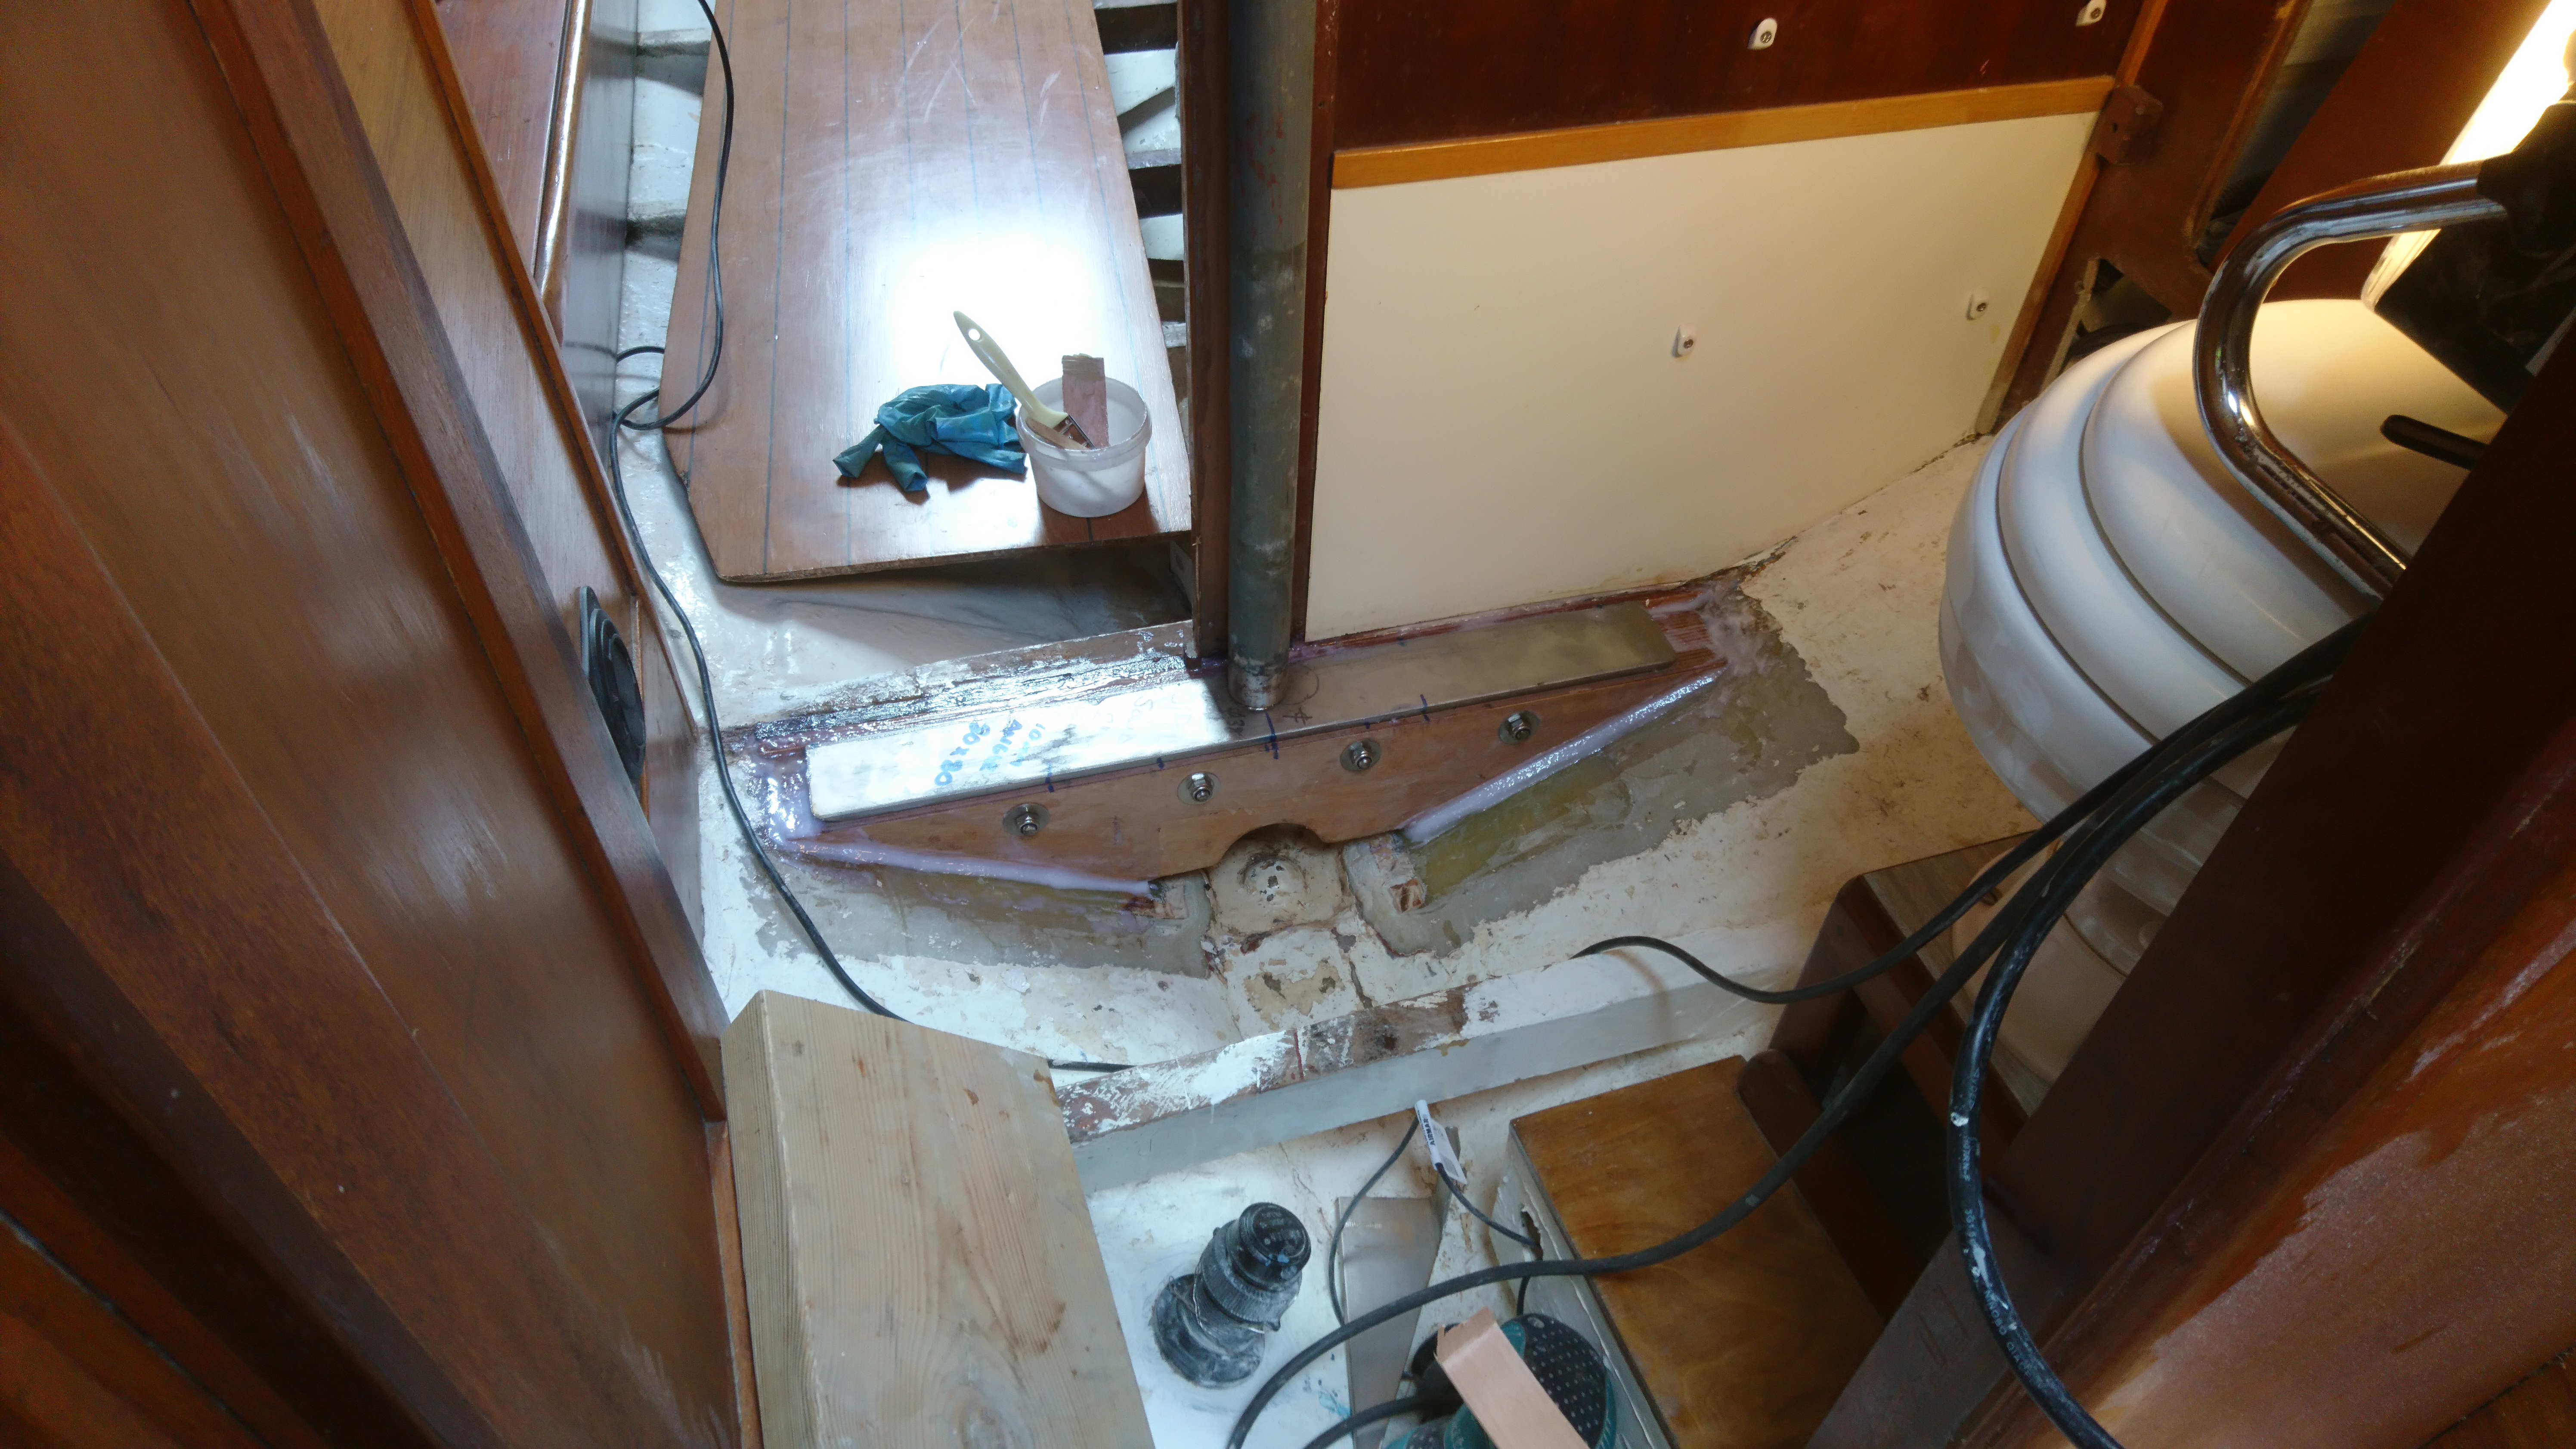
The whole assembly was to be bolted through the Saloon bulkhead so 4 x 10mm holes were drilled in the angle.
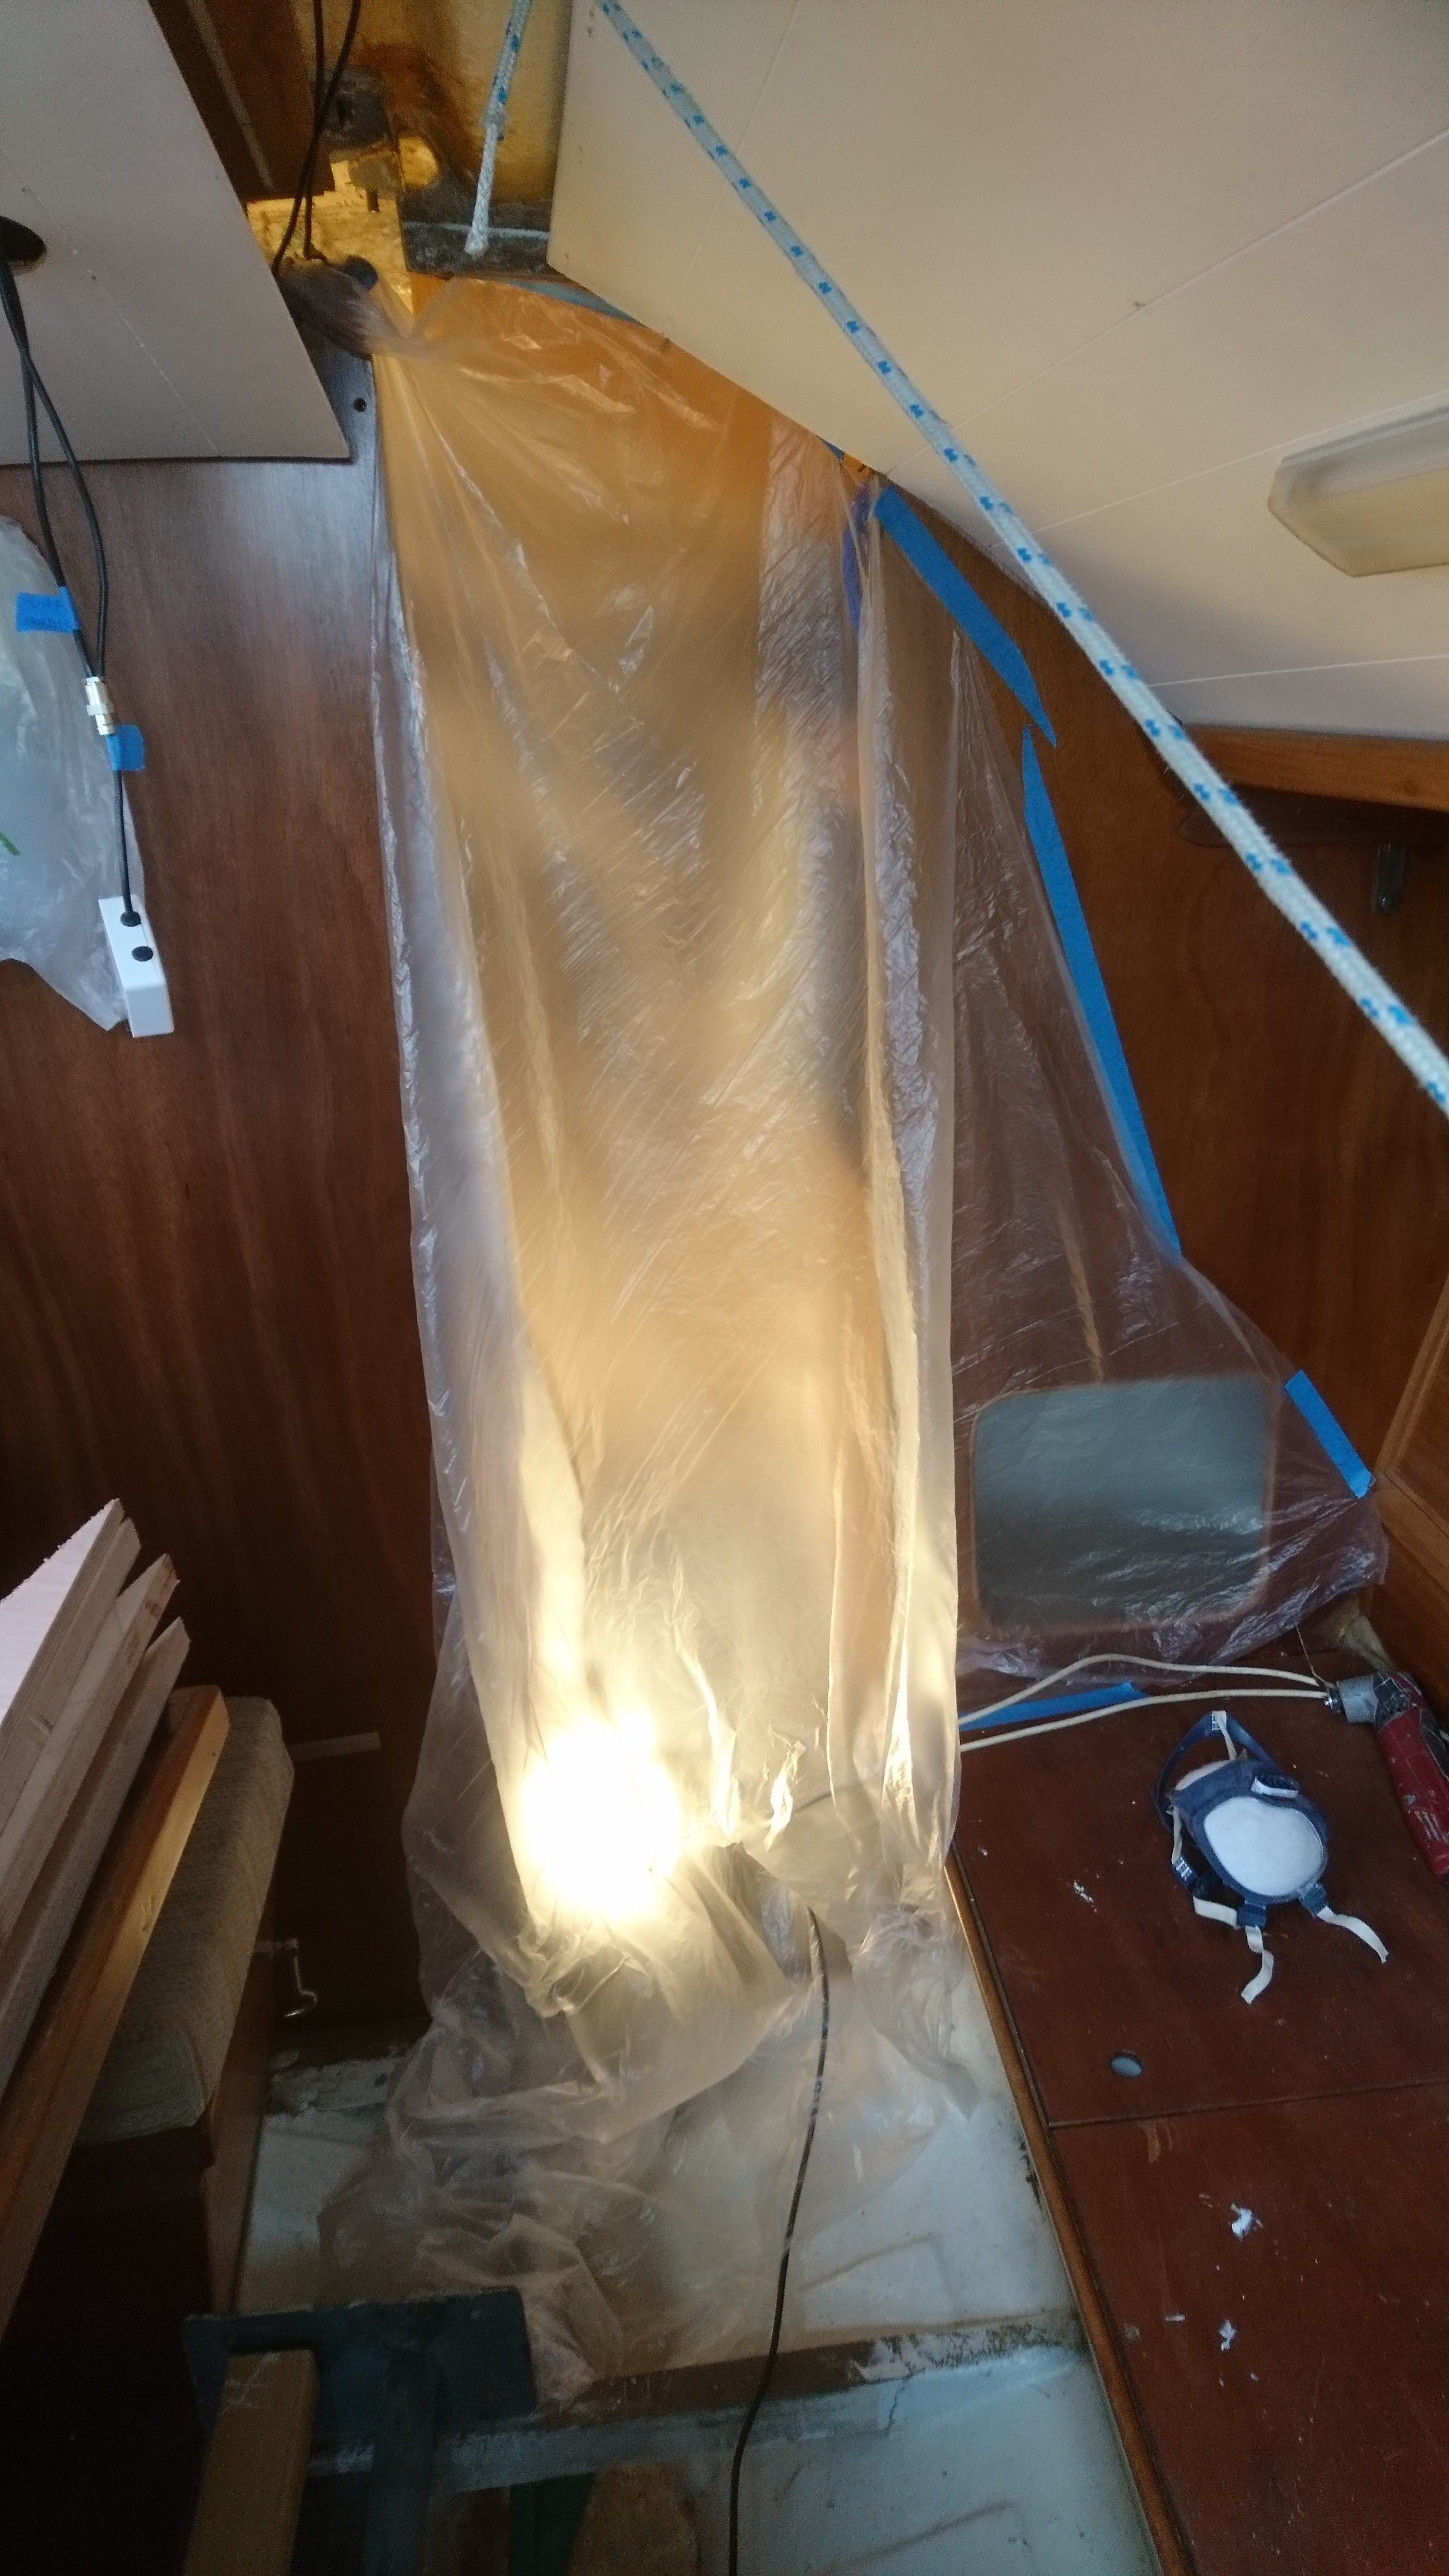
The area around the base of the post was taped up with plastic sheeting to try and contain the dust and the hull was ground back to clean glass.
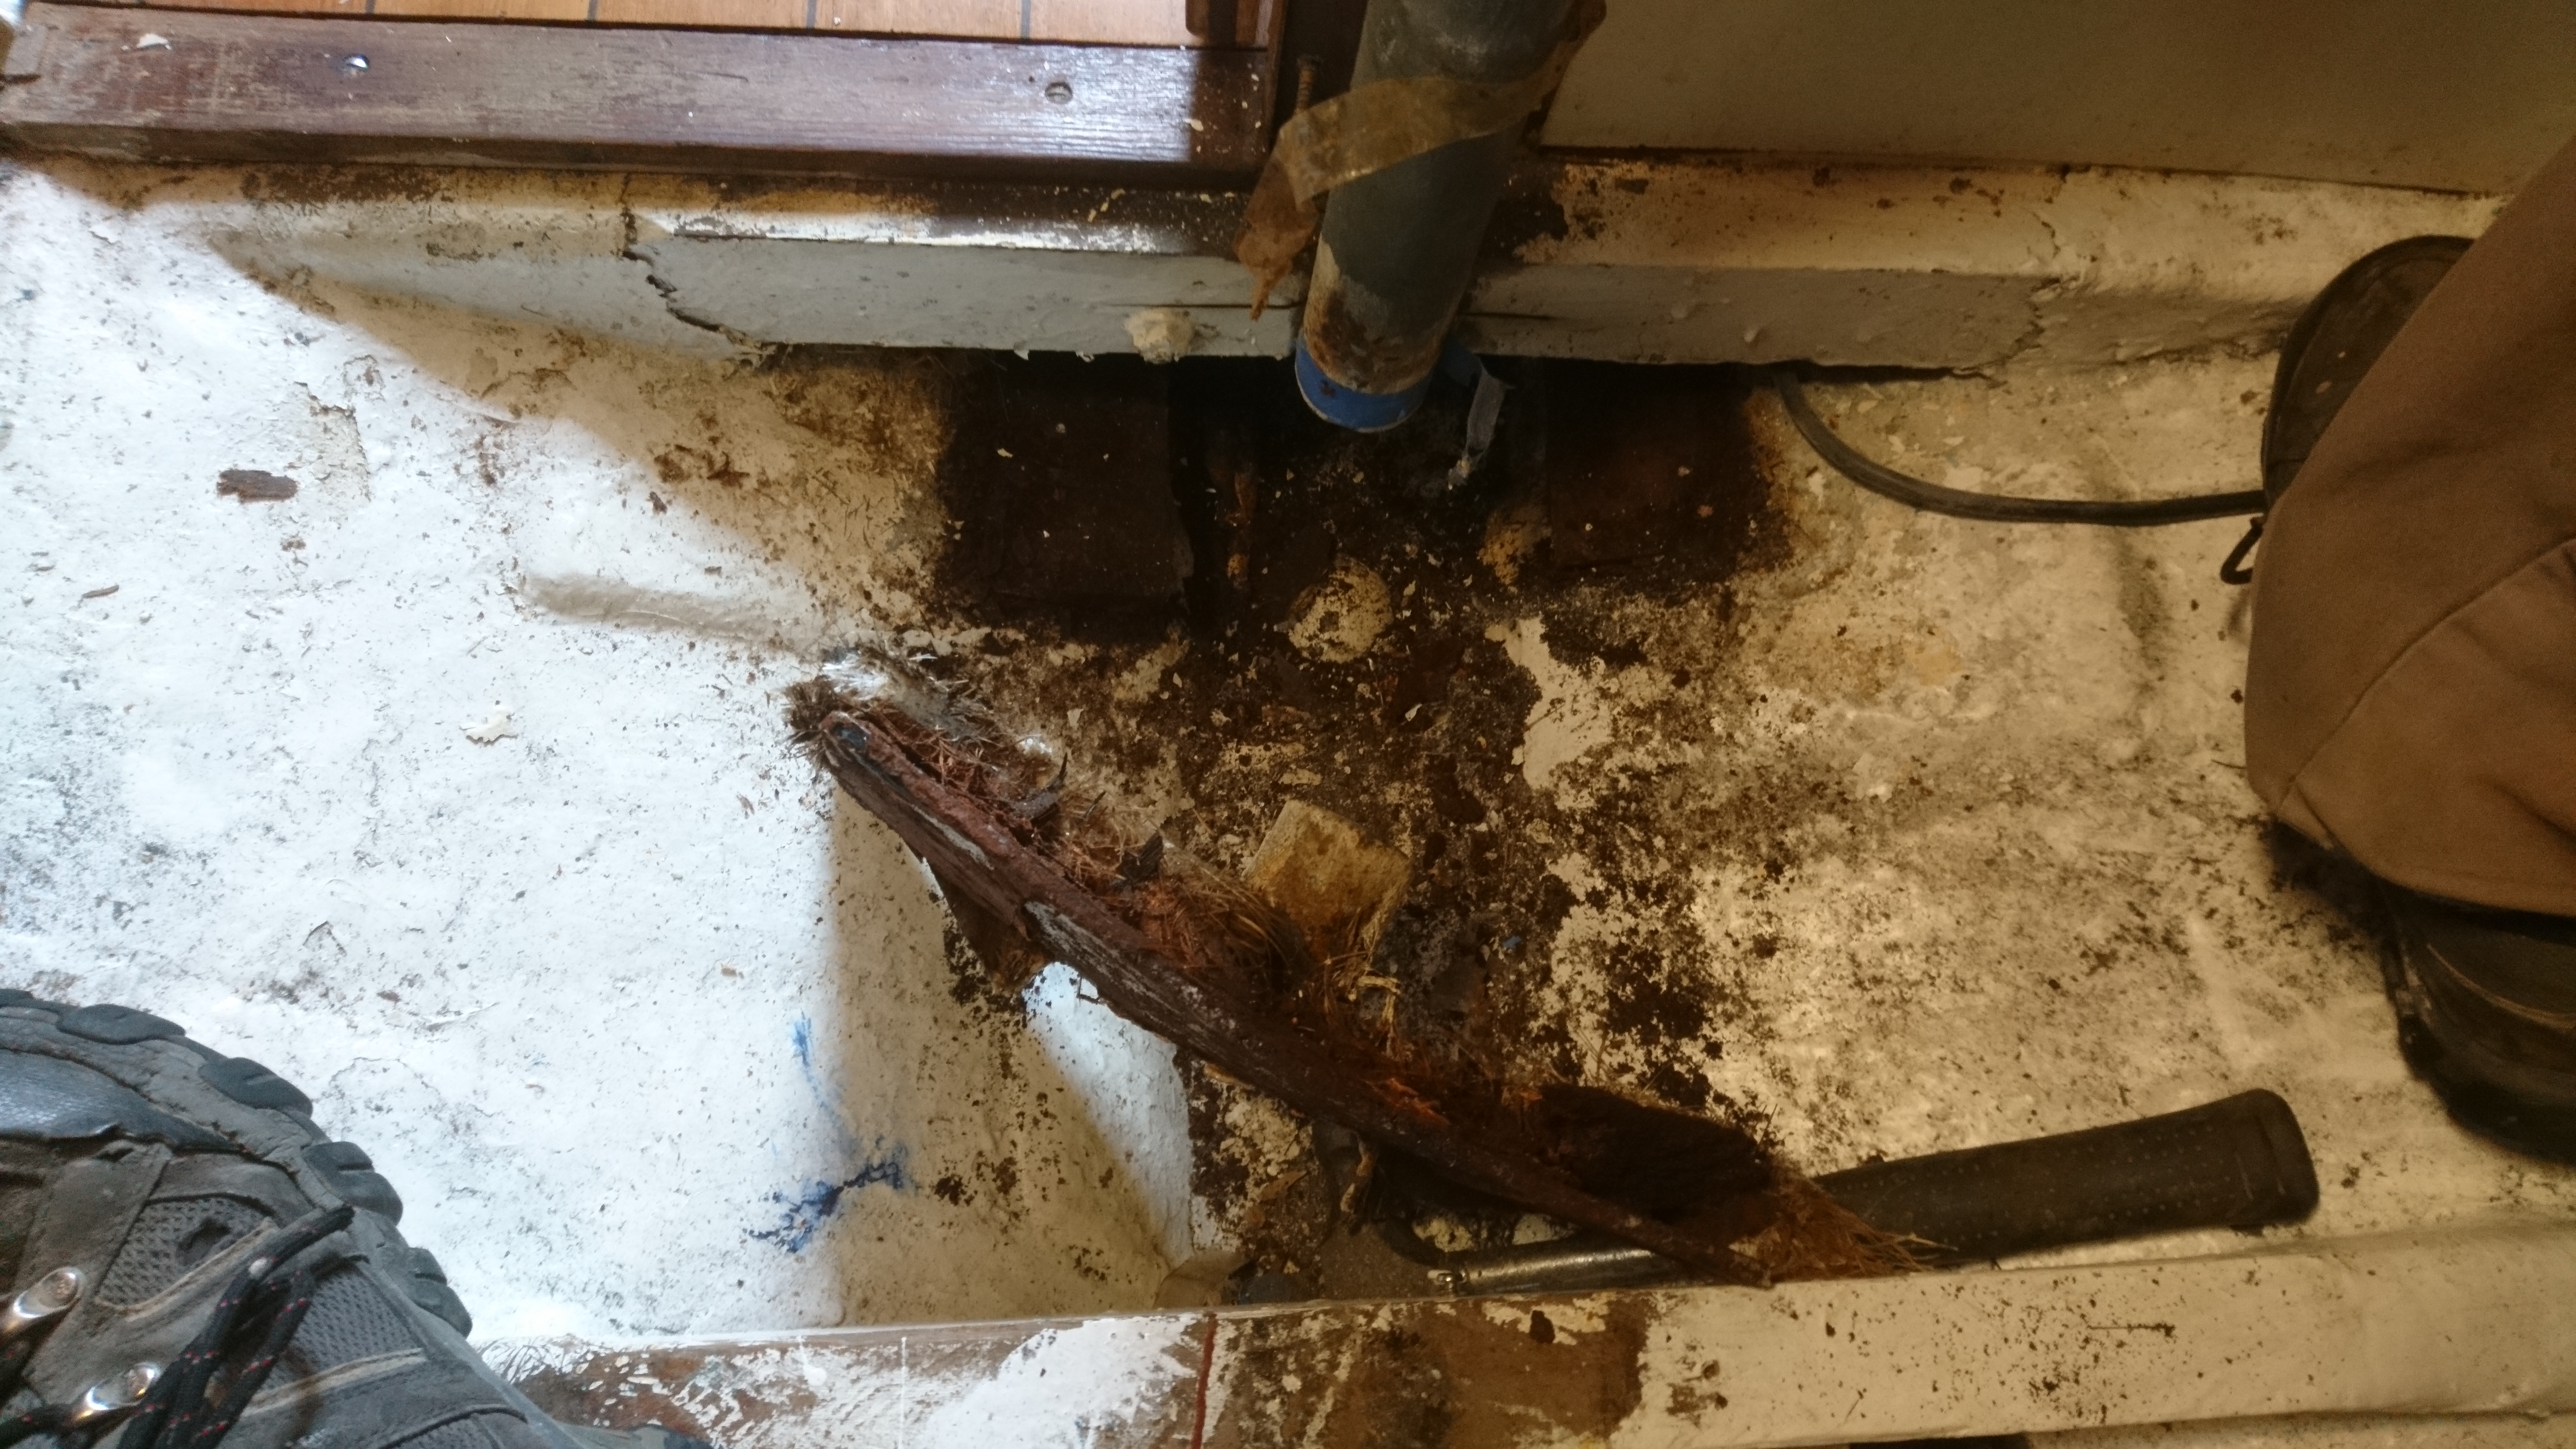
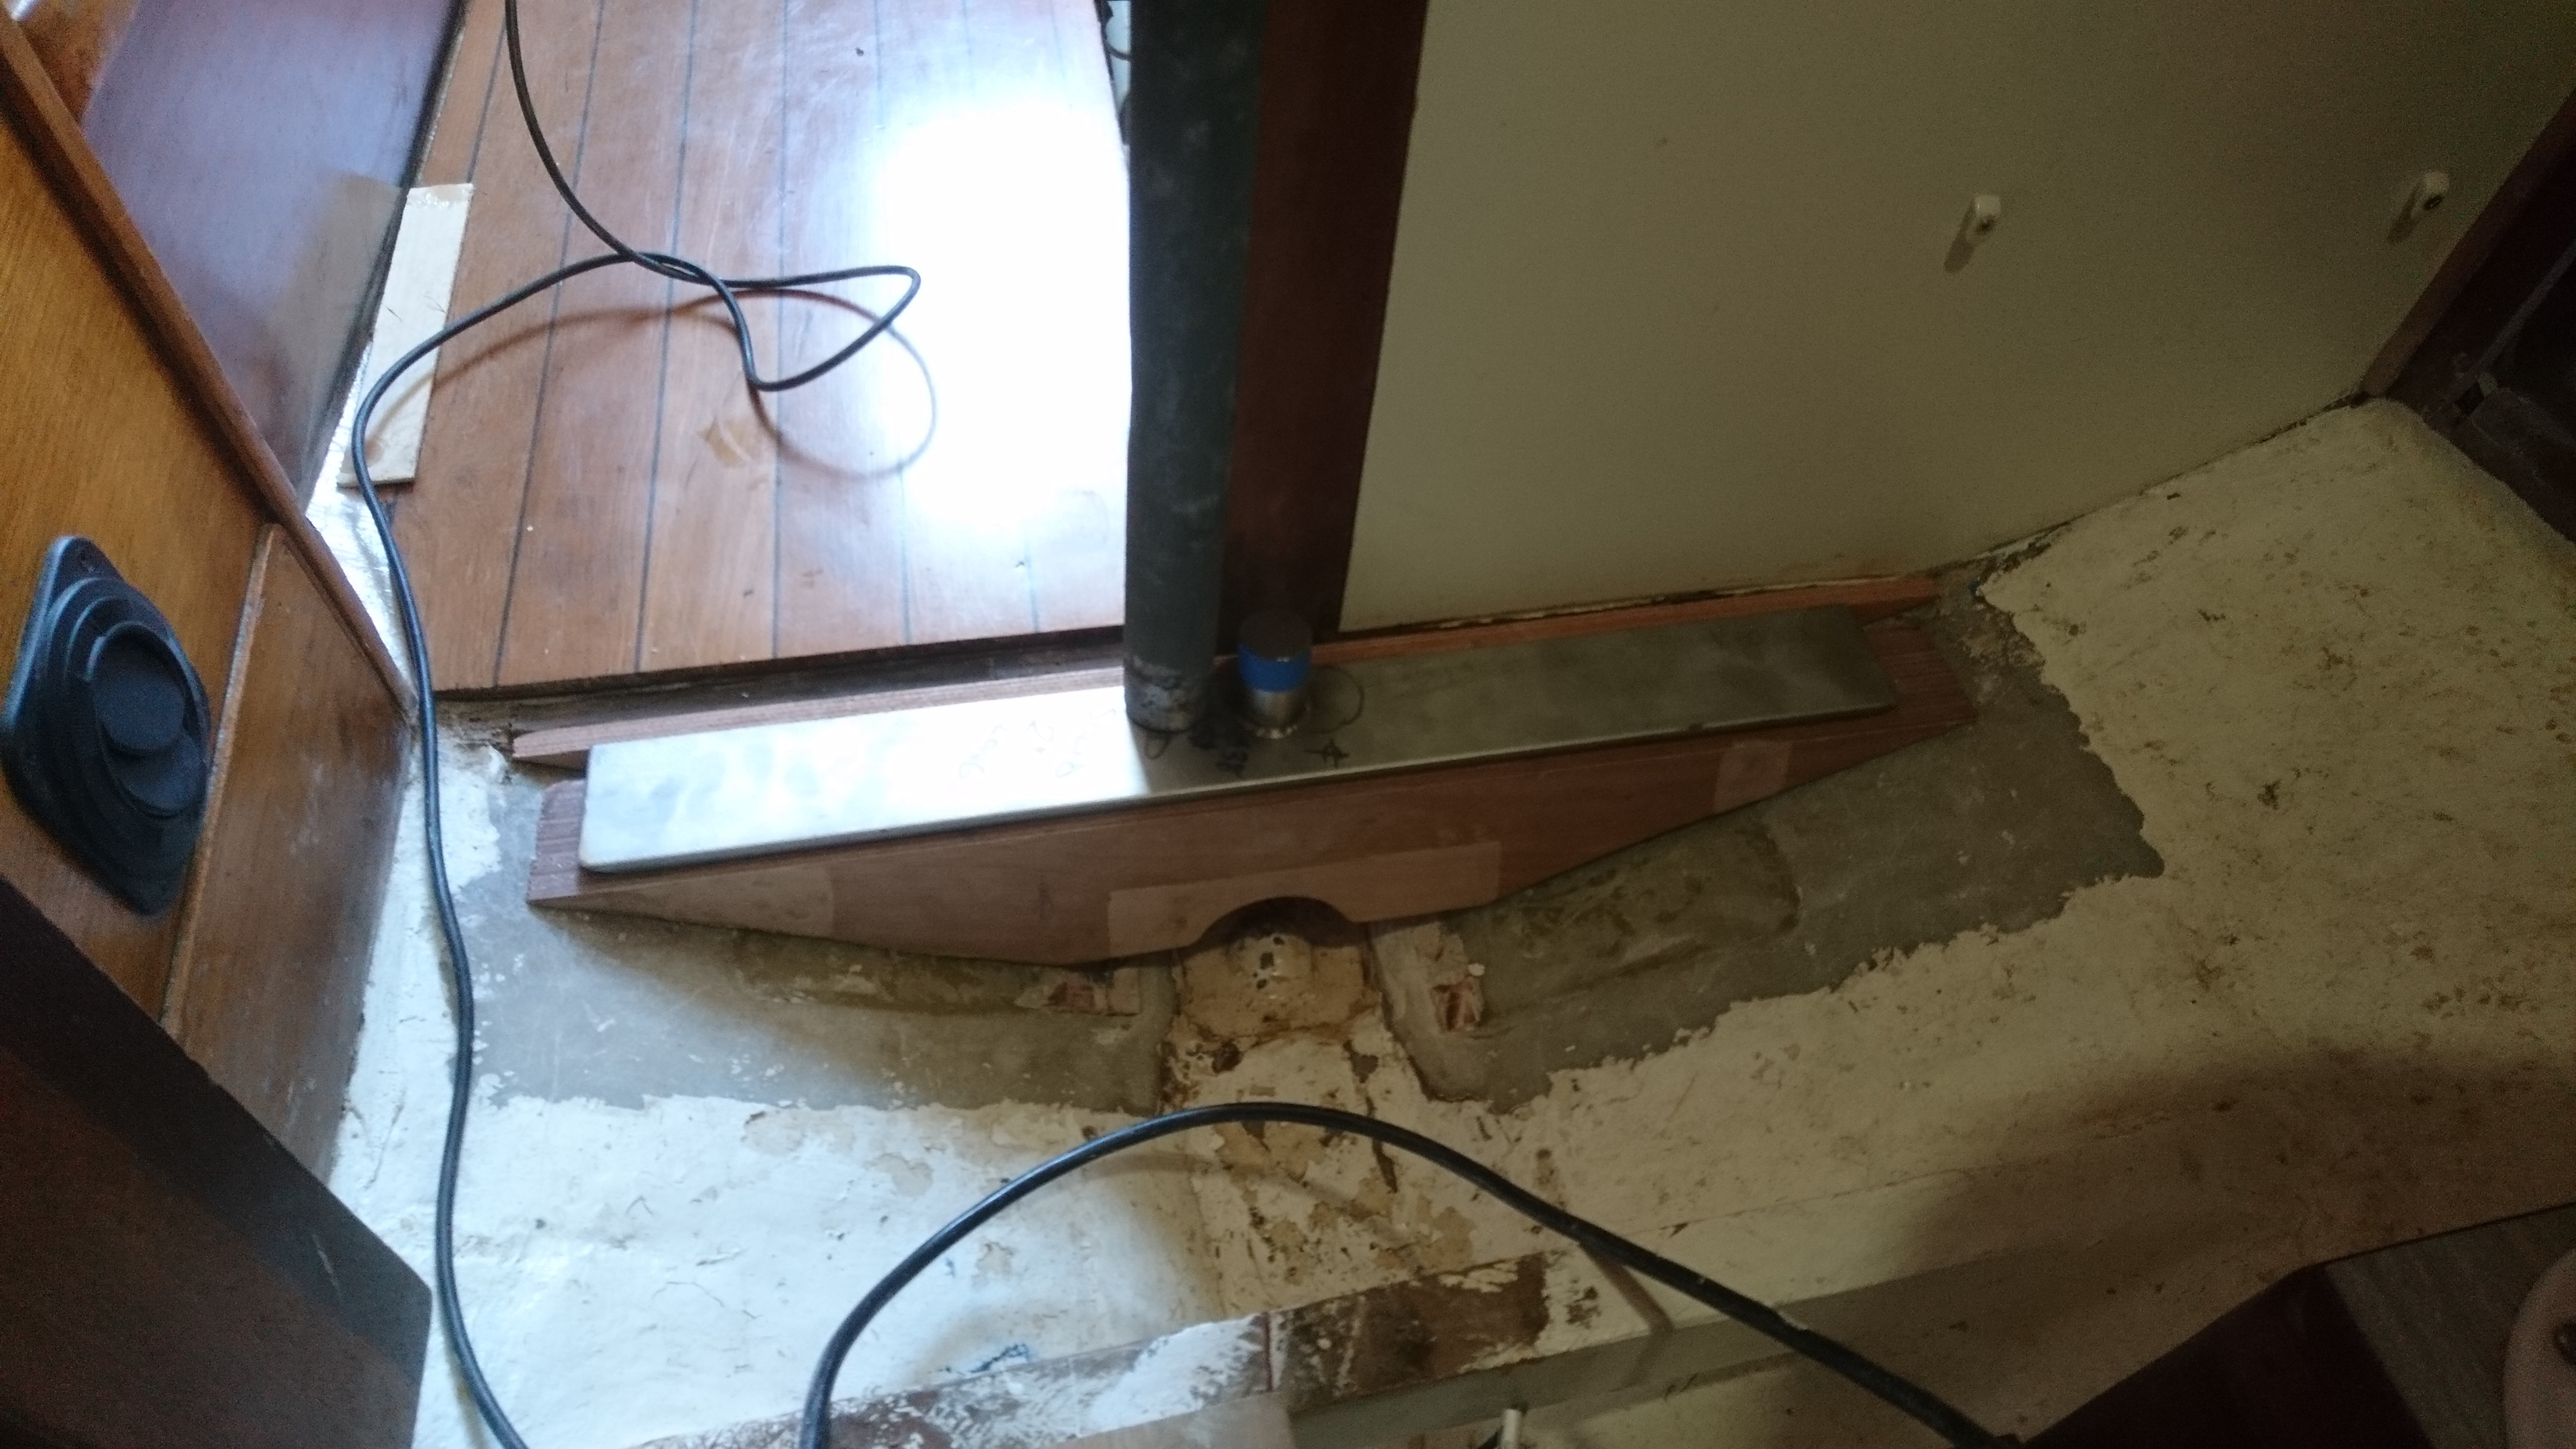
A section of old supporting rib screwed to the lower section of the bulkhead was also removed as there was evidence of water damage, along with the rotten pieces of hard wood used as piers for the bridge.
Using 2″ wide strips of scrap ply and a glue gun, a template for the new supporting rib was stuck together.
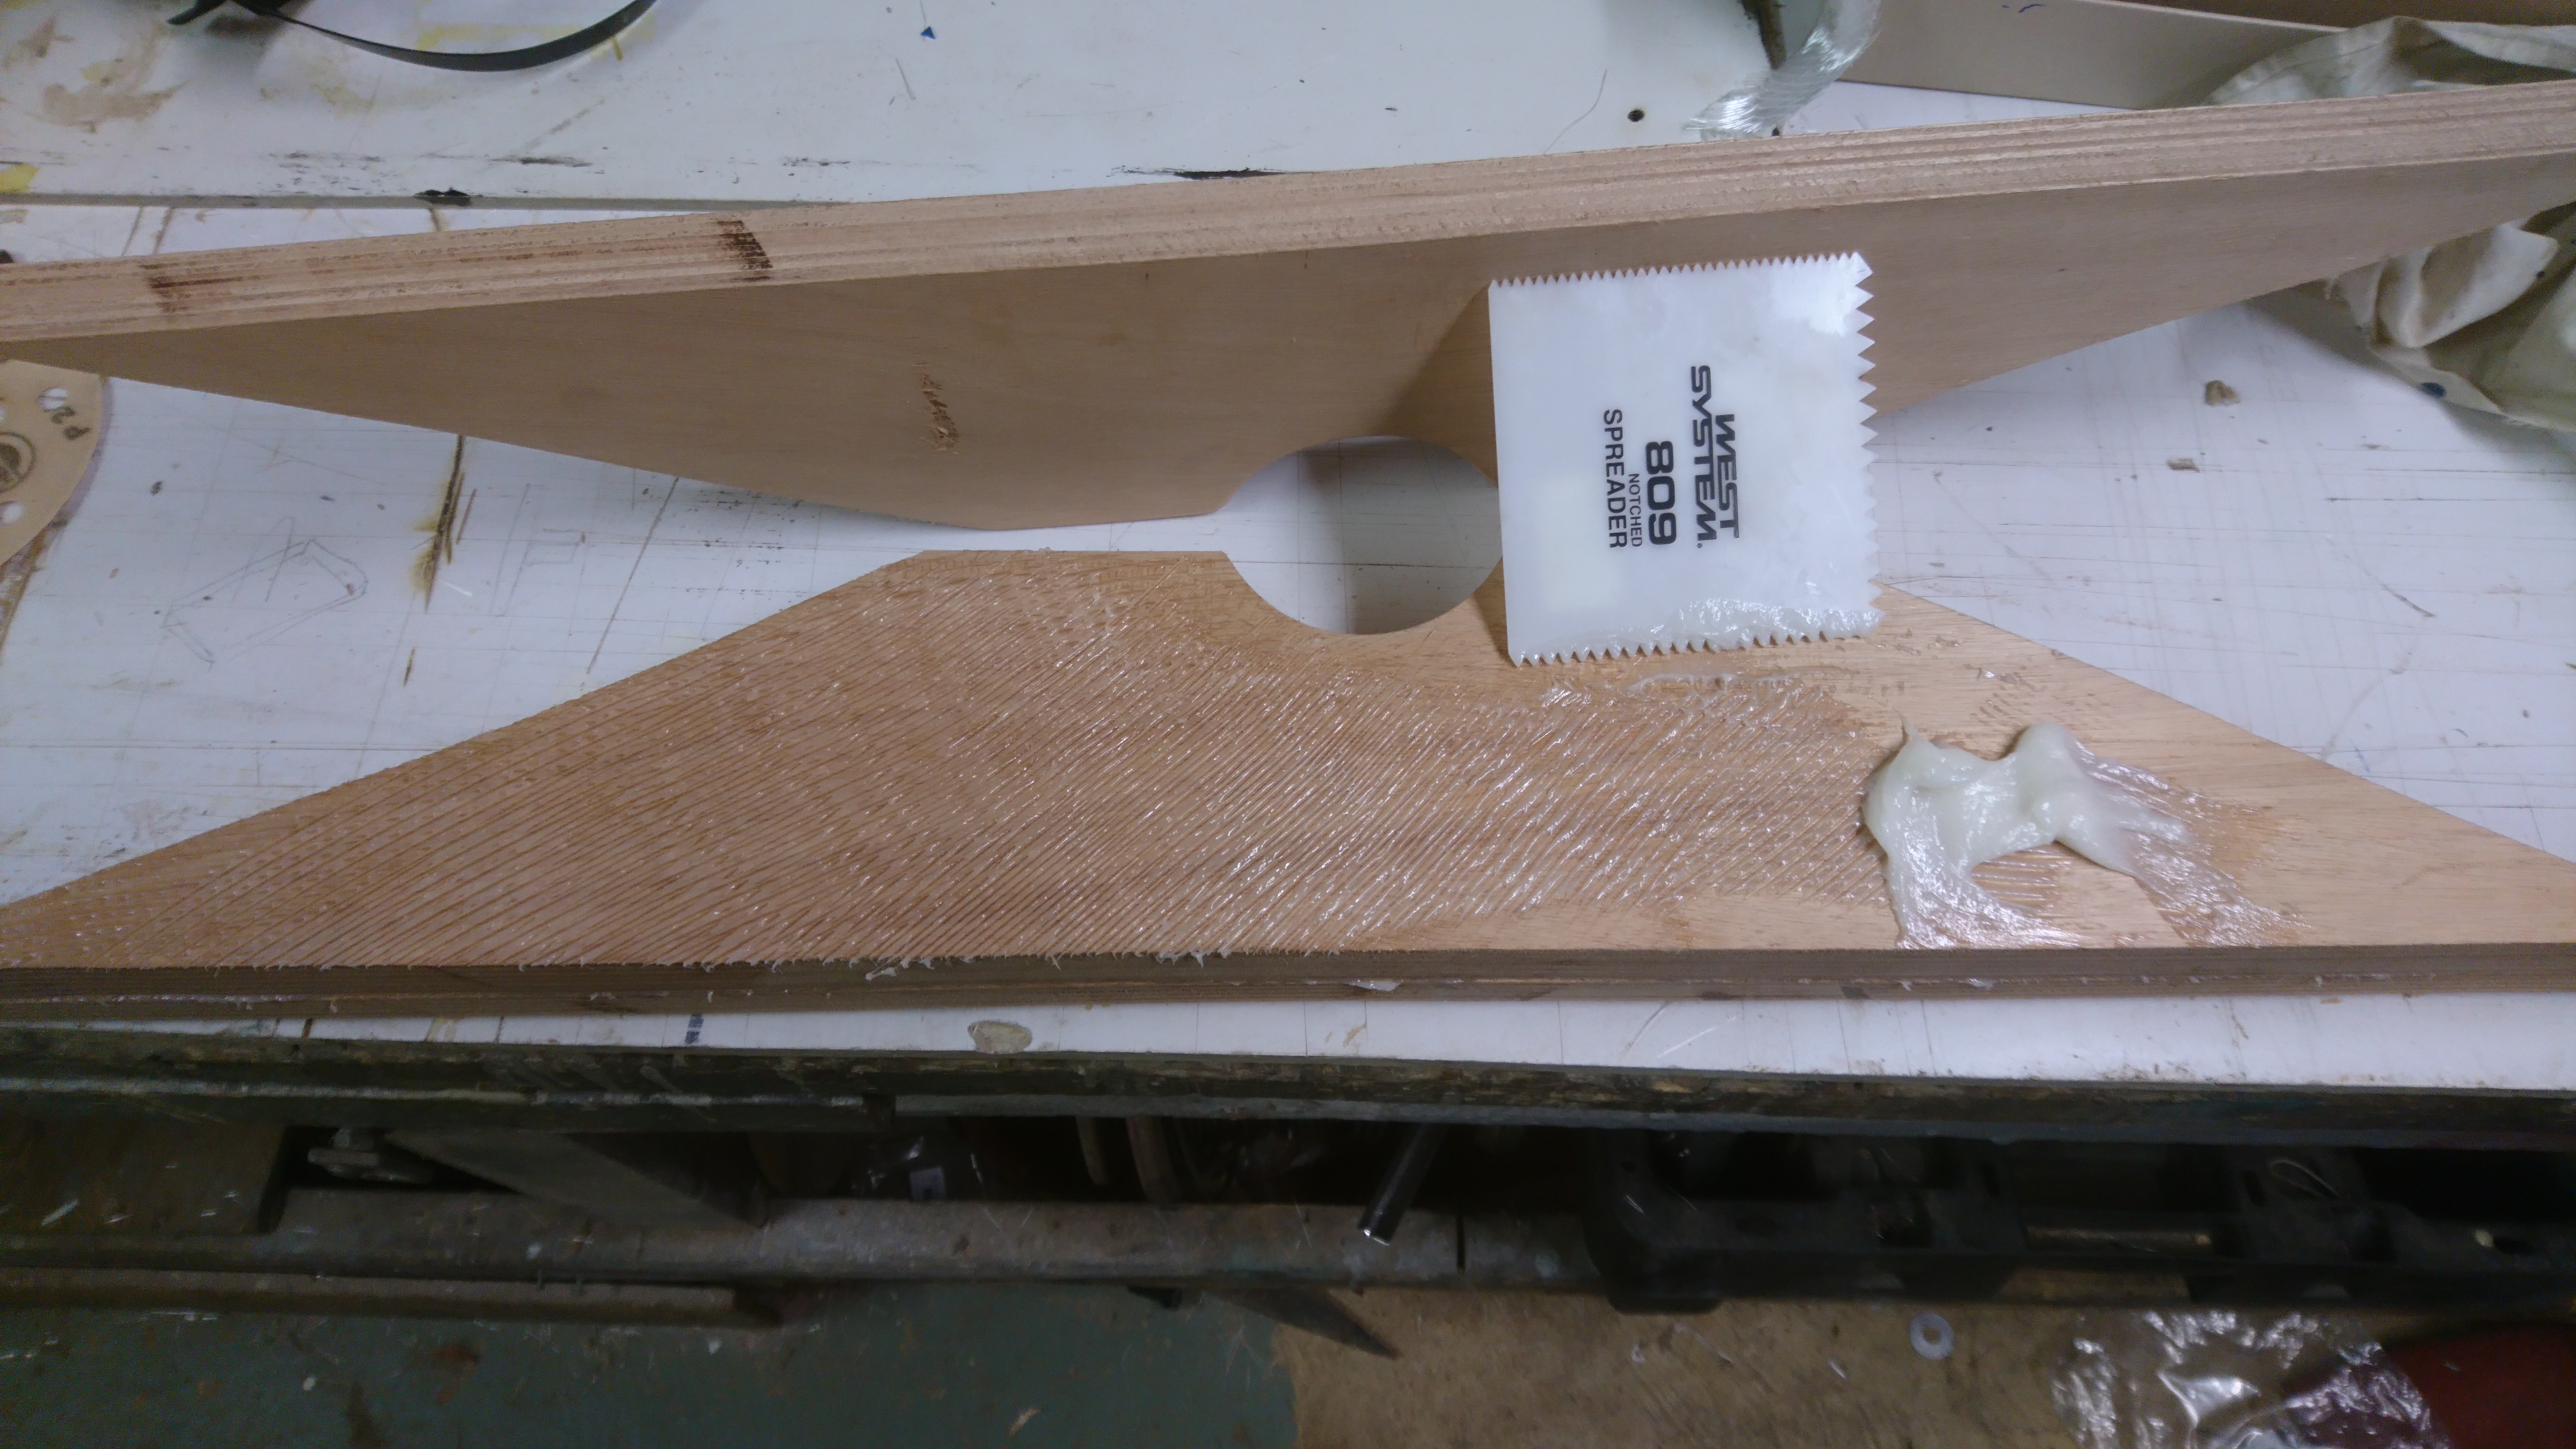
I decided to build the new rib out of 4 layers of 25mm thick marine plywood, laminated together using thickened West epoxy.
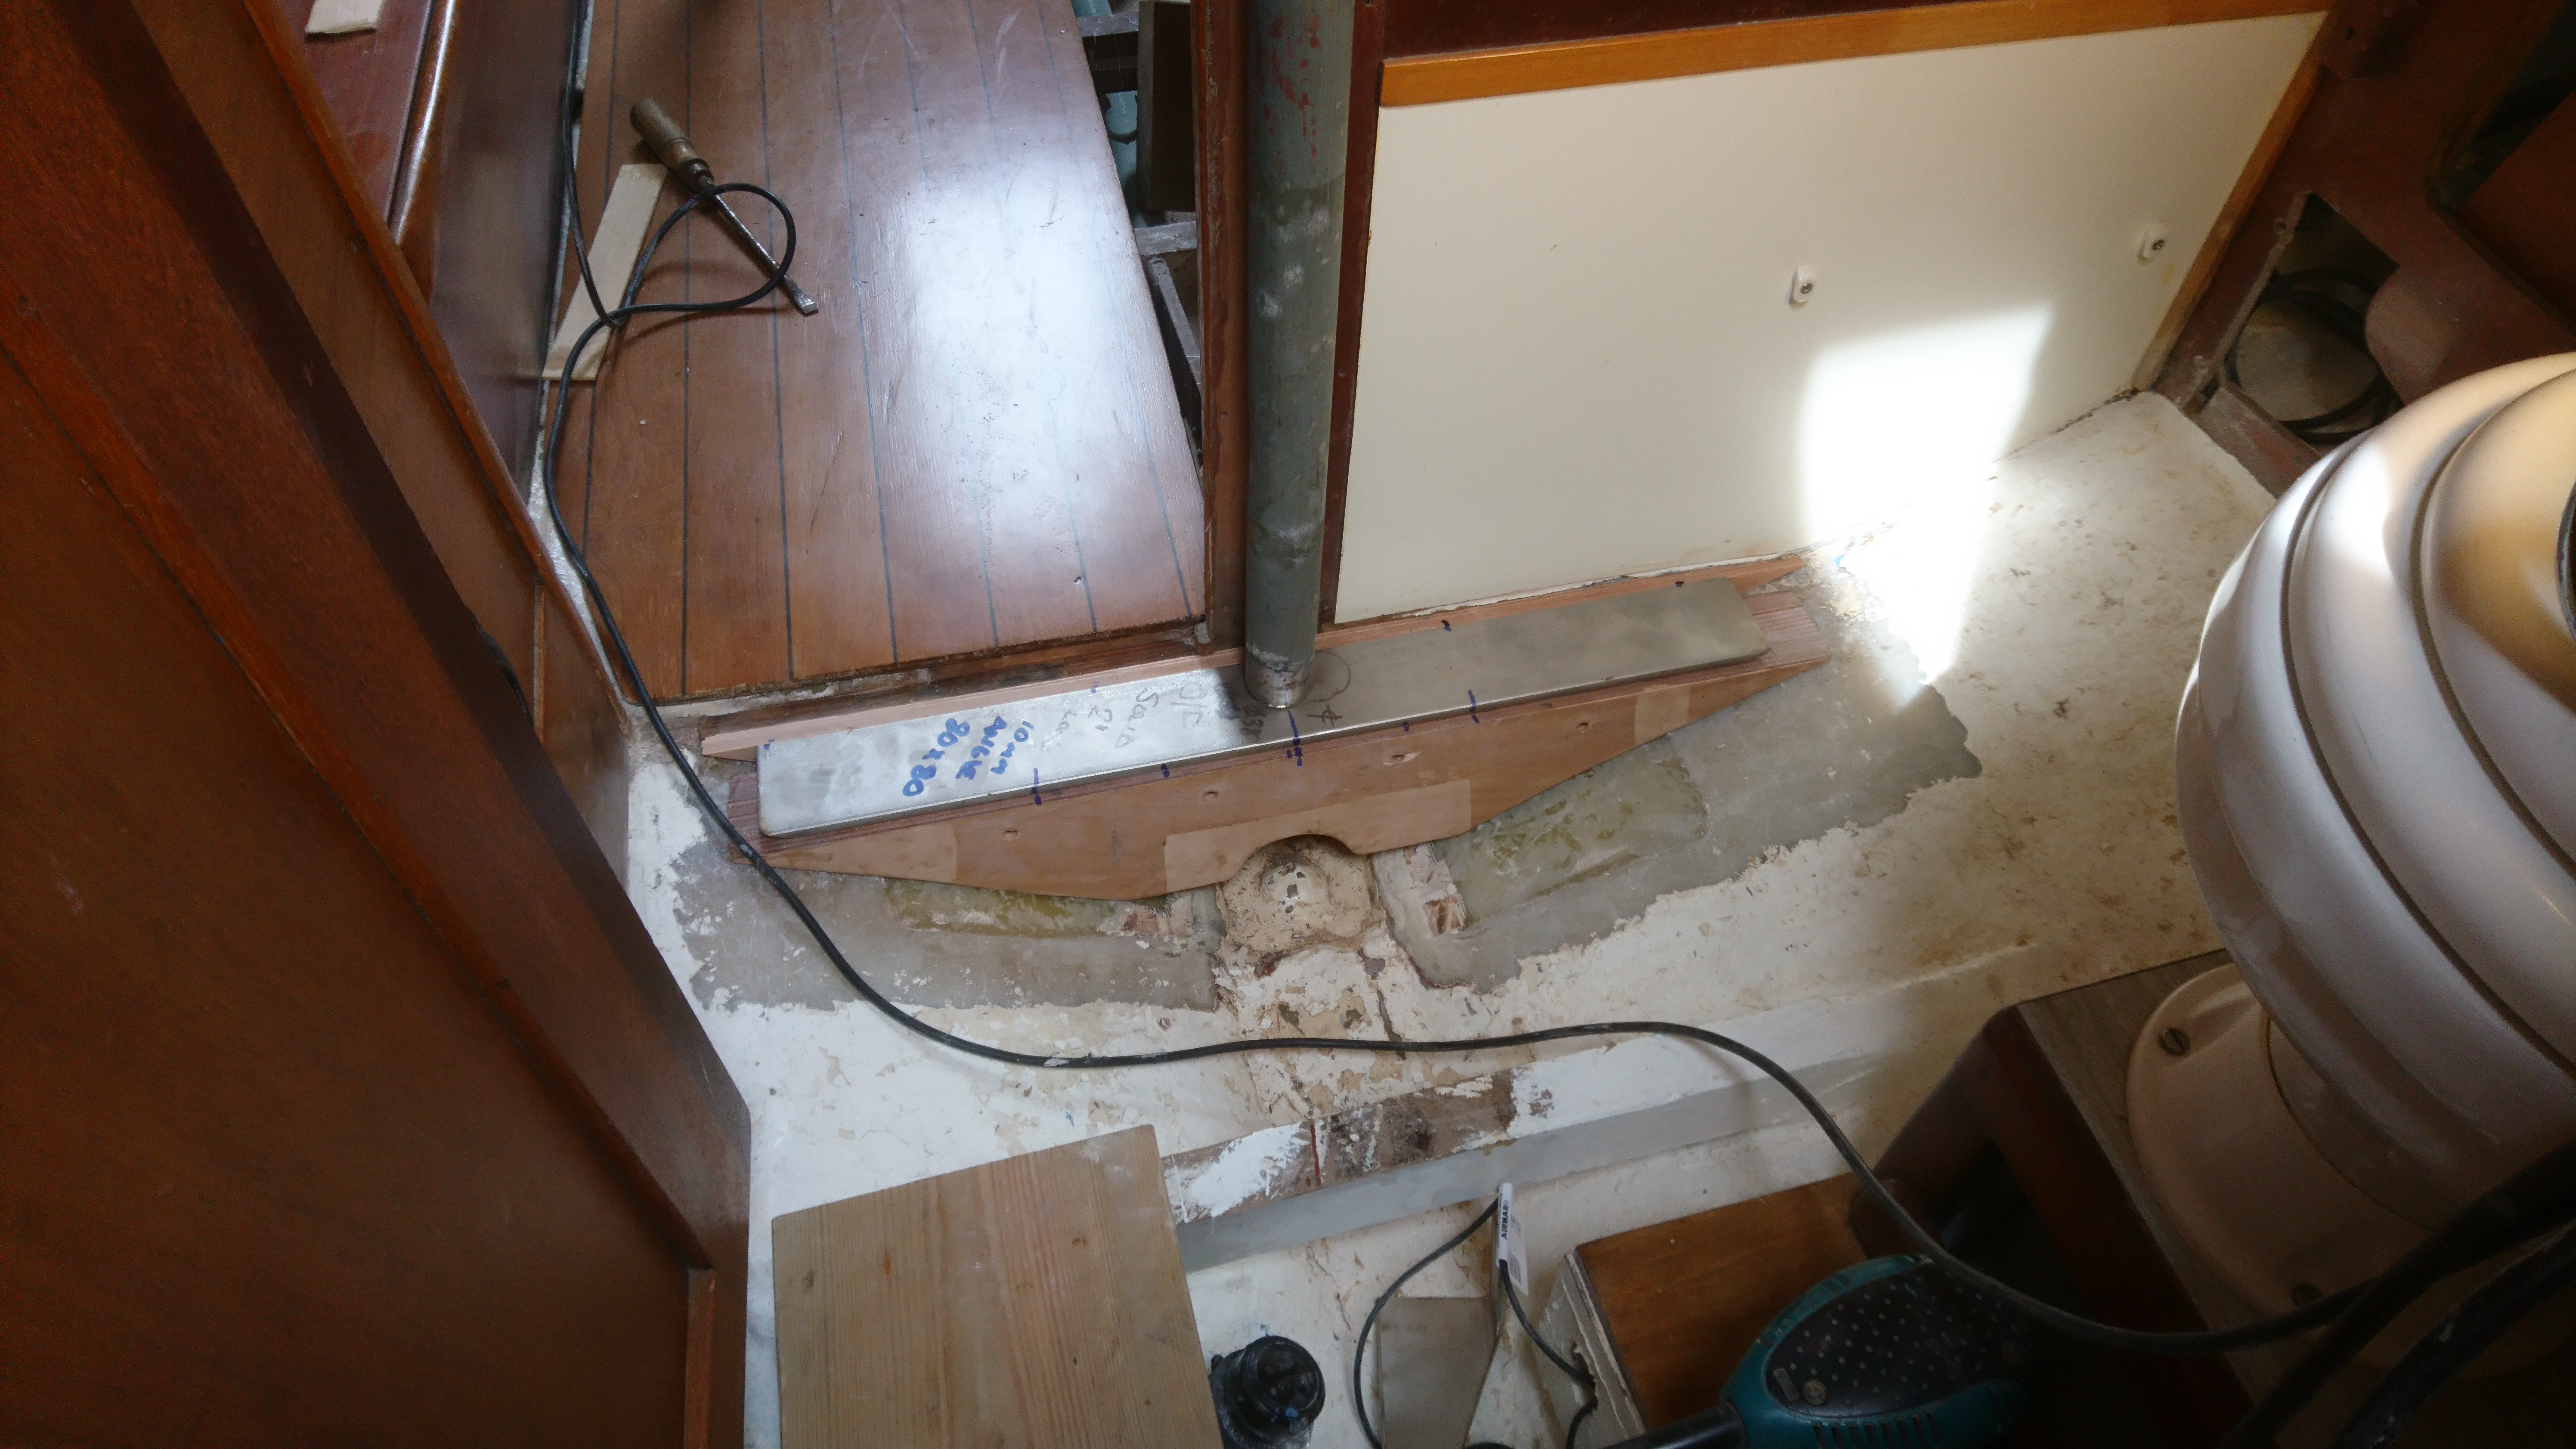
After a test dry fit a section was removed in the center with a large hole cutter to allow access to the keel-bolt head.
To ensure the loads on the support rib are transferred to the hull effectively its important achieve a close match between the rib landing surface and the hull.
It takes a number of test fits to get a perfect fit against the hull as typically the hull shape differs slightly from one side to the other, a fact that in my experience is normal though it does tend to surprise owners when you point out that their boat is not symmetrical.
Once completed the support rib was then sealed with glass cloth and epoxy.
The top of the support angle was also going to be the bearer for the floor so the support rib height had to allow for the 10mm thickness of the angle and the thickened epoxy that would bond it to the hull.
The last dry fit therefore included laying the support rib on a cardboard gasket to match the required thickness of epoxy in the joint and then the bolt holes were drilled through.
As usual I use a two step bonding process.
The first is to wet out the bonding surfaces with neat resin/hardener to ensure you don’t get any dry patches or voids.
The second is to then add thickened epoxy to one surface before pressing the components together.
Make sure you don’t press too much as all you will achieve is weakening the bond by forcing the epoxy out of the joint.
The 220mm ss stud bolts were inserted and partially tightened and a fillet of epoxy added round the rib/hull joint.
Using a syringe I injected a thickened epoxy mix between the deck and the upper plate.
When cured the whole surface was sanded to remove any sharp edges of epoxy and remove the cure blush before applying two coats of Damboline.
The bolts through the bulkhead were tightened up using plate washers and ss nylock nuts, followed by the upper through deck boats using Arbokol as the bolt sealant.
Finally it was just a case of re stepping the mast, setting up the rig and putting back the interior trim that had been removed to gain access.
As I finished this job a Nauticat 36 was sold locally and the survey picked up a major problem with its compression post.
Guess I know what I’m doing in a few weeks time…….
